Shahzad Bhatti Welcome to my ramblings and rants!

March 6, 2013

Tour of iOS game – ‘Passion Investment Portfolio’

Filed under: iPhone development — admin @ 9:25 pm

I recently finished an iOS (iPhone/iPad/iPod Touch) game called “Passion Investment Portfolio”, which provides a virtual stock trading for learning purpose. A unique feature of this application is that it chooses stocks for you based on your lifestyle. When you join this game, you receive $10,000 virtual cash money and then you are asked to add your life passions, interests, hobbies, products you like, stores where you shop, etc. The Passion Investment Portfolio game then finds companies that match your passions. It keeps updating those companies on daily basis and gives away free stocks from your matching companies. You can watch which companies grow with time and customize your favorite companies. The Passion Investment Portfolio game also provides analysts ratings, charts, fundamental data and news for your companies. Here is a short tour of the app:

Adding your passions

On iPhone/iPod touch, you can just select ‘My Passions’ from the menu, then choose category of passion. You can add new passions by touching (+) icon. You can also edit your existing passions by touching them and rewriting your passions. If you need to delete any passion, then select Edit option and touch (-) button.


On iPad, you can see categories and list of passions on the same screen but the process of adding or removing passions is same as iPhone, e.g.


Your portfolio

When you initially join “Passion Investment Portfolio”, you don’t have any existing stocks, but as you play the game, you will see how your portoflio grows over time, e.g.


Your Passion Companies

You can view your passion companies by selecting “My Passion Quotes” from the menu. You will be able to see all companies next to each passion along with delayed quotes. Also, you will be able to see thumbs up sign if the analysts rating is buy and thumbs down sign if analysts rating is sell.


Your Stocks

You can view all the stocks you own by selecting “My Stocks” from the menu. You will also see latest quotes for those companies and gain/loss for your stocks based on market prices. If you choose to dump the stocks, then just touch “Sell” button.


Your Capital Gains/Loss

When you sell stocks, the difference between initial purchase and final sell price is calculated and is recorded as your capital gain/loss. You can view history of all your capital gains by selecting “My Capital Gains”:

Orders History

When you buy or sell stocks or the game buys stocks for free giveaways, an order is created. You can browse past orders by selecting “My Orders”.


Quote Lookup

You can lookup any stock by symbol, name or description using “Quote Lookup” option. You can view delayed quotes, fundamental data, analysts rating and news.


Badges and Leaderboard

The “Passion Investment Portfolio” game gives away badges based on performance of your portfolio and top users are listed on the leaderboard.

Help and Feedback

The “Passion Investment Portfolio” also comes with help tips and a quick way to send any feedback, suggestions and comments.

Screencasts

You can also watch at for iPhone and for iPad respectively.

Download

You can download the app from Apple Appstore. Here are a few promotion codes that you can use to try the game (first come first serve):

RRTWFNNJRTAY
3WM96W9NLYTK
KLR7PE963K7E
NWXWJ7ATY6R7
7NHREJHWJMTH
XJPFHLAAXJLW
PTJXP6XXFRP3
FHLNATLKNRR3
X3KHXXT9LAY6
KKMJWA76MW7W
FHYR6XFLXJR3
3F6HHETJWR36
K6XJLMARMMET
H63RRP44KWWH
3P7KH763TEMA
X7NA4R7YN3H7
MX43TPNEJLL

Twitter

Follow the app at http://twitter.com/#!/passionportfol.


March 10, 2012

Building custom split view controller and tab view controller with horizontal/vertical orientations for iPhone and iPad

Filed under: iPhone development — admin @ 10:49 am

Over the last few years, I have been developing iPhone and iPad applications and one of recurring problem is managing how to present information in flexible way that works on both iPhone and iPad. The iOS platform uses UITabBarController to organize controllers, however it also comes with a number of limitations such as it only show five tabs on iPhone and though you can add more tabs but you have to go through “More” tab to access them. Also, it always show the tabs on the bottom and you cannot change their position.

I would show how you can develop a customized tab controller that works on both iPad and iPhone and supports multiple orientations.

Custom Split View Controller

The first thing I needed was to split screen between tab-bars and the main view and though iPad platform supports split view controller (UISplitViewController), however, there are several limitations of the builtin UISplitViewController class such as it only works on iPad in landscape mode and it does not work in iPhone. Here is an example of customized split view controller:

 #import "MasterDetailSplitController.h"
 #import "MenuViewController.h"
 #import "MenuCellView.h"
 
 
 @implementation MasterDetailSplitController
 
 @synthesize menuViewController = _menuViewController;
 @synthesize detailsViewController = _detailsViewController;
 @synthesize menuView = _menuView;
 @synthesize detailsView = _detailsView;
 
 - (id)initWithNibName:(NSString *)nibNameOrNil bundle:(NSBundle *)nibBundleOrNil {
     if((self = [super initWithNibName:nibNameOrNil bundle:nibBundleOrNil])) {
     }
     return self;
 }
 
 - (void)dealloc {
     [_menuViewController release];
     [_detailsViewController release];
     [_menuView release];
     [_detailsView release];
     [super dealloc];
 }


 #pragma mark - View lifecycle
 
 - (void)viewDidLoad {
     [super viewDidLoad];
     isPortrait = YES;
     
     self.menuViewController = [[[MenuViewController alloc] initWithSplit:self] autorelease];
     self.menuViewController.view.frame = CGRectMake(0, 0, self.menuView.frame.size.width, self.menuView.frame.size.height);
     [self.menuView addSubview:self.menuViewController.view];
     self.menuView.transform = CGAffineTransformMakeRotation(-M_PI * 0.5);
     self.menuView.autoresizesSubviews = YES;
     self.menuView.backgroundColor = [UIColor grayColor];
     [self layoutSubviews];
 
 }
 
 
 - (void)viewDidUnload {
     [super viewDidUnload];
     self.menuViewController = nil;
     self.detailsViewController = nil;
     self.detailsView = nil;
 }
 
 
 - (void) pushToDetailController:(UIViewController *)controller {
     if (self.detailsViewController == controller) {
         return;
     }
     if (self.detailsViewController != nil && [self.detailsViewController isKindOfClass:[UINavigationController class]]) {
         UINavigationController *navCtr = (UINavigationController *)self.detailsViewController;
         if ([navCtr.viewControllers containsObject:controller]) {
             return;
         }
     }
     for (UIView *v in self.detailsView.subviews) {
         [v removeFromSuperview];
     }
     if (![controller isKindOfClass:[UINavigationController class]]) {
         UINavigationController *navCtr = [[[UINavigationController alloc] initWithRootViewController:controller] autorelease];
         [navCtr setDelegate:self];
         controller = navCtr;
     }
 
     [self layoutSubviews];
 
     controller.view.frame = CGRectMake(0, 0, self.detailsView.frame.size.width, self.detailsView.frame.size.height);
     controller.view.autoresizingMask = UIViewAutoresizingFlexibleHeight | UIViewAutoresizingFlexibleWidth
     | UIViewAutoresizingFlexibleBottomMargin | UIViewAutoresizingFlexibleTopMargin
     | UIViewAutoresizingFlexibleRightMargin  | UIViewAutoresizingFlexibleLeftMargin;
     
     self.detailsView.autoresizingMask = UIViewAutoresizingFlexibleHeight | UIViewAutoresizingFlexibleWidth;    
     self.detailsViewController = controller;
     [self.detailsView addSubview:controller.view];
 
 }


 #pragma mark -
 #pragma mark STANDARD METHODS
 
 - (void) viewWillAppear:(BOOL)animated {
     [super viewWillAppear:animated];
     
     [self.menuViewController viewWillAppear:animated];
     [self.detailsViewController viewWillAppear:animated];
 }
 
 - (void) viewDidAppear:(BOOL)animated {
     [super viewDidAppear:animated];
     [self.menuViewController viewDidAppear:animated];
     [self.detailsViewController viewDidAppear:animated];    
 }
 
 - (void)viewWillDisappear:(BOOL)animated {
     [super viewWillDisappear:animated];
     [self.menuViewController viewWillDisappear:animated];
     [self.detailsViewController viewWillDisappear:animated];
 }
 
 - (void)viewDidDisappear:(BOOL)animated {
     [super viewDidDisappear:animated];
     [self.menuViewController viewDidDisappear:animated];
     [self.detailsViewController viewDidDisappear:animated];
 }
 
 - (BOOL)shouldAutorotateToInterfaceOrientation:(UIInterfaceOrientation)interfaceOrientation {
     return YES; 
 }
 
 - (void)willRotateToInterfaceOrientation:(UIInterfaceOrientation)toInterfaceOrientation duration:(NSTimeInterval)duration {
     isPortrait = toInterfaceOrientation == UIInterfaceOrientationPortrait || toInterfaceOrientation == UIInterfaceOrientationPortraitUpsideDown;
     if (isPortrait) {
         self.menuView.transform = CGAffineTransformMakeRotation(-M_PI * 0.5);
     } else {        
         self.menuView.transform = CGAffineTransformIdentity;
     }
     [self.menuViewController willRotateToInterfaceOrientation:toInterfaceOrientation duration:duration];
     [self.detailsViewController willRotateToInterfaceOrientation:toInterfaceOrientation duration:duration];
 }
 
 
 - (void)didRotateFromInterfaceOrientation:(UIInterfaceOrientation)fromInterfaceOrientation {
     isPortrait = fromInterfaceOrientation != UIInterfaceOrientationPortrait && fromInterfaceOrientation != UIInterfaceOrientationPortraitUpsideDown;
     [self layoutSubviews];
     [self.menuViewController didRotateFromInterfaceOrientation:fromInterfaceOrientation];
     [self.detailsViewController didRotateFromInterfaceOrientation:fromInterfaceOrientation];
 }
 
 - (void)willAnimateRotationToInterfaceOrientation:(UIInterfaceOrientation)toInterfaceOrientation duration:(NSTimeInterval)duration {
     [self.menuViewController willAnimateRotationToInterfaceOrientation:toInterfaceOrientation duration:duration];
     [self.detailsViewController willAnimateRotationToInterfaceOrientation:toInterfaceOrientation duration:duration];
 }
 
 - (void)willAnimateFirstHalfOfRotationToInterfaceOrientation:(UIInterfaceOrientation)toInterfaceOrientation duration:(NSTimeInterval)duration {
     [self.menuViewController willAnimateFirstHalfOfRotationToInterfaceOrientation:toInterfaceOrientation duration:duration];
     [self.detailsViewController willAnimateFirstHalfOfRotationToInterfaceOrientation:toInterfaceOrientation duration:duration];
 }
 
 - (void)didAnimateFirstHalfOfRotationToInterfaceOrientation:(UIInterfaceOrientation)toInterfaceOrientation {
     [self.menuViewController didAnimateFirstHalfOfRotationToInterfaceOrientation:toInterfaceOrientation];
     [self.detailsViewController didAnimateFirstHalfOfRotationToInterfaceOrientation:toInterfaceOrientation];
 }
 
 - (void)willAnimateSecondHalfOfRotationFromInterfaceOrientation:(UIInterfaceOrientation)fromInterfaceOrientation duration:(NSTimeInterval)duration {
     [self.menuViewController willAnimateSecondHalfOfRotationFromInterfaceOrientation:fromInterfaceOrientation duration:duration];
     [self.detailsViewController willAnimateSecondHalfOfRotationFromInterfaceOrientation:fromInterfaceOrientation duration:duration];
 }
 
 
 #pragma mark -
 #pragma mark Helpers
 - (CGSize) sizeRotated {    
     UIScreen *screen = [UIScreen mainScreen];
     CGRect bounds = screen.bounds;
     CGRect appFrame = screen.applicationFrame;
     CGSize size = bounds.size;
     
     float statusBarHeight = MAX((bounds.size.width - appFrame.size.width), (bounds.size.height - appFrame.size.height));
     
     if (UIInterfaceOrientationIsLandscape(self.interfaceOrientation)) 
     {
         // we're going to landscape, which means we gotta swap them
         size.width = bounds.size.height;
         size.height = bounds.size.width;
     }
     
     size.height = size.height - statusBarHeight -self.tabBarController.tabBar.frame.size.height;
     return size;
 }
 
 - (void) layoutSubviews {    
     CGSize size = [self sizeRotated];
     if (isPortrait) {
         self.detailsView.frame = CGRectMake(0, 0, size.width, size.height-kMENU_CELL_HEIGHT);
         self.menuView.frame = CGRectMake(0.0, size.height-kMENU_CELL_HEIGHT, size.width, kMENU_CELL_HEIGHT);
     } else {        
         self.menuView.frame = CGRectMake(0.0, 0.0, kMENU_CELL_WIDTH, size.height);
         self.detailsView.frame = CGRectMake(kMENU_CELL_WIDTH, 0, size.width-kMENU_CELL_WIDTH, size.height);
     }
 }


 - (void) loadView {
     CGSize size = [self sizeRotated];
     
     UIView *view = [[[UIView alloc] initWithFrame:CGRectMake(0, 0, size.width, size.height)] autorelease];
     view.autoresizingMask = UIViewAutoresizingFlexibleHeight | UIViewAutoresizingFlexibleWidth;
     self.view = view;
     
     self.menuView = [[[UIView alloc] initWithFrame:CGRectMake(0.0, 0.0, kMENU_CELL_WIDTH, size.height)] autorelease];
     self.menuView.autoresizesSubviews = YES;
     self.menuView.autoresizingMask = UIViewAutoresizingFlexibleRightMargin | UIViewAutoresizingFlexibleHeight;
     self.menuView.backgroundColor = [UIColor colorWithWhite:1.000 alpha:1.000];
     self.menuView.contentMode = UIViewContentModeScaleToFill;
     self.detailsView = [[[UIView alloc] initWithFrame:CGRectMake(kMENU_CELL_WIDTH, 0, size.width-kMENU_CELL_WIDTH, size.height)] autorelease];
     self.detailsView.autoresizesSubviews = YES;
     self.detailsView.autoresizingMask = UIViewAutoresizingFlexibleWidth | UIViewAutoresizingFlexibleHeight;
     self.detailsView.backgroundColor = [UIColor colorWithWhite:1.000 alpha:1.000];
     self.detailsView.contentMode = UIViewContentModeScaleToFill;
     
     [self.view addSubview:self.menuView];
     [self.view addSubview:self.detailsView];
 }


 @end
 

You can customize offset of split controller by setting values for kMENU_CELL_WIDTH and kMENU_CELL_HEIGHT. Note that split view controller transforms the menu-view controller and rotates it 90″ when orientation changes to portrait so that table can be scrolled horizontally.

Building Menu Controller, that can scroll vertically and horizontally

Next, you need a UITableViewController, which can scroll horizontal and vertically. You can use transform to change the view such as:

 #import "MenuViewController.h"
 #import "SampleTableController.h"
 #import "Configuration.h"
 #import "MenuCellView.h"
 #import "MenuInfo.h"
 #import "CustomNavigationController.h"


 @implementation MenuViewController
 @synthesize menuItems = _menuItems;
 @synthesize masterDetailSplitController = _masterDetailSplitController;
 
 
 - (id)initWithSplit:(MasterDetailSplitController*)split {
     self = [super initWithStyle:UITableViewStylePlain];
     if (self) {        
         self.masterDetailSplitController = split;
         self.tableView.separatorColor = [UIColor clearColor];
         self.menuItems = [[[NSMutableArray alloc] initWithCapacity:10] autorelease];
     }
     return self;
 }
 
 
 -(void)refresh {
     MenuInfo *menu = nil;
     [self.menuItems removeAllObjects];
     CustomNavigationController *settingsCtr = [[[CustomNavigationController alloc] initWithStyle:UITableViewStylePlain] autorelease];
     menu = [[[MenuInfo alloc] initWithLabel:@"Settings" andOnImage:@"onSettings.png" andOffImage:@"offSettings.png" andController:settingsCtr] autorelease];
     [self.menuItems addObject:menu];
     
     NSArray *orderList = [[Configuration sharedConfiguration] getNavigationOrder];
     for (NSString *order in orderList) {
         MenuKind kind = (MenuKind) [order intValue];
         SampleTableController *ctr = [[[SampleTableController alloc] initWithStyle:UITableViewStylePlain] autorelease];
         switch (kind) {
             case ONE:
                 ctr.heading = @"One";
                 menu = [[[MenuInfo alloc] initWithLabel:@"One" andOnImage:@"onDown.png" andOffImage:@"offDown.png" andController:ctr] autorelease];
                 break;
             case TWO:
                 ctr.heading = @"Two";
                 menu = [[[MenuInfo alloc] initWithLabel:@"Two" andOnImage:@"onDownLeft.png" andOffImage:@"offDownLeft.png" andController:ctr] autorelease];
                 break;
             case THREE:
                 ctr.heading = @"Three";
                 menu = [[[MenuInfo alloc] initWithLabel:@"Three" andOnImage:@"onDownRight.png" andOffImage:@"offDownRight.png" andController:ctr] autorelease];
                 break;
             case FOUR:
                 ctr.heading = @"Four";
                 menu = [[[MenuInfo alloc] initWithLabel:@"Four" andOnImage:@"onLeft.png" andOffImage:@"offLeft.png" andController:ctr] autorelease];
                 break;
             case FIVE:
                 ctr.heading = @"Five";
                 menu = [[[MenuInfo alloc] initWithLabel:@"Five" andOnImage:@"onNext.png" andOffImage:@"offNext.png" andController:ctr] autorelease];
                 break;
             case SIX:
                 ctr.heading = @"Six";
                 menu = [[[MenuInfo alloc] initWithLabel:@"Six" andOnImage:@"onPrevious.png" andOffImage:@"offPrevious.png" andController:ctr] autorelease];
                 break;
             case SEVEN:
                 ctr.heading = @"Seven";
                 menu = [[[MenuInfo alloc] initWithLabel:@"Seven" andOnImage:@"onRight.png" andOffImage:@"offRight.png" andController:ctr] autorelease];
                 break;
             case EIGHT:
                 ctr.heading = @"Eight";
                 menu = [[[MenuInfo alloc] initWithLabel:@"Eight" andOnImage:@"onUp.png" andOffImage:@"offUp.png" andController:ctr] autorelease];
                 break;
             case NINE:
                 ctr.heading = @"Nine";
                 menu = [[[MenuInfo alloc] initWithLabel:@"Nine" andOnImage:@"onUpLeft.png" andOffImage:@"offUpLeft.png" andController:ctr] autorelease];
                 break;
             case TEN:
                 ctr.heading = @"Ten";
                 menu = [[[MenuInfo alloc] initWithLabel:@"Ten" andOnImage:@"onUpRight.png" andOffImage:@"offUpRight.png" andController:ctr] autorelease];
                 break;
         }
         [self.menuItems addObject:menu];
     }
     selected = 0;
     [self.tableView reloadData];
 }
 
 - (UIViewController *) selectedController {
     MenuInfo *info = [self.menuItems objectAtIndex:selected];
     return info.controller;
 }
 
 
 - (void)dealloc
 {
     [_masterDetailSplitController release];
     [_menuItems release];
     [super dealloc];
 }


 #pragma mark - View lifecycle
 
 - (void)viewDidLoad
 {
     [super viewDidLoad];
     isPortrait = YES;
     UIView *bgView = [[[UIView alloc] initWithFrame:CGRectZero] autorelease];
     bgView.transform = CGAffineTransformMakeRotation(M_PI * 0.5);
     self.tableView.backgroundView = bgView;
     self.view.backgroundColor = [UIColor blackColor];
 }
 
 - (void)viewWillAppear:(BOOL)animated
 {
     [super viewWillAppear:animated];
     self.tableView.showsVerticalScrollIndicator = NO;
     self.tableView.showsHorizontalScrollIndicator = NO;        
     self.tableView.separatorStyle = UITableViewCellSeparatorStyleSingleLine;
     self.tableView.separatorColor = [UIColor clearColor];
     
     [self refresh];
     [self.masterDetailSplitController pushToDetailController:[self selectedController]];    
 
 }


 - (BOOL)shouldAutorotateToInterfaceOrientation:(UIInterfaceOrientation)interfaceOrientation
 {
     return YES;
 }
 
 -(NSArray *)allControllers {
     NSMutableArray *list = [[[NSMutableArray alloc] initWithCapacity:10] autorelease];
     for (MenuInfo *info in self.menuItems) {
         [list addObject:info.controller];
     }
     return list;
 }
 
 - (void)willRotateToInterfaceOrientation:(UIInterfaceOrientation)toInterfaceOrientation duration:(NSTimeInterval)duration {
     isPortrait = toInterfaceOrientation == UIInterfaceOrientationPortrait || toInterfaceOrientation == UIInterfaceOrientationPortraitUpsideDown;
 
     for (UIViewController *ctr in [self allControllers]) {
         [ctr willRotateToInterfaceOrientation:toInterfaceOrientation duration:duration];
     }
     [self.tableView reloadData];
 }


 - (void)didRotateFromInterfaceOrientation:(UIInterfaceOrientation)fromInterfaceOrientation {
     for (UIViewController *ctr in [self allControllers]) {
         [ctr didRotateFromInterfaceOrientation:fromInterfaceOrientation];
     }
 }
 
 - (void)willAnimateRotationToInterfaceOrientation:(UIInterfaceOrientation)toInterfaceOrientation duration:(NSTimeInterval)duration {
     for (UIViewController *ctr in [self allControllers]) {
         [ctr willAnimateRotationToInterfaceOrientation:toInterfaceOrientation duration:duration];
     }
 }
 
 - (void)willAnimateFirstHalfOfRotationToInterfaceOrientation:(UIInterfaceOrientation)toInterfaceOrientation duration:(NSTimeInterval)duration {
     for (UIViewController *ctr in [self allControllers]) {
         [ctr willAnimateFirstHalfOfRotationToInterfaceOrientation:toInterfaceOrientation duration:duration];
     }
 }
 
 - (void)didAnimateFirstHalfOfRotationToInterfaceOrientation:(UIInterfaceOrientation)toInterfaceOrientation {
     for (UIViewController *ctr in [self allControllers]) {
         [ctr didAnimateFirstHalfOfRotationToInterfaceOrientation:toInterfaceOrientation];
     }
 }
 
 - (void)willAnimateSecondHalfOfRotationFromInterfaceOrientation:(UIInterfaceOrientation)fromInterfaceOrientation duration:(NSTimeInterval)duration {
     for (UIViewController *ctr in [self allControllers]) {
         [ctr willAnimateSecondHalfOfRotationFromInterfaceOrientation:fromInterfaceOrientation duration:duration];
     }
 }
 
 
 #pragma mark - Table view data source
 
 - (NSInteger)numberOfSectionsInTableView:(UITableView *)aTableView
 {
     return 1;
 }
 
 - (NSInteger)tableView:(UITableView *)tableView numberOfRowsInSection:(NSInteger)section
 {
     return [self.menuItems count];
 }
 
 - (UITableViewCell *)tableView:(UITableView *)tableView cellForRowAtIndexPath:(NSIndexPath *)indexPath
 {
     static NSString *CellIdentifier = @"MenuCell";
     MenuCellView *cell = (MenuCellView *) [tableView dequeueReusableCellWithIdentifier:CellIdentifier];
     if (cell == nil) {
         cell = [[[MenuCellView alloc] initWithStyle:UITableViewCellStyleDefault reuseIdentifier:nil] autorelease];
     }
     MenuInfo *menu = [self.menuItems objectAtIndex:indexPath.row];
     NSString *imageName = selected == indexPath.row ? menu.onImage : menu.offImage;
     cell.imageView.image = [UIImage imageNamed:imageName];
     
     if (isPortrait) {
         cell.transform = CGAffineTransformMakeRotation(M_PI * 0.5);
     } else {
         cell.transform = CGAffineTransformIdentity;        
     }
     
     return cell;
 }
 
 /**
  * Displays the specified controller view
  */
 -(void) displayControllerView:(UIViewController*)controller {
     if (controller != nil) {
         [self.masterDetailSplitController pushToDetailController:controller];
     }
     [self.tableView reloadData];
 }
 
 
 - (void)tableView:(UITableView *)tableView didSelectRowAtIndexPath:(NSIndexPath *)indexPath {
     selected = indexPath.row;
     
     UIViewController *controller = [self selectedController];
  
     [self.tableView deselectRowAtIndexPath:indexPath animated:YES];
     [self.tableView scrollToRowAtIndexPath:indexPath atScrollPosition:UITableViewScrollPositionBottom animated:YES];
 
     [self displayControllerView:controller];
 }


 - (CGFloat)tableView:(UITableView *)tableView heightForRowAtIndexPath:(NSIndexPath *)indexPath {
     if (UI_USER_INTERFACE_IDIOM() == UIUserInterfaceIdiomPad) {
         return kMENU_CELL_WIDTH * 3;
     } else {
         return kMENU_CELL_WIDTH;
     }
 }


 @end
 

The height of cells for iPad is stretched so that you can test scrolling across the screen. The cells are also rotated 90″ when orientation is in portrait mode so that they are displayed properly on the horizontal table. Also, if you have a background image, then you will need to rotate it as well.

Customizing order of tabs

You can also allow users to change the order by storing order in a configuration, here is an example of controller that allows reordering:

 #import "CustomNavigationController.h"
 #import "MenuViewController.h"
 #import "Configuration.h"
 #import "AppDelegate.h"
 
 @implementation CustomNavigationController
 
 @synthesize controllers;
 
 static NSArray *kControllerNames;
 
 + (void) initialize {
     kControllerNames = [[NSArray arrayWithObjects:@"One", @"Two", @"Three", @"Four", @"Five", @"Six", @"Seven", @"Eight", @"Nine", @"Ten", nil] retain];    
 }


 - (id)initWithStyle:(UITableViewStyle)style
 {
     self = [super initWithStyle:style];
     if (self) {
     }
     return self;
 }


 #pragma mark - View lifecycle
 
 - (void)viewDidLoad
 {
     [super viewDidLoad];
     controllers = [[NSMutableArray alloc] initWithCapacity:10];
     [super setEditing:YES animated:YES];
     [self.tableView setEditing:YES animated:YES];
     self.navigationItem.title = @"Navigation";
     self.tableView.backgroundColor = [UIColor clearColor];
     [self.tableView setIndicatorStyle:UIScrollViewIndicatorStyleWhite];
     self.tableView.separatorColor = [UIColor blackColor];
 }
 
 
 -(void)viewWillAppear:(BOOL)animated {
     [super viewWillAppear:animated];
 
     [controllers removeAllObjects];
     NSArray *list = [[Configuration sharedConfiguration] getNavigationOrder];
     for (NSString *ctr in list) {
         [controllers addObject:[NSNumber numberWithInt:[ctr intValue]]];
     }
     
     [self.tableView reloadData];
 }
 
 
 - (void)viewDidUnload
 {
     [super viewDidUnload];
     self.controllers = nil;
 }
 
 - (BOOL)shouldAutorotateToInterfaceOrientation:(UIInterfaceOrientation)interfaceOrientation
 {
     return YES;
 }
 
 #pragma mark - Table view data source
 
 - (NSInteger)numberOfSectionsInTableView:(UITableView *)tableView
 {
     return 1;
 }
 
 - (NSInteger)tableView:(UITableView *)tableView numberOfRowsInSection:(NSInteger)section
 {
     return [controllers count];
 }
 
 - (UITableViewCell *)tableView:(UITableView *)tableView cellForRowAtIndexPath:(NSIndexPath *)indexPath
 {
     static NSString *CellIdentifier = @"CustomNavigationCellView";
     
     UITableViewCell *cell = [tableView dequeueReusableCellWithIdentifier:CellIdentifier];
     if (cell == nil) {
         cell = [[[UITableViewCell alloc] initWithStyle:UITableViewCellStyleDefault reuseIdentifier:CellIdentifier] autorelease];
     }
     
 
     NSNumber *num = [controllers objectAtIndex:indexPath.row];
     cell.textLabel.text = [kControllerNames objectAtIndex:[num intValue]];
 
     return cell;
 }


 #pragma mark - Table view delegate
 
 - (void)tableView:(UITableView *)tableView didSelectRowAtIndexPath:(NSIndexPath *)indexPath
 {
 
 }


 - (UITableViewCellEditingStyle)tableView:(UITableView *)aTableView editingStyleForRowAtIndexPath:(NSIndexPath *)indexPath {
     return UITableViewCellEditingStyleNone;
 }
 
 
 - (void)tableView:(UITableView *)aTableView commitEditingStyle:(UITableViewCellEditingStyle)editingStyle forRowAtIndexPath:(NSIndexPath *)indexPath {
     [self.tableView reloadData];    
 }
 
 
 #pragma mark Row reordering
 - (BOOL)tableView:(UITableView *)tableView canMoveRowAtIndexPath:(NSIndexPath *)indexPath {
     return YES;
 }
 
 - (void)tableView:(UITableView *)tableView moveRowAtIndexPath:(NSIndexPath *)fromIndexPath
       toIndexPath:(NSIndexPath *)toIndexPath {
     NSNumber *item = [[controllers objectAtIndex:fromIndexPath.row] retain];
     [controllers removeObject:item];
     [controllers insertObject:item atIndex:toIndexPath.row];
     [item release];
 
     NSMutableArray *list = [[[NSMutableArray alloc] initWithCapacity:10] autorelease];
     for (NSNumber *num in controllers) {
         [list addObject:[num stringValue]];
     }
     [[Configuration sharedConfiguration] setNavigationOrder:list];
 
     AppDelegate *delegate = (AppDelegate *) [[UIApplication sharedApplication] delegate];
     [delegate.splitViewController.menuViewController refresh];
 }


 - (BOOL)tableView:(UITableView *)tableView shouldIndentWhileEditingRowAtIndexPath:(NSIndexPath *)indexPath {
     return NO;
 }
 
 -(void)dealloc {
     [controllers release];
     [super dealloc];
 }
 @end
 

Note that we are storing the order of tabs in the configuration and saving it when user moves the navigation items.

Screen shots

iPhone Portrait

iPhone Landscape

iPad Portrait

iPad Landscape

(Note that iPad images are stretched to show that they are horizontal and vertical scrollable)

Download the code

I am not showing all code here but the full code is available from https://github.com/bhatti/SplitControllerAndCustomNavigation. I hope you find it useful.


November 16, 2011

Using self-signed certificates and resolving SSL version with iOS5 SDK

Filed under: iPhone development — admin @ 7:32 am

Using Self-signed certificates with iOS5

There have been a few changes to SSL in iOS5 SDK, which caused some snafus to our iPhone app. We have been using ASIHTTPRequest library for accessing our web services that require SSL and we use self-signed certificates in test environment. I noticed that the iPhone app wasn’t able to connect to the server after upgrading to iOS5 SDK. The original code in ASIHTTPRequest.m that accepted self-signed certificates looked like:

  NSDictionary *sslProperties = [[NSDictionary alloc] initWithObjectsAndKeys: 
                                       [NSNumber numberWithBool:YES], kCFStreamSSLAllowsExpiredCertificates,
                                       [NSNumber numberWithBool:YES], kCFStreamSSLAllowsAnyRoot,
                                       [NSNumber numberWithBool:NO], kCFStreamSSLValidatesCertificateChain,
                                       kCFNull,kCFStreamSSLPeerName, nil];
 
   CFReadStreamSetProperty((CFReadStreamRef)[self readStream], kCFStreamPropertySSLSettings, (CFTypeRef)sslProperties);
 

However, the iOS5 SDK deprecated kCFStreamPropertySSLPeerCertificates, kCFStreamSSLAllowsExpiredCertificates, kCFStreamSSLAllowsExpiredRoots, kCFStreamSSLAllowsAnyRoot and requires using kCFStreamSSLValidatesCertificateChain to disable certificates, e.g.:

 
   CFReadStreamSetProperty((CFReadStreamRef)[self readStream], kCFStreamPropertySSLSettings, 
         [NSMutableDictionary dictionaryWithObject:(NSString *)kCFBooleanFalse forKey:(NSString *)kCFStreamSSLValidatesCertificateChain]);
   [[self readStream] setProperty:[NSDictionary dictionaryWithObjectsAndKeys: 
         (id)kCFBooleanFalse, kCFStreamSSLValidatesCertificateChain, nil] forKey:(NSString *)kCFStreamPropertySSLSettings];


Here is a complete example if you need to skip validation without using ASIHTTPRequest:

 - (void)start {
     CFStringRef bodyString = CFSTR("xml....");
     CFDataRef bodyData = CFStringCreateExternalRepresentation(kCFAllocatorDefault, bodyString, kCFStringEncodingUTF8, 0);
 
     CFHTTPMessageRef request = CFHTTPMessageCreateRequest(NULL, CFSTR("POST"), (CFURLRef) [NSURL URLWithString:@"https://optionshouse.com:443/m?"], kCFHTTPVersion1_1);
     CFHTTPMessageSetBody(request, bodyData);
 
     CFReadStreamRef readStream = CFReadStreamCreateForHTTPRequest(NULL, request);
 
     self.inputStream = (NSInputStream *) readStream;
 
     [self.inputStream setProperty:[NSDictionary dictionaryWithObjectsAndKeys:(id) kCFBooleanFalse,    kCFStreamSSLValidatesCertificateChain, nil ] forKey:(NSString *) kCFStreamPropertySSLSettings];
 
     [self.inputStream setDelegate:self];
     [self.inputStream scheduleInRunLoop:[NSRunLoop currentRunLoop] forMode:NSDefaultRunLoopMode];
     [self.inputStream open];
 
     CFRelease(readStream);
     CFRelease(request);
 }
 
 - (void)stop {
     [self.inputStream setDelegate:nil];
     [self.inputStream removeFromRunLoop:[NSRunLoop currentRunLoop] forMode:NSDefaultRunLoopMode];
     [self.inputStream close];
     self.inputStream = nil;
 }
 
 - (void)stream:(NSStream *)aStream handleEvent:(NSStreamEvent)eventCode {
     switch (eventCode) {
         case NSStreamEventOpenCompleted: {
             NSLog(@"open");
         } break;
         case NSStreamEventHasBytesAvailable: {
             NSInteger   bytesRead;
             uint8_t     junk[1024];
 
             NSLog(@"has bytes");
             bytesRead = [self.inputStream read:junk maxLength:sizeof(junk)];
             if (bytesRead == 0) {
                 NSLog(@"read end");
                 [self stop];
             } else if (bytesRead < 0) {
                 NSLog(@"read error");
                 [self stop];
             } else {
                 NSString *string = [[[NSString alloc] initWithBytes:junk
                                                         length:bytesRead
                                                       encoding:NSUTF8StringEncoding] autorelease];
                 NSLog(@"Read %@", string);
             }
         } break;
         case NSStreamEventErrorOccurred: {
             NSError * error = [self.inputStream streamError];
             NSLog(@"error %@ / %zd", [error domain], (ssize_t) [error code]);
             [self stop];
         } break;
         case NSStreamEventEndEncountered: {
             NSLog(@"end");
             [self stop];
         } break;
         default: {
             assert(NO);
             [self stop];
         } break;
     }
 }


Using SSL with old F5 load balancers

Another issue I found with iOS5 was that despite using valid certificate in production environment, the SSL was still not working. Based on Apple's documentation, it turned out that the default version for SSL has been changed to TLS 1.0 and our production environment used F5 load balancer, which required SSLv3. So, I had to explicitly specify SSL version in ASIHTTPRequest.m

     const void* keys[] = { kCFStreamSSLLevel };
     // kCFStreamSocketSecurityLevelTLSv1_0SSLv3 configures max TLS 1.0, min SSLv3
     // (same as default behavior on versions before iOS 5).
     // kCFStreamSocketSecurityLevelTLSv1_0 configures to use only TLS 1.0.
     // kCFStreamSocketSecurityLevelTLSv1_1 configures to use only TLS 1.1.
     // kCFStreamSocketSecurityLevelTLSv1_2 configures to use only TLS 1.2.
     const void* values[] = { CFSTR("kCFStreamSocketSecurityLevelTLSv1_0SSLv3") };
     CFDictionaryRef sslSettingsDict = CFDictionaryCreate(kCFAllocatorDefault, keys, values, 1, &kCFTypeDictionaryKeyCallBacks, &kCFTypeDictionaryValueCallBacks);
     CFReadStreamSetProperty((CFReadStreamRef)[self readStream], kCFStreamPropertySSLSettings, sslSettingsDict);
     CFRelease(sslSettingsDict);
 

With these changes, our iPhone app was working as expected.

Acknowledgement

Many thanks for Apple Engineer "Quinn", who helped resolving the SSL issues.


June 21, 2011

Overview of Trading Floor Game for iOS

Filed under: iPhone development — admin @ 4:51 pm


Introduction

The Trading Floor is a social game based on auction-styled stock trading where you trade virtual stocks and options with your friends and family. Each game lasts for a day, where you join a game as a stock broker with objective of buying stocks at low-price and selling at high-price, thus making most money from the trades. Unlike a real-world stock market, each game is limited to a single exchange, which can be public or private. In addition to trading, the Trading Floor brings a lot social aspects to the game such as building private exchanges, which can be only joined by your friends and expressing like-ability for a company, which determines a Buzz for the company. Also, the members can view activities for other players in a game, view their gain/loss from the trading, view ranking of the players in terms of gain/loss and comment on their trades. At the end of a game, the top players for each game are awarded badges, which are permanently visible from their profile.

Getting Started

You can download Trading Floor from Apple AppStore.

iPad iPhone

You would see listing o active games that you can join. A game is started for each exchange in the system which can be public or privately created by the users.

Joining a game

When you click on games, you would see listing of all games such as:


From there you can select the game that you wish to join and you would be prompted to enter a nick name that you can use to join the game such as:

iPad iPhone

If an exchange is private, you would require a password to join and would need to contact the owner of the exchange. After clicking the Join button the Trading Floor would allocate a virtual cash of $10,000 to you and would create a portfolio with stocks and options for ten companies, where five of the companies are chosen from your favorite companies and five companies are randomly chosen. It takes about a minute to populate all the portfolio and then you can start trading. After joining the game you can also browse other players, view activities, portfolio, capital gains, orders and badges. There are also buttons below to quickly select between players, view rankings, floor bids, comments and lookup quotes, e.g.

iPad iPhone

Browsing Players

You can see list of players that have joined the game by touching “Browse Players” option, e.g.

iPad iPhone

When you select the player, you will see more details about the player and view activities, orders, portfolio, capital gains, badges, etc. as displayed above.

Selling Stocks/Options from Portfolio

When you select “Portfolio” option, you would see summary of your available cash and list of all stocks/options you hold such as:

iPad iPhone

When you select “Sell” link, you would be taken to the order screen such as:

iPad iPhone

You can specify your selling price and then select “Sell” button to submit the bid. It would take you to the Floor Bid, which lists all bids for buying and selling stocks/options.

Floor Bids

The Floor Bids show all companies available for buy or sell. When you post bids to sell or buy, the go to the floor bids. You can accept the bids that other players have posted for stock/option sell or buy on the Floor Bids. Note that when you post bids you specify the price for the stock but when you accept bids you don’t negotiate. If you need to change the price for your bids, you can edit your open orders. Also, when you trade stocks or options, you are only trading to the people who are in the same exchange.

iPad iPhone

When another user accepts your bid, the sale is completed and you would collect gain/loss from the trade.

Capital Gains

You can view your overall capital gains as result of trading or portfolio gain because the market price for your stocks went up from the player details, orders or portfolio screen. You can drill deep into your capital gain and find out how much profit/loss you made for each order by selecting Capital Gains option from the home screen or selecting Capital Gains row from the player details, orders or portfolio screen.

iPad iPhone

Quote Lookup

You can lookup stock/option quotes as well as latest news for the companies from Quote-Lookup menu option. You can also buy or sell stocks from the Quote-Lookup screen based on your portfolio.

iPad iPhone

In addition to buying and selling stocks/options, you can express how you feel about a company by liking/disliking/loving/hating. This in turn determines the buzz quote for that company. The more players like a company, the higher the buzz quote value that company would have. Unlike buying and trading stocks/options, which are limited to a single exchange (both public and private), the buzz quote is calculated across all exchanges. However, buzz quote is reset when the Trading Floor market is closed (11pm EST). Here is another benefit of Buzz Quote, the BOT player would buy stocks from you at the Buzz Quote price. So, if a stock becomes popular you can make more profit by selling it to the BOT.

Orders history

You can view your past orders for selling or buying stocks/options by selecting “Orders” option, which would show something like:

iPad iPhone

You can also drill into details for each order by selecting the row for the order such as:

iPad iPhone

Player Rankings

You can view your the rankings of players for each game by selecting “Rankings” option which lists players sorted by the capital gains they earned, e.g.

iPad iPhone

Comments

You can view comments on the game by selecting “Comments” option, e.g.


You can add your own comment by selecting “+” icon and typing your message, e.g.

My Badges

The top players for each game get badges at the end of the game, which are permanently visible under the “Badges” option, e.g.


When you select your badge, you will be taken to the old game that you played and can go back to your portfolio, orders and other details.

Exchanges

The exchanges are places where public companies are listed for trading. You can join exchanges created by your friends or build your exchanges. A unique game is started for each exchange, where member players trade against other member players. You can view both public and private exchanges by selecting “Exchanges” from main menu . You would see three types of exchanges: mine, public and private. Mine would list all exchanges that you have created, public would list all public exchanges and private would list top private exchanges. You can also search private exchanges.

iPad iPhone

You can create your own exchange by selecting “+” icon and typing in the exchange symbol, name and password, e.g.


You can then let your friends know about the exchange symbol and password so that they can join them.

Industries

You can view top level industries by selecting “Industries” from the main menu, e.g.

iPad iPhone

When you select an industry, it would list all companies that belong to that industry.

Companies

You can browse or search over 20,000 companies by selecting “Companies” option from the main menu, e.g.

iPad iPhone

When you select a company, it would show latest quote, news and buzz quote for that company.

Companies Around Me

Trading Floor takes advantage of your geo-location capabilities and finds companies that are located near your location, e.g.

Leader Board

The leader board shows top players with most capital gains for all the games that they have played over last month. This option uses Game Center and requires login to the Game Center. You can post your scores to the leader board by selecting the \”Post Capital Gains\” option from the main menu. Also, you can send match invites to your friends at Game Center.

In the end, I hope you find Trading Floor, a fun game for your friends and family and you may learn a few things about the stock market as well. Enjoy!.

February 9, 2011

Tips and Idioms for Developing Network based iOS Applications

Filed under: iPhone development — admin @ 12:21 pm

Over the last year, I built a number of iOS applications such as yogaspot, iPlexLotto and OptionsHouse (still in development), which are backed by the network services. I am documenting a few idioms and best practices that I have used in these applications along with some lessons learned:

Separation of concerns

The iOS APIs are based on MVC design pattern, which encourages separating the non-GUI code such as Models, Services, Helper classes from your views and uses Controllers to communicate between GUI and non-GUI code. As with building any other kind of application, keeping your design and code clean would make your application more maintainable and extendable. The iOS APIs make heavy use of protocols for interface segaration principle. Here are some of the usages of protocols in iOS APIs:

Data Sources

The iOS API use protocols for data sources, which then populate views such as table views, pickers and other views. In most application, your controller will be the data source but I used the data source protocols to create Wizard like behavior by implementing the data source interface in multiple classes and displaying different contents based on the state of application.

Delegates

The delegates are callback interface that are generally used for communication between classes or threads. As, protocols in Objective C can define both mandatory and optional behavior, delegates are also used to provide customized UI behavior. The iOS SDK uses delegates for customizing UI in a number of classes such as UISearchDisplayDelegate, UISearchBarDelegate, UIGestureRecognizerDelegate, UITableViewDelegate, etc. Here is an example of delegate for communication between classes:

 @protocol OrderCallbackDelegate
 @required
 - (void) addedOrder: (Order *)order;
 @end
 
Implementing Delegate

@protocol OrderCallbackDelegate
@interface OrderCallbackDelegate : NSObject {
}
@end

Referencing Delegate
 @interface SomeObject : NSObject {
     id delegate;
 }
 @property(nonatomic, retain) id delegate;
 @end
 

Encapsulation and Extensions

The iOS provide several options for hiding private details or extending existing classes. For example, you can use @private keyword in the class declaration to enforce encapsulation such as:

 
 @interface MyClass : NSObject {
     @private
     int myVar;
 }
 @end
 

The myVar attribute can only be accessed by the instance of MyClass.

Objective C supports inheritance and composition as other object-oriented languages, which I won’t cover here. However, the Categories feature of Objective C language is a more powerful way to extend an existing class without modifying it. For example, you can extend UIColor to provide additional colors as follows:

 @interface UIColor(MyBlueColor)
 +(UIColor *)myBlueColor;
 @end
 
 @implementation UIColor(MyBlueColor)
 +(UIColor *)myBlueColor {
     return [UIColor colorWithRed:0.2274 green:0.4666 blue:0.8235 alpha:1.000];
 }
 
 @end


Other examples include JSON parsing library, which extends NSString to support JSON parsing.
In addition to extension, you can also use categories for encapsulation by using categories syntax in the implementation file and adding private method and properites, e.g.

 @interface MyClass(private)                                                                                                                                                                                                                                                 
 //my private methods only visible in the implementation file
 @end
 

Code Structure

As with any other application, keeping your code organized in your iOS project helps readability and maintenance. One thing I don’t like about XCode is that when you create groups for organizing classes in your XCode project, it doesn’t create folders, so you will find all classes in Classes directory. So, I prefer creating folders on the file system and then add folders as groups to XCode. Here is an example of different groups I used in my projects:

  • Models
  • Network
  • Controllers
  • Utils
  • OtherSources
  • Parsing
  • Views
  • Resources

Dynamic Language Support

Objective C supports both static and dynamic language syntax and has powerful support of reflection. This gives you powerful tool to write concise code. For example, I could not find any XML or JSON binding library for Objective C, so I built helper classes that parsed XML and JSON and automatically bound the properties to the classes that used same names, e.g.

 typedef id (^objectFactoryBlk_t)();
 
 @interface JsonParser : NSObject {
 }
 + (void)bindJson:(NSData *)data toObject:(NSObject *) object;
 + (void)bindJson:(NSData *)data toArray:(NSMutableArray *) array mandatoryFields:(NSArray *)fields withFactory:(objectFactoryBlk_t) objectFactoryBlk;
 
 @end
 

And

 
 @interface XmlParser : NSObject {
     xmlDocPtr doc;
 }
 - (id)initWithXML:(NSData *) document;
 + (void)bindXml:(NSData *)xml toObject:(NSObject *) object;
 + (void)bindXml:(NSData *)xml toArray:(NSMutableArray *) array  mandatoryFields:(NSArray *)fields withFactory:(objectFactoryBlk_t) objectFactoryBlk;
 @end
 

I am skipping more details but you can download the implementation from Parser.zip.
Also, as Objective-C is dynamic languages, the compiler won’t complain if you call methods that are not defined, so you need to pay special attention to warnings when using dynamic language constructs or better turn warnings into errors by configuring your build. You can also use CLANG static analyzer to find improper dynamic method.

Network Services

Any network based iPhone app would rely on the backend network services and you would make these easier if these services are REST based. I recommend ASIHTTPRequest library, which supports asynchronous communication and concurrency.

Loading Status

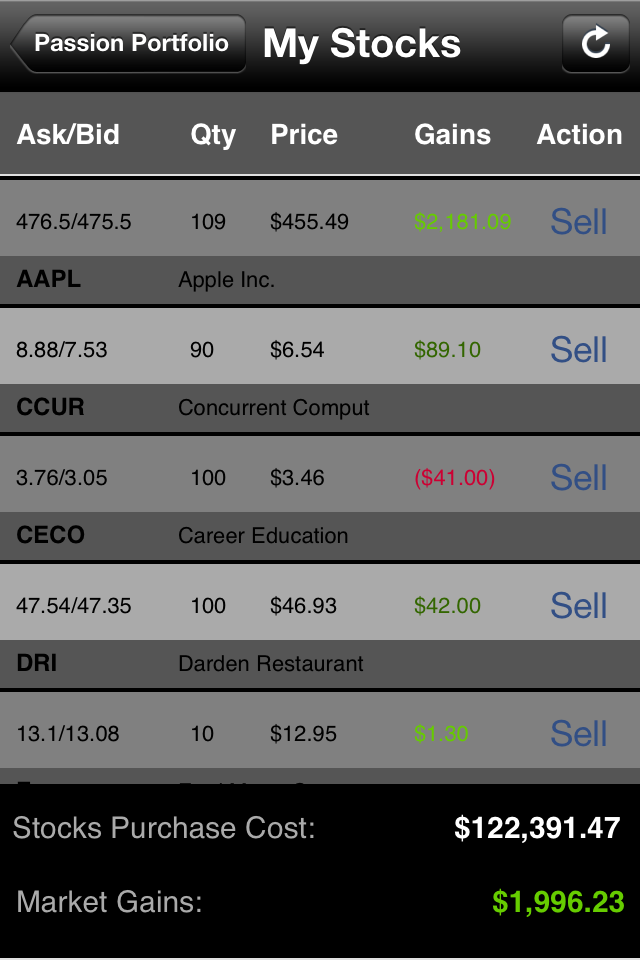
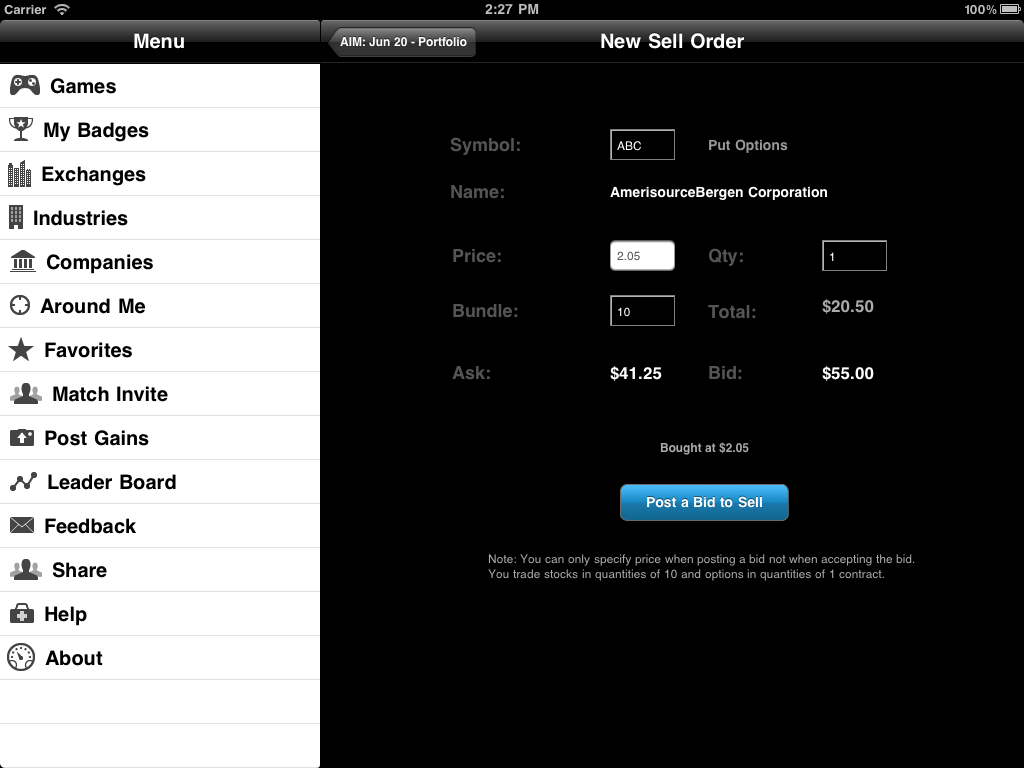
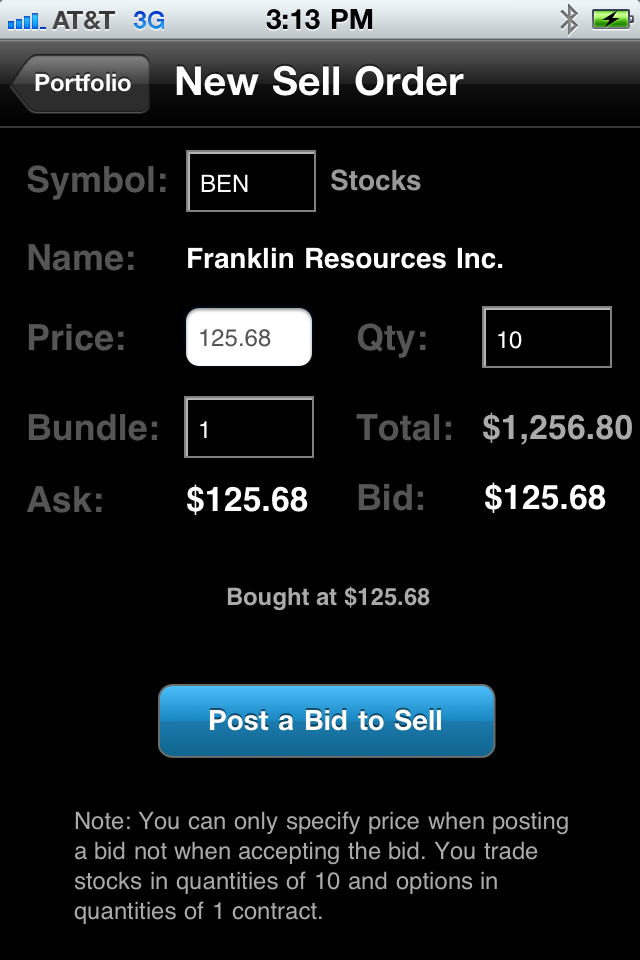
When designing an modal dialog that interacts with the backend, it helps if you show loading message or use UIActivityIndicator when making network request (even though the network request would be asynchronous). For example, the OptionsHouse app shows loading status when executing trades as it may take a couple of seconds to communicate with the server.

XML vs JSON vs Binary

When you are developing an iPhone application, you will learn that despite the increasing powerful hardware it’s not same as desktop, laptops or servers we have in the office. Thus, you will have to learn how to optimize every aspect of the application and one of the key factor for network application is the protocol for the payload. I used both XML and JSON based services and found that JSON parsing was at least twice as fast compare to XML. Optionally, you can use Binary format such as binary plist, which further improves the performance of parsing.

Network Latency

An iPhone user might be connected on Edge, 3G, 4G or WiFi network and the network speed would vary. Though, you can make a general assumption that WiFi would be faster than 3G/4G, which would be faster than Edge, but I suggest that you test the speed within the app instead of relying on the connection. For example, you might be using WiFi at a local coffee shop or a conference, where the speed is slower than the edge or 3G.

Network Outages

On websites, the network services are often behind the web server so when they are down it’s easy to post a page for network outage. You will have to handle such outages in the application and notify the users about the outages.

Network Data Requests

A network based application requires fetching the data from the server and it’s best that you communicate with the services without blocking user interface. Both ASIHTTPRequest and NSURL supports asynchronous communcationions, where you register callback methods when the data arrives or network failure occurs. I built a thin layer on top of ASIHTTPRequest so that I could use blocks:

 typedef void (^requestCompletedBlk_t)(id payload);
 typedef void (^requestFailedBlk_t)(NSError *error);
 
 @interface ServiceBlocks : NSObject {
     requestCompletedBlk_t requestCompletedBlk;
     requestFailedBlk_t requestFailedBlk;
     ASIHTTPRequest *request;
     NSTimeInterval started;
     int retries;
 } 
 @property (copy, nonatomic) requestCompletedBlk_t requestCompletedBlk;
 @property (copy, nonatomic) requestFailedBlk_t requestFailedBlk;
 @property (retain, nonatomic) ASIHTTPRequest *request;
 @property (assign, nonatomic) NSTimeInterval started;
 @property (assign, nonatomic) int retries;
 
 @end
 
 @implementation ServiceBlocks
 @synthesize requestCompletedBlk, requestFailedBlk, request, started, retries;
 -(id)initWithRequest:(ASIHTTPRequest *) arequest completedBlock:(requestCompletedBlk_t) arequestCompletedBlk failedBlock:(requestFailedBlk_t) arequestFailedBlk {
     if(self = [super init]) {
         self.requestCompletedBlk = arequestCompletedBlk;
         self.requestFailedBlk = arequestFailedBlk;
         self.request = arequest;
         self.started = [[NSDate date] timeIntervalSince1970];
         self.retries = 0;
     }
     return self;
 }
 
 - (void)dealloc {
     [requestCompletedBlk release];
     [requestFailedBlk release];
     [request release];
                                                                                                                                                                      
     [super dealloc];
 }
 @end
 

Here is how you can use ASIHTTPRequest to make REST POST and GET requests:

 - (void)postJson:(NSData *) json completedBlock:(requestCompletedBlk_t)requestCompletedBlk failedBlock:(requestFailedBlk_t) requestFailedBlk {                       
     NSURL *url = [NSURL URLWithString:[[Configuration sharedConfiguration] getJsonServerUrl]];
     NSString *jsonBuffer = [[[NSString alloc] initWithData:json encoding:NSASCIIStringEncoding] autorelease];
     
     ASIHTTPRequest *request = [ASIHTTPRequest requestWithURL:url];
     request.connectionCanBeReused = YES;
     [request setUseKeychainPersistence:YES];
     [request setTimeOutSeconds:60];
     [request setValidatesSecureCertificate:NO];
     [request setDelegate:self];
     [request setShouldPresentAuthenticationDialog:YES];
     [request setDidFinishSelector:@selector(downloadCompleted:)];
     [request setDidFailSelector:@selector(downloadFailed:)];
     [request appendPostData:json];
 
     [request addRequestHeader:@"Content-Type" value:@"application/json"];
     [request setRequestMethod:@"POST"];
     [request buildPostBody];
     ServiceBlocks *blocks = [[ServiceBlocks alloc] initWithRequest:request completedBlock:requestCompletedBlk failedBlock:requestFailedBlk];
     [requests setValue:blocks forKey:[self toKey:request]];
     [blocks release];
     [request startAsynchronous];
 }
 
 
 - (void)get:(NSString *) uri completedBlock:(requestCompletedBlk_t) requestCompletedBlk failedBlock:(requestFailedBlk_t) requestFailedBlk {
     NSURL *url = [NSURL URLWithString:uri];                                                                                                                          
     ASIHTTPRequest *request = [ASIHTTPRequest requestWithURL:url];
     [request setUseKeychainPersistence:YES];
     [request setDelegate:self];
     [request setShouldPresentAuthenticationDialog:YES];
     [request setDidFinishSelector:@selector(downloadCompleted:)];
     [request setDidFailSelector:@selector(downloadFailed:)];
 
     ServiceBlocks *blocks = [[ServiceBlocks alloc] initWithRequest:request completedBlock:requestCompletedBlk failedBlock:requestFailedBlk];
     [requests setValue:blocks forKey:[self toKey:request]];
     [blocks release];
     [request startAsynchronous];
 }


Above methods setup downloadCompleted as a callback handler for successful completion of the request and downloadFailed for service failure, which are defined as follows:

 - (void)downloadFailed:(ASIHTTPRequest *)theRequest {
     ServiceBlocks *blk = [requests valueForKey:[self toKey:theRequest]];
     if (blk != nil) {
         NSTimeInterval interval = [[NSDate date] timeIntervalSince1970] - blk.started;
         NSLog(@"#####downloadFailed for %@ in %f seconds", [self toKey:theRequest], interval);
         
         if (blk.requestFailedBlk != nil) {
             blk.requestFailedBlk([theRequest error]);
         }
         [requests removeObjectForKey:[self toKey:theRequest]];
     } else {
         NSLog(@"#####downloadFailed could not find blocks for %@, available %@", [self toKey:theRequest], [requests allKeys]);
     }
     
     [[UIApplication sharedApplication] setNetworkActivityIndicatorVisible:NO];
 }                                                                                                                                                                    
 
 - (void)downloadCompleted:(ASIHTTPRequest *)theRequest {
     ServiceBlocks *blk = [requests valueForKey:[self toKey:theRequest]];
     if (blk != nil) {
         NSTimeInterval interval = [[NSDate date] timeIntervalSince1970] - blk.started;
         NSLog(@"################################downloadCompleted for %@  in %f seconds", [self toKey:theRequest], interval);
 
         NSData *content = [theRequest responseData];
         if (blk.requestCompletedBlk != nil) {
             blk.requestCompletedBlk(content);
         }
         [requests removeObjectForKey:[self toKey:theRequest]];
     } else {
         NSLog(@"################################downloadCompleted could not find blocks for %@, available %@", [self toKey:theRequest], [requests allKeys]);
     }
 
     [[UIApplication sharedApplication] setNetworkActivityIndicatorVisible:NO];
 
 }
 

Both methods lookup the user’s block that was passed upon request and then callback the proper block. In certain cases, I extended downloadFailed method to automatically retry the request upon certain failure types such as timeout errors.

Gateway and Proxy Patterns

I used Gateway and Proxy patterns to wrap remote services in a local class that defined methods using local Model classes and automatically converted Models into proper XML/JSON format for requests and responses. This kept the code clean and in a few cases, I had to switch from XML to JSON, which was made in these classes and rest of application remained unchanged.

Check-If-Modified

As both iPlexLotto and OptionsHouse refreshed data continuously in background, I needed an efficient way to check if the data is updated on the server. HTTP provides a great way to reduce bandwidth by using E-Tag or Last-Modified headers, and we used similar techniques to send modified timestamp as part of the response and used it in future requests. The server then compared the timestamp in the request with local state and sent response only if the data was modified.

Network Errors

A critical aspect of network based applications is handling network errors. There can be various reasons for the network errors such as phone might be in Airplane mode so no network requests should be made. In other cases network connection might be too slow or the service is down. Also, you may be continuously updating data in background and in some cases occasional network interruptions can be ignored. This requires careful consideration of the UI so that the application is smart about the environment and retries when possible instead of annoying users with popup alerts.

Caching

A quick way to improve performance is to cache contents for a certain period of time depending on the data. As iOS devices have limited memory, I used in-memory cache for small objects and used file based cache for larger objects. For example, I cached lottery results for a couple of hours, on the other hand for trading application I cached orders and positions for a few seconds. I didn’t’ cache quotes data as it changed frequently and showing stale quotes can result in financial loss. In addition to the user data, I also cached chart images or other meta-data that is not frequently changed. Here is a simple implementation of file based cache:

 
 #define K_CACHE_TIMEOUT_SECS 3600
 @interface FileCache : NSObject {
 }
 
 +(BOOL)saveObject:(NSString *)name withData:(id)entry;
 +(id)loadObject:(NSString *)name expired:(BOOL*)expired;                                                                                                                                                                                                                      
 
 @end
 
 
 #import "FileCache.h"
 
 @implementation FileCache
 
 +(id)loadObject:(NSString *)name expired:(BOOL*)expired {
     *expired = YES;
     NSString *docs = [NSSearchPathForDirectoriesInDomains(NSDocumentDirectory, NSUserDomainMask, YES) lastObject];
     NSString *filePath = [docs stringByAppendingPathComponent:[NSString stringWithFormat:@"%@.obj", name]];
     NSError *error;
     NSFileManager *fileManager = [NSFileManager defaultManager];
     NSDictionary *attrs = [fileManager attributesOfItemAtPath:filePath error:&error];
     id obj = nil;
     if (attrs != nil && [attrs count] > 0) {
         NSDate *date = [attrs valueForKey:@"NSFileModificationDate"];
         if (date != nil) {
             NSTimeInterval interval = [[NSDate date] timeIntervalSinceDate:date];
             if (interval <= K_CACHE_TIMEOUT_SECS) {
                 *expired = NO;
             }
             obj = [NSKeyedUnarchiver unarchiveObjectWithFile:filePath];
         }
     }
     return obj;
 }
 
 
 +(BOOL)saveObject:(NSString *)name withData:(id)entry {
     NSString *docs = [NSSearchPathForDirectoriesInDomains(NSDocumentDirectory, NSUserDomainMask, YES) lastObject];
     NSString *filePath = [docs stringByAppendingPathComponent:[NSString stringWithFormat:@"%@.obj", name]];
     return  [NSKeyedArchiver archiveRootObject:entry
                                               toFile:filePath];
 }
 @end
 

Using Timers for Repeatable Tasks

Both iPlexLotto and OptionsHouse continuously updated the data in background. For example, the OptionsHouse application fetched stock/option quotes, order transactions, positions in background. I used GCD's based Timers to schedule periodic download of the data:

 dispatch_time_t now = dispatch_walltime(DISPATCH_TIME_NOW, 0);
 dispatch_source_t timer = dispatch_source_create(DISPATCH_SOURCE_TYPE_TIMER, 0, 0, dispatch_get_global_queue(0, 0));                                                                                                                                                               
 int kPOLL_INTERVAL_SECS = 5;
 dispatch_source_set_timer(timer, now, [kPOLL_INTERVAL_SECS * NSEC_PER_SEC, 5000ull);
 dispatch_source_set_event_handler(timer, ^{
     // fetch data and update
     });
 

Above timer runs every 5 seconds and polls for new data and download updates for the user. In my applications, I activated the timer when the application comes in foreground (applicationDidBecomeActive method) and disable it when it goes in background (applicationWillResignActive method). Note that this syntax is much simpler compared to prior syntax of NSTimer and NSRunLoop.

Multi-tasking

Apple added support for multi-tasking in iOS SDK 4.0, which means an application can now be in one of these states

Active

When an application is in foreground and interacting with the user.

InActive

When an application is on its way to background and stops receiving the events.

Background

When an application is running in background.

Suspended

When application is still in memory but not executing.

Callback Methods

The iOS SDK added a number of callback methods for the state transfer such as:

 - (void)applicationWillResignActive:(UIApplication *)application {
     /*
      Sent when the application is about to move from active to inactive state. This can occur for certain types of temporary interruptions (such as an incoming phone
  call or SMS message) or when the user quits the application and it begins the transition to the background state.
      Use this method to pause ongoing tasks, disable timers, and throttle down OpenGL ES frame rates. Games should use this method to pause the game.
      */
 }
 
 - (void)applicationDidEnterBackground:(UIApplication *)application {
     /*
      Use this method to release shared resources, save user data, invalidate timers, and store enough application state information to restore your application to it
 s current state in case it is terminated later. 
      If your application supports background execution, called instead of applicationWillTerminate: when the user quits.
      */
 }
 
 - (void)applicationWillEnterForeground:(UIApplication *)application {
 }
 - (void)applicationDidBecomeActive:(UIApplication *)application {
 }
 

On the older devices without multi-tasking support, applicationWillTerminate is called after applicationDidEnterBackground.

Multi-Threading

The iOS SDK provides multiple ways to add concurrency support to your application.

NSThread

You can create NSThread as follows

 NSThread* myThread = [[NSThread alloc] initWithTarget:self
                                         selector:@selector(myThreadMainMethod:)
                                         object:nil];
 [myThread start];  // Actually create the thread
 

However, there is an easier way to create a thread by invoking a custom method on an object as follows:

 [NSThread detachNewThreadSelector:@selector(myThreadMainMethod:) toTarget:self withObject:nil];
 

Alternatively, you can start a background task as follows:

 [myObj performSelectorInBackground:@selector(doSomething) withObject:nil];
 

You will then define your method for doing the work as follows:

 
 - (void)myThreadMainRoutine
 {
     NSAutoreleasePool *pool = [[NSAutoreleasePool alloc] init]; // Top-level pool
  
     // Do thread work here.
  
     [pool release];  // Release the objects in the pool.
 }
 

Note that you will have to create an auto-release pool before doing the actual work. Though, these APIs are simple to use but managing threads manually is harder and you have to synchronize shared data, cleanup upon termination or when the app goes in background. See Apple's documentation for more details.

NSOperationQueue

NSOperationQueue is much easier way to manage concurrency as you don't have to create threads manually. For example, you can create an operation to save data asynchronously as follows:

 NSInvocationOperation *operation = [[NSInvocationOperation alloc] initWithTarget:self selector:@selector(saveData:) object:data];
 NSOperationQueue *queue = [[NSOperationQueue alloc] init];
 [queue addOperation:operation];
 

Instead of using NSInvocationOperation, you can define an operation class as follows:

 @interface SaveOperation : NSOperation {
     NSData *data;
 }
  
 @property(retain) NSData *data;
  
 - (id)initWithData:(NSData*)data;
  
 @end
 
 @implementation SaveOperation
  
 @synthesize data;
  
 - (id)initWithData:(NSData*)theData;
 {
     if ([super init]) {
         self.data = theData;
     }
     return self;
 }
  
 - (void)dealloc {
     [data release], data = nil;
     [super dealloc];
 }
  
 - (void)main {
     // saving
 }
  
 @end
 

You will then add the operation as follows:

 SaveOperation *op = [[SaveOperation alloc] initWithDataL:data];
 [queue addOperation:op];
 [op release];
 

You can also control the number of concurrent operations via:

 [queue setMaxConcurrentOperationCount:2];
 

Grand Central Dispatch

By far, the easiest way to add concurrency is to use Grand Central Dispatch (GCD) syntax and libraries. The GCD allows you to define tasks via function or blocks and schedules them to the available processors and automatically uses threads behind the scene. Though, it's similar to NSOperation, but the syntax is very terse and the performance is much better than using threads directly.

 dispatch_async(dispatch_get_global_queue(0, 0), ^{
     // save data
     NSLog(@"finished saving data");
  });
 

You can also nested blocks such as

 dispatch_async(dispatch_get_global_queue(0, 0), ^{
     // save data
     NSLog(@"finished saving data");
     dispatch_async(dispatch_get_main_queue(), ^{
         [self.tableView reloadData]
     });
     
  });
 

In addition to using predefined queues, you can also create your own queues, which execute the tasks in serial order such as:

 dispatch_queue_t myQueue = dispatch_queue_create("com.plexobject.myqueue", NULL);
 dispatch_async(myQueue, ^{
     // save data
     //  ...
     // now release the queue (optionally)
     dispatch_release(myQueue);
  });
 

Note that if we need to delete the queue, we must do it after all tasks are finished executed. See Apple's documenation for more details on queues.

Final word on Multi-threading

When using multi-threading explicitly or implicitly, you have to synchronize shared data. The IOS SDK provides several constructs such as @synchronized keyword, mutexes, locks, etc. to protect shared data. Nevertheless, this can be error-prone and can slowdown your application, so eliminate shared data if possible. Also, pay special attentions to exceptions within the thread method and cleanup threads upon app termination or when it becomes inactive. See Apple's documentation for more details. Also, any operations that require UI interaction must be run via main thread, though there are some exceptions such as some QuickTime APIs can be run in background.

Event Notifications

The iOS supports notifications for intercommunication between classes and threads, which promote loosely coupled design. In my applications, I extended notification by creating my own events such as:

 @interface MyEvent : NSObject {
     NSString *type;
 }
 
 @property(nonatomic, copy) NSString *type;
 -(void)fireEvent;
 @end
 
 #import                                                                                                                                                                                                                                                  
 
 #import "MyEvent.h"
 
 
 @implementation MyEvent
 
 @synthesize type;
 
 -(void)fireEvent {
     dispatch_async(dispatch_get_main_queue(), ^{
         [[NSNotificationCenter defaultCenter] postNotificationName:type object:self];
     });
 }
 

@end

Note that the event is being fired on the main thread so that UI controllers can respond to the event and update UI without any changes. The controller class would register for the event (typically in viewDidLoad) as follows:

 [[NSNotificationCenter defaultCenter] addObserver:self selector:@selector(handleMyevent:) name:@"MyEvent" object:nil];
 

Similarly, controller would unregister for the event in viewDidUnload as follows:

 [[NSNotificationCenter defaultCenter] removeObserver:self name:@"MyEvent" object:nil];
 

The controller would then define the method handler for the event as follows:

 - (void) handleMyevent:(NSNotification *)notif {
     MyEvent *event = (MyEvent *) [notif object];
 }
 

You would then generate the event as follows:

 MyEvent *event = new MyEvent();
 event.type = @"MyEvent"
 event.fireEvent;
 

sending bug reports Automatically

Though, you can download crash reports from the Apple website, I added automatic reporting mechanism for bug reports and crashes. I used UncaughtExceptionHandler class to handle unexpected exceptions and automatically send bug reports. I don’t try to recover from unexpected exceptions as often the memory corruption leave the application in such unstable condition that it’s better to restart the application.

 
 - (void)validateAndSaveCriticalApplicationData:(NSException *)exception {
     NSMutableString *message = [[[NSMutableString alloc] initWithCapacity:200] autorelease];
     [message appendFormat:@"{name:'%@', ", exception.name];
     [message appendFormat:@"reason:'%@', ", exception.reason];
     [message appendFormat:@"userInfo:'%@', callStack:[", exception.userInfo];
     int count=0;
     for (NSObject *obj in exception.callStackReturnAddresses) {
         if (count > 0) {
             [message appendString:@","];
         }   
         [message appendFormat:@"callStack_%d:'%@'", obj];            
     }   
     [message appendString:@"], callSymbols:["];
     count=0;
     for (NSObject *obj in exception.callStackSymbols) {
         if (count > 0) {
             [message appendString:@","];
         }   
         [message appendFormat:@"callSymbol_%d:'%@'", obj];            
     }   
     [message appendString:@"]}"];
 
     [self sendBug:@"Crash report" withMessage:message];
 }
 

Persistence

The iOS SDK provides several options for persistence such as user preferences, file I/O, serialization, sqlite and CoreData. I used file based serialization for caching resources and objects that implemented NSCoding protocol and used CoreData for more complexed data. I will skip file based serialization as it’s fairly straightforward, but would list some tips on CoreData.

  • Setup versions for your data mapping files so that you can easily upgrade schema. You can add the version by selecting xcdatamodel file, choosing Design and then selecting “Add Model Version” from “Data Model” submenu. In order to auto-upgrade migration, define persistentStoreCoordinator accessor as
     
     - (NSPersistentStoreCoordinator *)persistentStoreCoordinator {
         if (persistentStoreCoordinator != nil) {
             return persistentStoreCoordinator;
         }   
         
         NSString *docs = [NSSearchPathForDirectoriesInDomains(NSDocumentDirectory, NSUserDomainMask, YES) lastObject]; 
         NSURL *storeUrl = [NSURL fileURLWithPath: [docs stringByAppendingPathComponent: @"MyData"]];
         
         NSError *error = nil;    
         NSDictionary *options = [NSDictionary dictionaryWithObjectsAndKeys:                                                                                                                                                                                                       
                                  [NSNumber numberWithBool:YES], NSMigratePersistentStoresAutomaticallyOption,    
                                  [NSNumber numberWithBool:YES], NSInferMappingModelAutomaticallyOption, nil];
         
     
         persistentStoreCoordinator = [[NSPersistentStoreCoordinator alloc] initWithManagedObjectModel:[self managedObjectModel]];
         if (![persistentStoreCoordinator addPersistentStoreWithType:NSSQLiteStoreType configuration:nil URL:storeUrl options:options error:&error]) {
             NSLog(@"Unresolved error %@, %@", error, [error userInfo]);
             abort();
         }    
         return persistentStoreCoordinator;
     }
     
  • Use a single NSManagedObjectContext per thread or queue. For example, I used different NSManagedObjectContext for background timer that updated the database than the NSManagedObjectContext that displayed the table using NSFetchedResultsController.
  • Merge changes when using multiple NSManagedObjectContext objects, e.g.
     
     NSNotificationCenter *dnc = [NSNotificationCenter defaultCenter];
     
     
     [dnc addObserverForName:NSManagedObjectContextDidSaveNotification object:insertManagedObjectContext
                               queue:nil usingBlock:^(NSNotification *saveNotification) {
                                   [[self readManagedObjectContext] mergeChangesFromContextDidSaveNotification:saveNotification];
         }];
     
     // update here
     
     [dnc removeObserver:self name:NSManagedObjectContextDidSaveNotification object:ctx];
     
     
  • In found problems with caching NSManagedObjects when using multiple NSManagedObjectContexts as iOS invalidate existing references when new updates come and you get wonderful error:
    The NSManagedObject with ID:#### has been invalidated.

I ended up creating transient copy of the object for caching purpose. Another factor you will have to consider is what information should be kept in memory and what information can be stored in the database. In general, if the data is small or frequently updated such as stock quote, I kept it in memory, however if the data is large and less often updated such as stock positions, I kept it in the database. In addition, I used the database as interface between UI and network, so the data would get updated asynchronously in background and stored in the database. The network code would then fire an event, which the UI subscribes and would then update the view from the database. This provided fast and efficient way to view large amount of data without waiting.

Performance

Performance is a key part of usage experience. Apple provides a number of tools such as Shark and Instruments to measure performance bottlenecks as well as investigate memory leaks and CPU activity, file I/O, database and other issues. You need to start measuring the performance on real devices early in the application lifecycle so that you can design the application properly.

Memory Management

As, Apple does not support garbage collection on iOS devices, the memory management is one of most painful aspects of the development. I felt that pain as I have been using language such as Java, Ruby, Erlang and Python for past many years that come with garbage collection. Here are some of the tips for memory management:

  • Use properties and synthesize keywords to automatically generate proper accessors/setters.
  • When assigning properties within the class use the syntax “self.property = aproperty” instead of “property = aproperty” so that you invoke your setters properly.
  • Use retain and release instead of dealloc method.
  • Use retain for all object references.
  • Use assign for primitive references.
  • Use copy for String types, GCD blocks and other instances where you want clone of the objects.
  • Use assign when you are using delegate pattern to hold another controller for callback so that you don’t end up with cyclic references.
  • Use AutoRelease Pools for separate threads.
     
     NSAutoreleasePool *pool = [ [ NSAutoreleasePool alloc ] init ];
      // ...
     [pool drain];
     
  • Use auto-release objects sparsely, for example if you only need an object in a method or a block and then just allocate it at the beginning and release it at the end (possibly in finally block of try-catch).
  • If a method name begins with alloc, copy, or new, then you must return allocated instance and caller would own the reference, otherwise you must return an auto-released object.

Use Memory-Leak detection feature of Instruments to find the objects that are not properly released. You can set NSZombieEnabled flag to true on your executable, which can help track the memory leaks when the app crashes. Finally, multi-threading further complicates the memory management. For example, you may pass auto-released object to another thread and by the time that the thread uses it, the first thread’s auto-release pool released it. So, you must retain the object in separate thread before processing it.

Testing

Though, iPhone Simulator is fast and easy way to test the application during the development, but there are significant difference between the iPhone Simulator and real devices. First, many of the APIs such as Location, Apple Store, Accelerator, Email are not supported on the Simulator, but most importantly the Simulator runs on blazing fast MacPro machine, whereas real devices are slow and limited. I highly recommend start your testing with real devices early in your app lifecycle. There is also a big difference in hardware between different generation of iPod touch, iPhone and iPad. For example, iPhone 3G has 620Mhz processor with 128M memory, iPhone 3GS has 833Mhz with 256M memory and latest iPhone 4 has 1Ghz with 512M memory. I suggest using older devices to really find performance and stability issues with the application. Also, you want it to run on most devices so you should target lowest device that you can, which you can configure it by setting target OS property of the build.

Though, Apple provides basic Unit Test support, but I found it very painful to use. We have used the UI Automation tool for functional testing with some success, but it lacks good documentation.

Conclusion

In this blog, I listed several techniques for designing and developing iOS applications, though most of the techniques can be easily applied to other mobile platforms. Though, hardware on mobile devices is becoming more powerful, but it is still constrained with limited memory. You have to pay an exceptional attention to the memory usage, performance and stability of the app and users are going to hate if it’s slow or crashes. The network apps have to further address the availability and speed of the network so that apps is not completely unusable in airport mode and with slow connection. In the end, testing on real devices and real environment is the key to create effective network based applications.


August 5, 2010

Implementing Apple Remote Push Notification using Objective-C and Ruby

Filed under: iPhone development — admin @ 3:44 pm

Recently, I added the remote push capabilities to an iPhone/iPad application at work. It turned out to be a bit more involved process than I expected so I would document key steps of the process.

Overview of Remote Push Notification

The Apple Push Notification works like SMS, where the application providers can send short messages to the users (upto 256 bytes). The message consists of JSON structure as follows:

 { 
   "aps" : {  "alert" : "your-message", "sound" : "filename" : "badge" : 5,     },     
   // optionally more structures, e.g. {"acme1" : "bar"}
 }
 

The alert key defines the contents of the message, which is displayed to the user. You can play sound by specifying the sound filename (which is already bundled with the app), however you can leave it blank or use ‘default’ for playing default sound. Finally, the badge will allow notification to show a number next to your application icon. Also, you can optionally add action buttons that can take user to a particular screen in your application (though I won’t show it here).

The format for sending notification is as follows:

You can read Apple documentation for more inforamtion on the binary format.

The architecture of Push Notification consists of three key pieces:

  • iOS Application – that enables push notification and registers the device for notification
  • Application Server – is responsible for generating the messages and publishing them to the Apple Push Notification Service (APNS)
  • Apple Push Notification Service (APNS) – is responsible for delivering the messages to the devices where the application is installed

Here is the architecture diagram from Apple documentation on Push Notification:

Enabling Push Notification for the application

I assume you have already created an application with developer certificate, app-id and provisioning profile. However, Apple Push Notification requires another set of certificates for development and production. So, login to the iPhone developer site and select iPhone Provisioning Portal from the upper right side and then choose App IDs link.

Select “Enable for Apple Push Notification service” checkbox, then click on Configure link:

It will guide you through creating certificate, where you will have to create a certificate request by opening “Keychain Access”, then selecting “Certificate Assistant” option from the menu and choosing “Request a Certificate from Certificate Authority”. You can then upload the generated request file to the portal. Once the certificate is generated you should see the option to download the certificate, e.g.

After downloading the certificate, you can double click or drag it to the “Keychain Access” and it will add the certificate to the Keychain.

Publishing Push Notifications on the Application Server

The push notification requires a server that connects to the APNS service and sends notification messages. You will need to use same set of keys and certificates that you created on the Apple development portal. So open “Keychain Access” and select Keys from the left options, then select the private key for the push notification. You can then export the key by right clicking, which will create a file with .12 file extension. Note that it will ask you for a password for encrypting the key (type in anything as we will remove it later). Next, select “My Certificates” from the left options and select the certificate for push notification. Then repeat the process of exporting by right clicking and saving the certificate. You will see two files with .12 extensions, which can be converted into .pem files as follows:

 openssl pkcs12 -clcerts -nokeys -out apns_cert.pem -in 
 openssl pkcs12 -nocerts -out apns_key.pem -in 
 

You can remove password with the the following command:

 openssl rsa -in apns_key.pem -out apns_key_unenc.pem 
 

Then merge two files with following command:

 cat apns_cert.pem apns_key_unenc.pem > apns.pem
 

I used Rails on the server side, so I defined a few models and controllers to store devices and messages, where the device model had an attribute ‘token’ and the message model had three attributes: alert, badge and sound. Each device also has an attribute deactivated_at, which is set to the date when the device is disabled. Next, I created a short Ruby library for sending notifications. The library provides two methods send_message for sending notifications and get_feedbacks for checking disabled devices so that you can remove them from your database. The send_message method accepts a message model as an argument and then opens a connection to the APNS service. Apple recommends using a single connection for publishing notifications to all devices, so it adds all devices within a single a connection.

 require 'socket'                                                                                                                                                                                                                                                                                                           
 require 'openssl'
 
 class ApnsPublisher
   def self.send_message(apns_message)
     json_payload =  {"aps" => {"alert" => apns_message.alert, "sound" => apns_message.sound, "badge" => apns_message.badge}}.to_json.to_s
 
     open_connection(APNS_SERVER, 2195) do |conn, sock|
       ApnsDevice.find_in_batches(:batch_size => 500 ) do |devices| 
         devices.each do |device|
           next unless device.deactivated_at.nil?
           unless ApnsDevicesMessage.find_by_apns_device_id_and_apns_message_id(device.id, apns_message.id)
             token = device.token.gsub(/\s+/,'')
             byte_token = [token].pack("H*")
             message = "\0\0 #{byte_token}\0#{json_payload.length.chr}#{json_payload}"                                                                                                                                                                                                                                      
             raise "message #{message} is too big" if message.size.to_i > 256 
             conn.write(message)
             f.write(message)
             ApnsDevicesMessage.create(:apns_device_id => device.id, :apns_message_id => apns_message.id, :delivered_at => Time.new.utc)
           end                                                                                                                                                                                                                                                                                                              
         end 
       end 
     end 
   end 
 
   def self.get_feedbacks()
     open_connection(APNS_FEEDBACK_SERVER, 2196) do |conn, sock|
       while line = sock.gets
         line.strip!
         feedback = line.unpack('N1n1H140')
         token = feedback[2].scan(/.{0,8}/).join('').strip
         device = ApnsDevice.find_by_token(token)
         if device
           device.update_attribute(deactivated_at, Time.at(feedback[0])
         end 
       end 
     end 
   end 
 private
   def self.open_connection(host, port, passphrase='')
     cert = File.read(APNS_CERT_FILE)
     ctx = OpenSSL::SSL::SSLContext.new
     ctx.key = OpenSSL::PKey::RSA.new(cert, passphrase)
     ctx.cert = OpenSSL::X509::Certificate.new(cert)
   
     sock = TCPSocket.new(host, port)
     ssl = OpenSSL::SSL::SSLSocket.new(sock, ctx)
     ssl.sync = true
     ssl.connect
     yield ssl, sock 
   
     ssl.close
     sock.close
   end 
 end
 

You can use delayed_job plugin to run the get_feedbacks method periodically. Also, I added a service for registering and adding the devices, which is called from the iPhone devices (but not shown here).

Configuration

You will need to define following properties for development:

 APNS_SERVER = "gateway.sandbox.push.apple.com"
 APNS_FEEDBACK_SERVER = "feedback.sandbox.push.apple.com"
 APNS_CERT_FILE = File.join(RAILS_ROOT, 'config', 'apns_dev.pem')
 

and following properties for production:

 APNS_SERVER = "gateway.push.apple.com"
 APNS_FEEDBACK_SERVER = "feedback.push.apple.com"
 APNS_CERT_FILE = File.join(RAILS_ROOT, 'config', 'apns_prod.pem')
 

Registering devices for notification

You can register the device by adding following method in your didFinishLaunchingWithOptions of the primary delegate class:

 
         [[UIApplication sharedApplication] 
                 registerForRemoteNotificationTypes:( UIRemoteNotificationTypeAlert |UIRemoteNotificationTypeBadge | UIRemoteNotificationTypeSound)];


and then registering with following callback methods:

 #pragma mark push notifications
 - (void)application:(UIApplication *)app didRegisterForRemoteNotificationsWithDeviceToken:(NSData *)devToken {
         NSString *token = [[devToken description] stringByTrimmingCharactersInSet:[NSCharacterSet characterSetWithCharactersInString:@"<> "]];
         token = [token stringByReplacingOccurrencesOfString:@" " withString:@""];
         DeviceRegisterer *registrar = [[DeviceRegisterer alloc] init];
         [registrar registerDeviceWithToken:token];
 }
 
 
 - (void)application:(UIApplication *)app didFailToRegisterForRemoteNotificationsWithError:(NSError *)err {
         NSLog(@"failed to regiser %@", err);
 }
 
 - (void)application:(UIApplication *)application didReceiveRemoteNotification:(NSDictionary *)userInfo {
         NSLog(@"notification options %@", userInfo);
 }


I used ASIHTTPRequest library for invoking REST service I wrote for registering devices (on Rails side), e.g.

DeviceRegisterer.h

 @class ASIFormDataRequest;                                                                                                                                                                                                                                                                                                 
 
 
 @interface DeviceRegisterer : NSObject {
         ASIFormDataRequest *request;
 
 }
 
 @property (retain, nonatomic) ASIFormDataRequest *request;
 
 - (void)registerDeviceWithToken:(NSString *)token;
 
 @end
 

DeviceRegisterer.m

 
 #import "DeviceRegisterer.h"
 
 #import "ASIFormDataRequest.h"
 
 @implementation DeviceRegisterer
 @synthesize request;
 
 - (void)registerDeviceWithToken:(NSString *)token {
         if (self.request == nil) {
                 NSURL *url = [NSURL URLWithString:[NSString stringWithFormat:@"%@/admin/apns_devices.json", API_BASE_DOMAIN]];
                 [self setRequest:[ASIFormDataRequest requestWithURL:url]];
                 [request setPostValue:token forKey:@"token"];
 
                 [request setTimeOutSeconds:30];
                 [request setDelegate:self]; 
                 [request setDidFailSelector:@selector(registerFailed:)];
                 [request setDidFinishSelector:@selector(registerFinished:)];
                 
                 [request startAsynchronous];            
         }
 }
 
 
 - (void)registerFailed:(ASIHTTPRequest *)theRequest {
         NSLog(@"registerFailed %@", [theRequest error]);
 }
 
 - (void)registerFinished:(ASIHTTPRequest *)theRequest {
         NSLog(@"registerFinished %d",[theRequest postLength]);
 }
 
 - (void)dealloc {
         [request cancel];
         [request release];
         [super dealloc];
 }
 
 @end
 

Summary

In nutshell, push notification is powerful feature that can help your users engage with your application, though it must be used with caution so that users are not annoyed and in turn remove your application or disable it. It also requires a lot of moving parts for sending notification, registering, getting feedback on the devices. I found that Apple does not provide a great debugging options when testing the push notification. For example, first problem I encoutered with testing was that my profile on XCode was old and wasn’t updated after I enabled push notification. I had to delete my old profile and then refresh it from the Organizer. Also, when you send notifications to the APNS, you don’t get any response code or errors. This caused some frustration when I wasn’t getting messages due to slightly wrong JSON format. Fortunately, when your device is connected you can select the device from the XCode Organizer and view the Console tab for debugging information. I was able to view the error (which a bit vague) and then got everything working after fixing the JSON structure.


May 24, 2010

Validating receipts from Apple iPhone store in Ruby

Filed under: iPhone development — admin @ 1:41 pm

Recently, I had to write a service on Ruby-on-Rails project to validate an in-store purchase for iPhone application. Though, it was fairly straight forward, but I am posting the code in case someone else needs it:

  1 require 'net/http'                                                                                                                                                                                                                                                            
 
  2 require 'net/https'
  3 require 'uri'
  4 
  5 class AppleReceiptVerifier 
 
  6   #
  7   ### Verifies Apple receipt submitted by iPhone 
  8   ### See http://developer.apple.com/iphone/library/documentation/NetworkingInternet/Conceptual/StoreKitGuide/Overview%20of%20the%20Store%20Kit%20API/OverviewoftheStoreKitAPI.html#//apple_ref/doc/uid/TP40008267-CH100-SW14
 
  9   #
 10   def self.verify(b64_receipt)
 11     url = URI.parse(APPLE_RECEIPT_VERIFY_URL)
 
 12     http = Net::HTTP.new(url.host, url.port)
 13     http.use_ssl = true 
 14     http.verify_mode = OpenSSL::SSL::VERIFY_NONE
 
 15     valid = false
 16     json_request = {'receipt-data' => b64_receipt}.to_json
 17     resp, resp_body = http.post(url.path, json_request.to_s, {'Content-Type' => 'application/x-www-form-urlencoded'})
 
 18     if resp.code == '200'
 19       json_resp = JSON.parse(resp_body)
 20       if json_resp['status'] == 0
 
 21         valid = true 
 22       end 
 23     end 
 24     valid
 25   end 
 
 26 end
 27 
 28 
 

Note that the receipt returned by iPhone APIs is not base 64 encoded so you will need to encode it before calling the service. Also, for testing, APPLE_RECEIPT_VERIFY_URL will point to the sandbox environment, i.e., https://sandbox.itunes.apple.com/verifyReceipt and for real purchase it will point to https://buy.itunes.apple.com/verifyReceipt. Finally, you can learn more from the Apple documentation on purchase model and on validating receipts.


June 13, 2009

ActiveObject based O/R Mapping library for iPhone development

Filed under: iPhone development — admin @ 6:38 pm

I have been learning iPhone development lately and needed to add some persistence capability to my application. There are varied options available for persistence such as using “User Defaults” for small user specific settings, serialization similar to serialization or pickle features of other languages and builtin support of embeded Sqlite. I found Sqlite more performant, memory efficient and flexible than other options so I chose it. Using Sqlite with iPhone is fairly straight forward and there are tons of examples such Creating Todo list using Sqlite. However, when I looked for some O/R mapping framework for iPhone, I found that iPhone SDK unlike Mac development didn’t have any support and neither I could find any other solution elsewhere. So, I started writing a simple O/R mapping library based on Active Object pattern. This is similar to how Rails and Django implement O/R mapping. Based on convention over configuration, it simply maps object properties to the database table fields. At this time, this is very basic O/R mapping library and does not support relations, validation, database integrity support, etc. Nevertheless, it met my simple needs and I have released it as open source project under OCActiveObjects on GitHub.

The OCActiveObjects library is fairly small and consists of following classes:

ActiveObject

This is the base class that you extend in order to add automatic O/R support. You have to override following Class methods to specify name of the database and table:

     + (NSString *) getTableName;
   

Above method defines name of table where instances of the object will be stored.

     + (NSString *) getDatabaseName;
   

Above method defines name of the database to be used. You will then be able to call following methods to interact with the Sqlite database:

   + (void) openDatabase;
   

Above method must be called once before any other methods, usually at the start of your application.

   + (void) closeDatabase;
   

Above method must be called once before you shutodnw your application.

  
   - (void) save;
 

Above method saves a new object or updates an existing object. Each subclass of ActiveObject is automatically assigned a unique database id with a property
named “objectId”. This is another example of convention where all tables will use a numeric surrogate key to identify each row.
If that property is nil then it assumes this is new object and inserts a new row in the database, otherwise it updates an existing row in the
database. It assumes that name of database fields are same as property names, though you can override that behavior by overriding _getPropertyNamesAndTypes Class method.

   + (ActiveObject *) findByPrimaryKey:(NSNumber *)objId;
 

Above method queries an object in the database matching objectId property, which identifies each object in the database.

   + (NSArray *) findWithCriteria:(NSDictionary *)criteria;
 

Above method returns an array of objects that match criteria. The criteria at this time is simple dictionary, i.e., pair of name and values that are joined by
“AND” clause. There is a immediate need to extend this to support more flexible queries.

   + (NSArray *) findAll;
 

Above method returns all objects, which may not be good for iPhone application due to limited amount of memory. This is another area that needs immediate attention.

   + (int) removeAll;
 

Above method removes all rows in the table so be careful with this.

   + (int) removeWithCriteria:(NSDictionary *)criteria;
 

Above method removes only methods matching criteria. Again criteria consists of name/value pairs.

   + (int) countWithCriteria:(NSDictionary *)criteria;
 

Above method counts the number of rows in the database matching criteria.

   + (int) countAll;
 

Above method returns count of all rows in the table.

Exension Methods in ActiveObject

There are number of extension methods to customize SQLs or behavior of the object such as

 - (void) _insert;
 

Above method inserts an object into the database.

 - (void) _update;
 

Above method updates an existing object into the database.

 + (NSDictionary *) _getPropertyNamesAndTypes;
 

You can override above method to change properties that needs to be persisted.

 + (NSString *) _getCreateSQL;
 

Above method generates an SQL for creating table.

 + (NSMutableString *) _getInsertSQL;
 

Above method generates an SQL for inserting a row in the table.

 + (NSMutableString *) _getUpdateSQL;
 

Above method generates an SQL for updating a row in the table.

 + (NSMutableString *) _getSelectSQL;
 

Above method generates an SQL for selecting fields from the database.

 + (void) _createTable;
 

Above method creates database table.

IntrospectHelper

The OCActiveObjects library uses some Objective C magical runtime support to query for properties and this class encapsulates those methods.

SqliteHelper

This class some helper methods for Sqlite3.

How to use

In order to test it, let’s define a simple Person class that extends ActiveObject, e.g.

 #import <Foundation/Foundation.h>
 #import "ActiveObject.h"
 
 @interface Person : ActiveObject {
         NSString *name;
         short age;
         int rank;
         long votes;
         char sex;
         double income;
         BOOL active;
         NSInteger flags;
         NSNumber *rating;
         NSDate *birthdate;      
 }
 
 
 @property (nonatomic, retain) NSString *name;
 @property (nonatomic, assign) short age;
 @property (nonatomic, assign) int rank;
 @property (nonatomic, assign) long votes;
 @property (nonatomic, assign) char sex;
 @property (nonatomic, assign) double income;
 @property (nonatomic, assign) BOOL active;
 @property (nonatomic, assign) NSInteger flags;
 @property (nonatomic, retain) NSNumber *rating;
 @property (nonatomic, retain) NSDate *birthdate;
 
 - (BOOL)isEqualToPerson:(Person *)aPerson;
 
 @end
 

Implemention of Person.m looks like:

 #import "Person.h"
 
 @implementation Person
 @synthesize name;
 @synthesize age;
 @synthesize rank;
 @synthesize votes;
 @synthesize sex;
 @synthesize income;
 @synthesize active;
 @synthesize flags;
 @synthesize rating;
 @synthesize birthdate;
 
 - (BOOL)isEqual:(id)other {
     if (other == self)
         return YES;
     if (!other || ![other isKindOfClass:[self class]])
         return NO;
     return [self isEqualToPerson:other];
 }
 
 - (BOOL)isEqualToPerson:(Person *)aPerson {
         if (self == aPerson)
         return YES;
     if (![(id)[self name] isEqual:[aPerson name]])
         return NO;
     return YES;
 }
 
 - (NSUInteger)hash {
         NSUInteger hash = 0;
         hash += [[self name] hash];
         return hash;
 }


 - (NSString *)description {
         return [NSString stringWithFormat:@"id %@, name %@", self.objectId, self.name);
 }
 
 
 - (void) dealloc {
         [name release];
         [birthdate release];
         [super dealloc];
 }
 
 + (NSString *) getTableName {
         return @"persons";
 }
 
 + (NSString *) getDatabaseName {
         return @"personsdb";
 }
 
 @end
 

Then you can first open the database, e.g.

 
         [Person openDatabase];
 

Then create a new person object, e.g.

         Person *person = [[[Person alloc] init] autorelease];
         person.birthdate = [[NSDate alloc]init];
         int random = [person.birthdate timeIntervalSince1970];
         person.age =  random % 30;
         person.rank = random % 20;
         person.votes = random % 10;
         person.sex = 'M';
         person.name = [NSString stringWithFormat:@"Joe #%d", random % 1000];
         person.income = random % 3000;
         person.active = YES;
         person.flags = random % 30 + 0.5;
         person.rating = [NSNumber numberWithInt:20.5];  
         return person;
 

You will then be able to save the person object as

         [person save];
 

You can see how many rows are in the database by

         int count = [Person countAll];
 

And then retrieve the object that we saved as

         Person *person2 = (Person *) [Person findByPrimaryKey:person.objectId];
 

When you are done, you can then close the database:

         [Person closeDatabase];
 

One of the frustrating aspect of iPhone development has been lack of good unit testing support. Though, XCode comes with OCUnit, but it is hard to install and use with iPhone. I kept getting weird errors like:

 exited abnormally with code 139
 
 failed tests for architecture 'i386'
 

Though, there are some basic tutorials like Test Driving Your Code with OCUnit or OCUnit: Integrated Unit Testing In Xcode, but they didn’t help. I also tried adding google-toolbox-for-mac but macro errors are extremely frustrating. Besides better testing, OCActiveObjects needs a lot of help to add better support of criteria, paging, relational mapping and validation. I also had hard time figuring out how to create a static library until I found Building static libraries with the iPhone SDK though I still need help in adding framework level support. Hopefuly, other people can contribute to the open source project. You can send me your suggestions and comments as well via email “bhatti AT plexobject DOT com” or tweet me at bhatti_shahzad.

Powered by WordPress