I became seriously interested in computers after learning about Microprocessor architecture during a special summer camp program at school that taught us about how computer systems work among other topics. I didn’t have easy access to computers at my school and I learned a bit more about programming on an Atari system. This hooked me to take some private lessons on programming languages and pursue computer science college studies in college and a career as a software developer spanning three decades.
My professional journey started mostly with mainframe systems and then I shifted more towards UNIX systems and then later to Linux environments. Along the way, I’ve witnessed entire technological ecosystems rise, thrive, and ultimately vanish like programming languages abandoned despite their elegance, operating systems forgotten despite their robustness, and frameworks discarded despite their innovation. I will dig through my personal experience with some of the archaic technologies that have largely disappeared or diminished in importance. I’ve deliberately omitted technologies I still use regularly to spotlight these digital artifacts. These extinct technologies shaped how we approach computing problems and contain the DNA of our current systems. They remind us that today’s indispensable technologies may someday join them in the digital graveyard.
Programming Languages
BASIC & GW-BASIC
I initially learned BASIC on an Atari system and later learned GW-BASIC, which introduced me to graphics programming on IBM XT computers running early DOS versions. The use of line numbers organizing program flow with GOTO and GOSUB statements seemed strange to me but its simplicity helped me to build create programs with sounds and graphics. Eventually, I moved to Microsoft QuickBASIC that had support for procedures and structured programming. This early taste of programming led me to pursue Computer Science in college. I sometimes worry about today’s beginners facing overwhelming complexity like networking, concurrency, and performance optimization just to build a simple web application. BASIC on the other hand was very accessible and rewarding for newcomers despite its limitations.
Pascal & Turbo Pascal
College introduced me to both C and Pascal through Borland’s Turbo compilers. I liked cleaner and more readable syntax of Pascal compared to C. At the time, C had best performance so Pascal couldn’t gain wide adoption and it has largely disappeared from mainstream development. Interestingly, career of Turbo Pascal’s author, Anders Hejlsberg was saved by Microsoft who went on to create C# and later TypeScript. This trajectory taught me that technical superiority alone doesn’t ensure survival.
FORTRAN
During a college internship at a physics laboratory, I learned about FORTRAN running on massive DEC-VAX/VMS systems, which was very popular among scientific computing at the time. While FORTRAN maintains a niche presence in scientific circles but DEC VAX/VMS systems have vanished entirely from the computing landscape. VMS systems were known for powerful, reliable and stable computing environments but DEC failed to adapt to the industry’s shift toward smaller, more cost-effective systems. The market ultimately embraced UNIX variants that offered comparable capabilities at lower price points with greater flexibility. This transition taught me an early lesson in how economic factors often trump technical superiority.
COBOL, CICS and Assembler
My professional career at a marketing firm began with COBOL, CICS, and Assembler on mainframe. JCL (Job Control Language) was used to submit the mainframe jobs that had unforgiving syntax where a misplaced comma could derail an entire batch job. I used COBOL for batch processing applications that primarily processed sequential ISAM files or the more advanced VSAM files with their B-Tree indexing for direct data access. These batch jobs often ran for hours or even days that created long feedback cycles where a single error could cause cascading delays and missed deadlines.
I used CICS for building interactive applications with their distinctive green-screen terminals. I had to use BMS (Basic Mapping Support) for designing the 3270 terminal screen layouts, which was notoriously finicky language. I built my own tool to convert plain text layouts into proper BMS syntax so that I didn’t have to debug syntax errors. The most challenging language that I had to use was mainframe Assembler, which was used for performance-critical system components. These programs were monolithic workhorses —thousands of lines of code in single routines with custom macros simulating higher-level programming constructs. Thanks to the exponential performance improvements in modern hardware, most developers rarely need to descend to this level of programming.
PERL
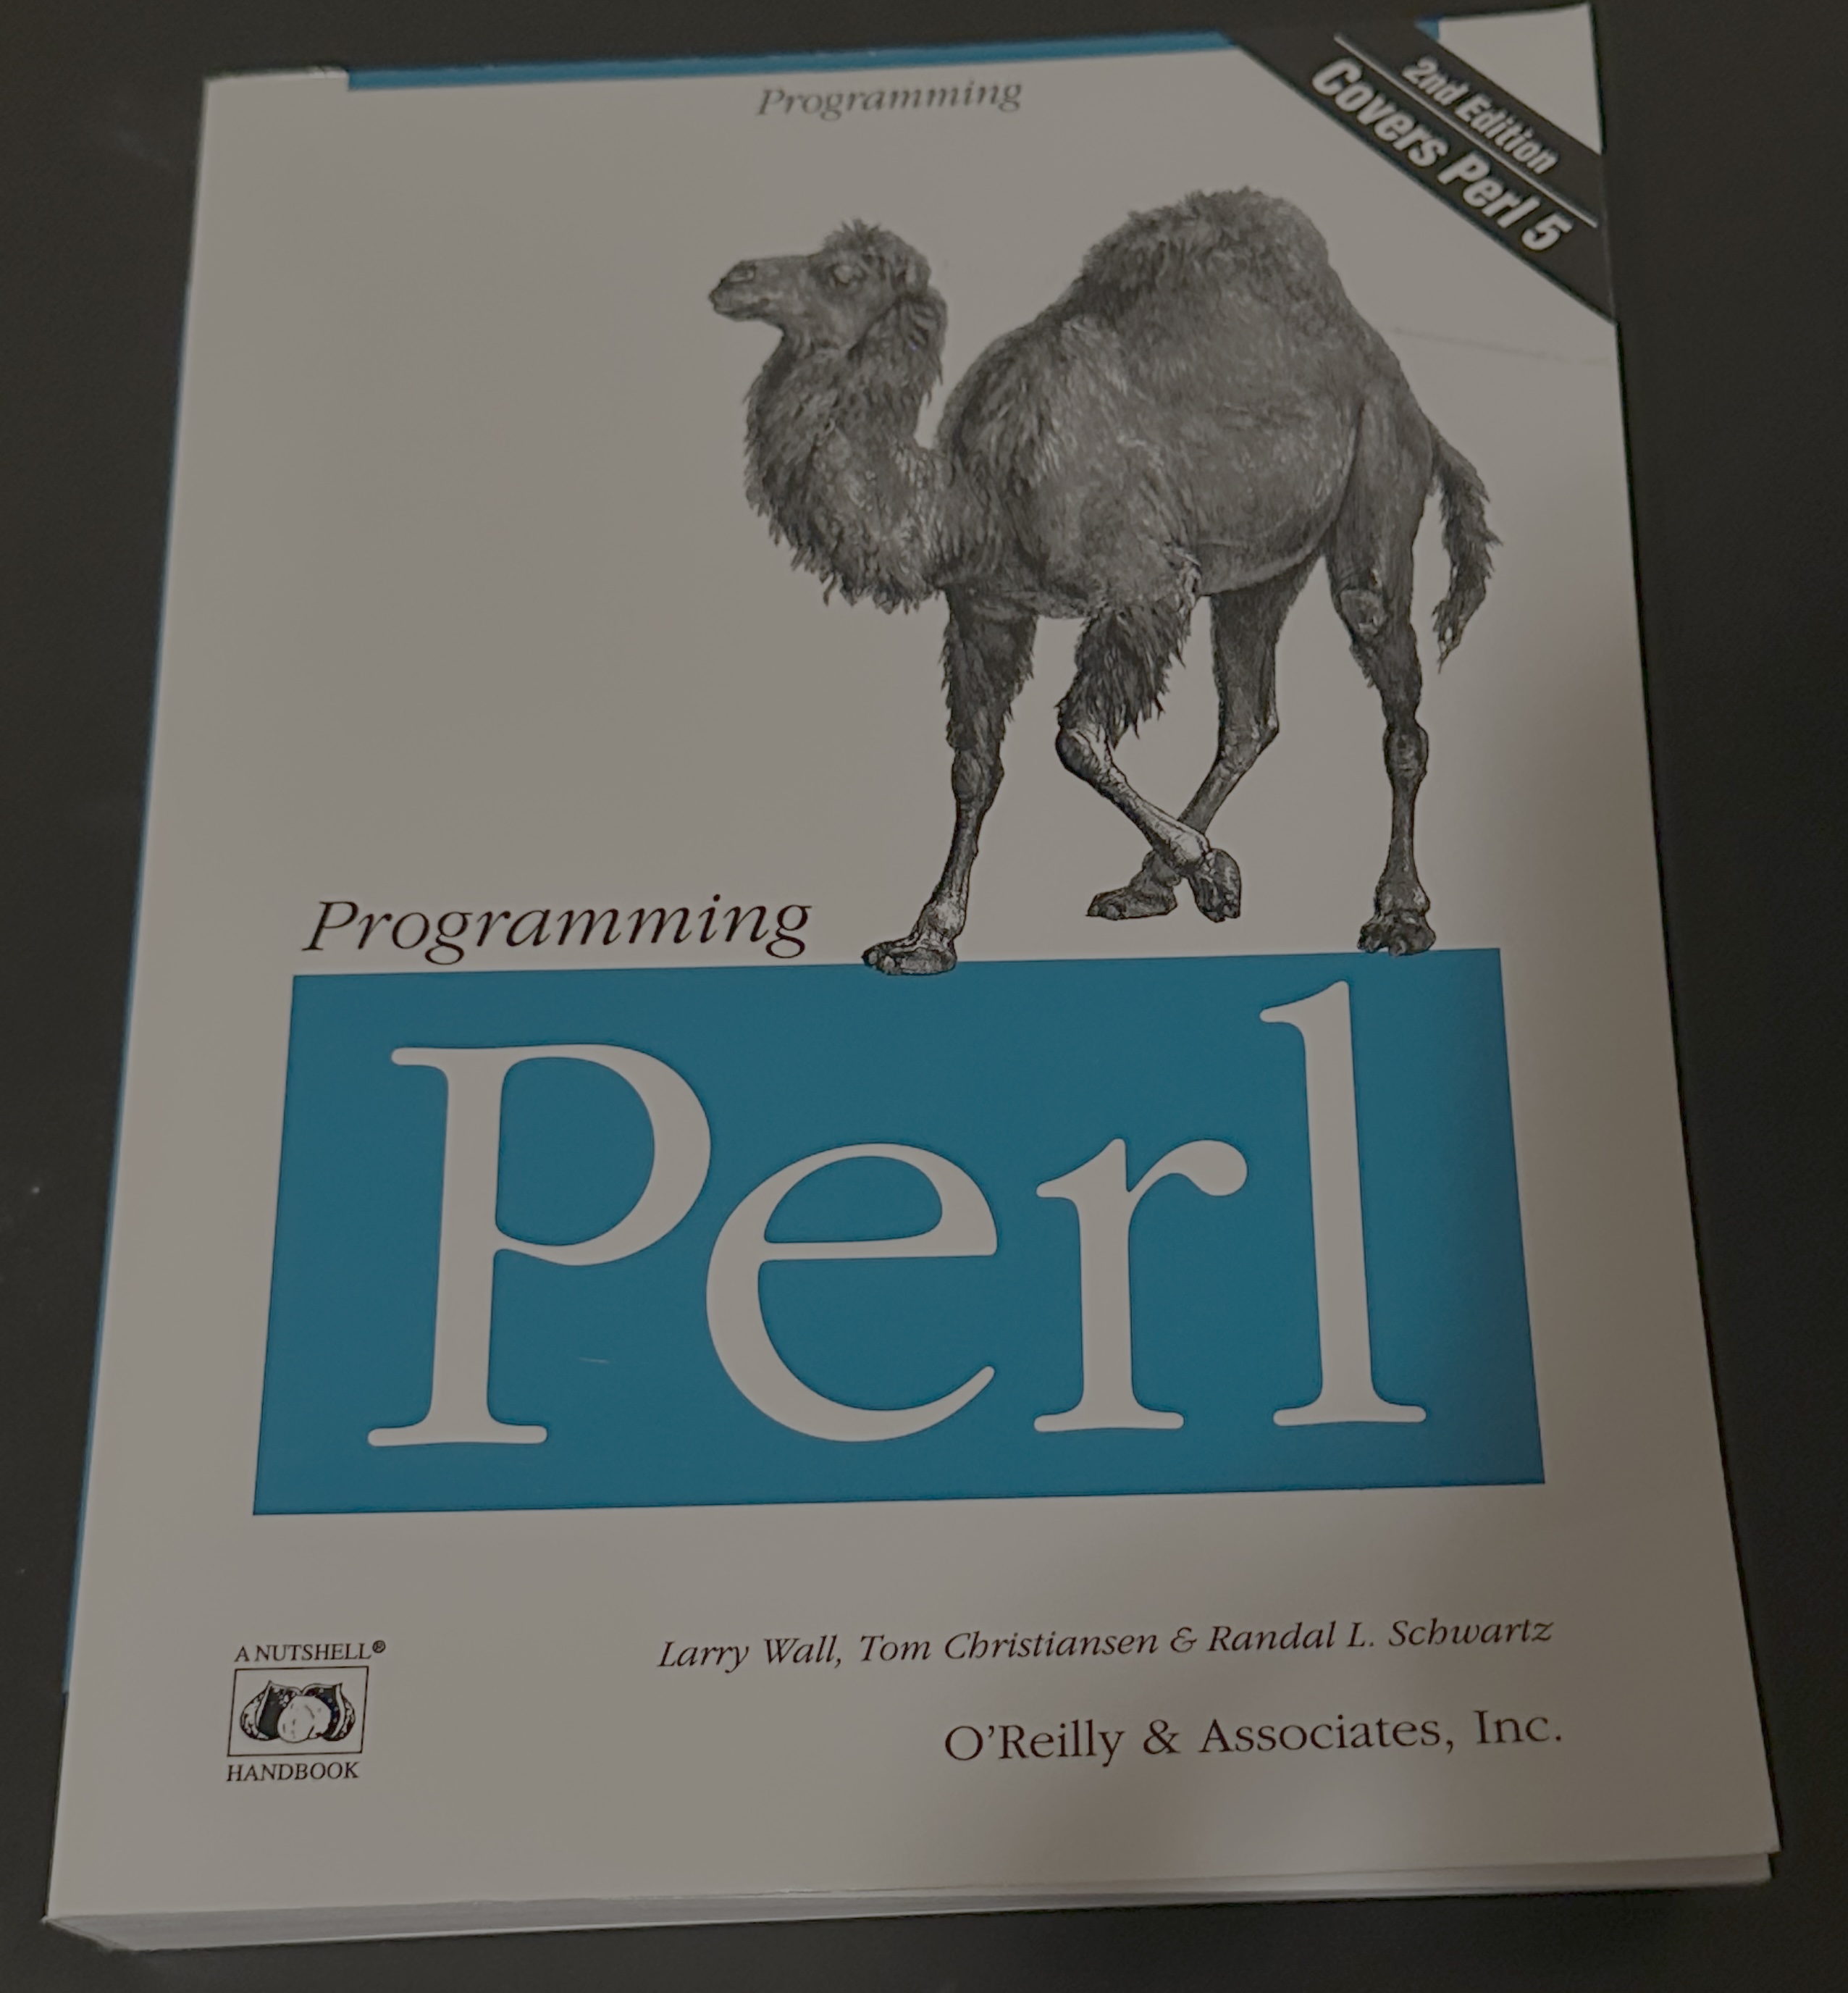
I first learned PERL in college and embraced it throughout the 1990s as a versatile tool for both system administration and general-purpose programming. Its killer feature—regular expressions—made it indispensable for text processing tasks that would have been painfully complex in other languages. At a large credit verification company, I leveraged PERL’s pattern-matching to automate massive codebase migrations, transforming thousands of lines of code from one library to another. Later, at a major airline, I used similar techniques to upgrade legacy systems to newer WebLogic APIs without manual rewrites.
In the web development arena, I used PERL to build early CGI applications and it was a key component of revolutionary LAMP stack (Linux, Apache, MySQL, PERL) before PHP/Python supplanted it. The CPAN repository was another groundbreaking innovation that allowed reusing shared libraries at scale. I used it along with Mason web templating system at a large online retailer in the mid 2000s and then migrated some of those applications to Java as PERL based systems were difficult to maintain. I found similar experience with other PERL codebases and I eventually moved to Python, which offered cleaner object-oriented design patterns and syntax. Its cultural impact—from the camel book to CPAN—influenced an entire generation of programmers, myself included.
4th Generation Languages
Early in my career, Fourth Generation Languages (4GLs) promised a dramatic boost productivity by providing a simple UI for managing the data. On mainframe systems, I used Focus and SAS for data queries and analytics, creating reports and processing data with a few lines of code. For desktop applications, I used a variety of 4GL environments including dBase III/IV, FoxPro, Paradox, and Visual Basic. These tools were remarkable for their time, offering “query by example” interfaces that allowed quickly build database applications with minimal coding. However, as data volumes grew, the limitations of these systems became painfully apparent. Eventually, I transitioned to object-oriented languages paired with enterprise relational databases that offered better scalability and maintainability. Nevertheless, these tools represent an important evolutionary step that influenced modern RAD (Rapid Application Development) approaches and low-code platforms that continue to evolve today.
Operating Systems
Mainframe Legacy
My career began at a marketing company working on IBM 360/390 mainframes running MVS (Multiple Virtual Storage). I used a combination of JCL, COBOL, CICS, and Assembler to build batch applications that processed millions of customer records. Working with JCL (Job Control Language) was particularly challenging due to its incredibly strict syntax where a single misplaced comma could cause an entire batch run to fail. The feedback cycle was painfully slow; submitting a job often meant waiting hours or even overnight for results. We had to use extensive “dry runs” of jobs to test the business logic —a precursor to what we now call unit testing. Despite these precautions, mistakes happened, and I witnessed firsthand how a simple programming error caused the company to mail catalogs to incorrect and duplicate addresses, costing millions in wasted printing and postage.
These systems also had their quirks: they used EBCDIC character encoding rather than the ASCII standard found in most other systems. They also stored data inefficiently—a contributing factor to the infamous Y2K crisis, as programs commonly stored years as two digits to save precious bytes of memory in an era when storage was extraordinarily expensive. Terminal response times were glacial by today’s standards—I often had to wait several seconds to see what I’d typed appear on screen. Yet despite their limitations, these mainframes offered remarkable reliability. While the UNIX systems I later worked with would frequently crash with core dumps (typically from memory errors in C programs), mainframe systems almost never went down. This stability, however, came partly from their simplicity—most applications were essentially glorified loops processing input files into output files without the complexity of modern systems.
UNIX Variants
Throughout my career, I worked extensively with numerous UNIX variants descended from both AT&T’s System V and UC Berkeley’s BSD lineages. At multiple companies, I deployed applications on Sun Microsystems hardware running SunOS (BSD-based) and later Solaris (System V-based). These systems, while expensive, provided the superior graphics capability, reliability and performance needed for mission-critical applications. I used SGI’s IRIX operating system running on impressive graphical workstations when working at a large physics lab. These systems processed massive datasets from physics experiments by leveraging non-uniform memory access (NUMA) and symmetric multi-processing (SMP) based architecture. IRIX was among the first mainstream 64-bit operating systems, pushing computational boundaries years before this became standard. They were used for visual effects in movies like Jurassic Park to life in 1993, which was amazing to watch. I also worked with IBM’s AIX on SP1/SP2 supercomputers at the physics lab, using Message Passing Interface (MPI) APIs to distribute processing across hundreds of nodes. This message-passing approach ultimately proved more scalable than shared-memory architectures, though modern systems incorporate both paradigms—today’s multi-core processors rely on the same NUMA/SMP concepts pioneered in these early UNIX variants.
On the down side, these systems were very expensive and Moore’s Law enabled commodity PC hardware running Linux to achieve comparable performance at a fraction of the price. I saw a lot of those large systems replaced with a farm of low-cost PCS based on Linux clusters that reduced infrastructure costs drastically. I was deeply passionate about UNIX and even spent most of my savings in the early ’90s on a high-end PowerPC system, which was result of a partnership between IBM, Motorola, Apple, and Sun. This machine could run multiple operating systems including Solaris and AIX, though I primarily used it for personal projects and learning.
DOS, OS/2, SCO and BeOS
For personal computing in the 1980s and early 1990s, I primarily used MS-DOS, even developing several shareware applications and games that I sold through bulletin board systems. DOS, with its command-line interface and conventional/expanded memory limitations taught me valuable lessons about resource optimization that remain relevant even in today. I preferred UNIX-like environments whenever possible so I installed SCO UNIX (based on Microsoft’s Xenix) on my personal computer. SCO was initially respected in the industry before it transformed into a patent troll with controversial patent lawsuits against Linux distributors. I also liked OS/2 and it was a technically superior operating system developed compared to Windows with its support of true pre-emptive multitasking. But it lost to Windows due to massive Microsoft’s market power similar to other innovative competitors like Borland, Novell, and Netscape.
Perhaps the most elegant of these alternative systems was BeOS, which I eagerly tested in the mid-1990s when it released in beta. It supported microkernel design and pervasive multithreading capabilities, and was a serious contender for Apple’s next-generation OS. However, Apple ultimately acquired NeXT instead, bringing Steve Jobs back and adopting NeXTSTEP as the foundation—another case where superior technology lost to business considerations and personal relationships.
Storage Media
My first PC had a modest 40MB hard drive and I relied heavily on floppy disks in both 5.25-inch and later 3.5-inch formats. They took a long time to copy data and made a lot of scratching sounds as both progress indicators and early warning systems for impending failures. In professional environments, I worked with SCSI drives that had better speed and reliability. I generally employed RAID configurations to protect against drive failures. For archiving and backup, I generally used tape drives that were also painfully slow but could store much more data. In mid-1990s, I switched to Iomega’s Zip drives from floppy disks for personal backups that could store up to 100MB compared to 1.44MB floppies. Similarly, I used CD-R and later CD-RW drives for storage that also had slow write speeds initially.
Network Protocols
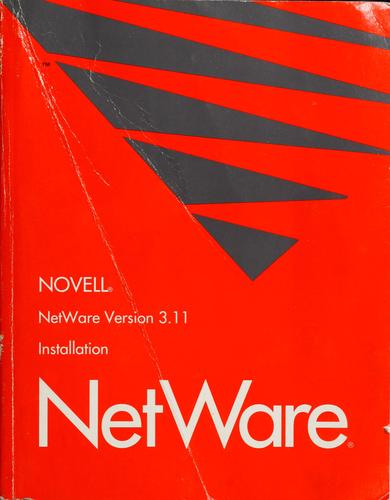
In my early career, networking was fairly fragmented and I generally used Novell’s proprietary IPX (Internetwork Packet Exchange) protocol and Novell NetWare networks at work. It provided nice support of file sharing and printing service. On mainframe systems, I worked with Token Ring networks that offered more reliable deterministic performance. As the internet was based on TCP/IP, it eventually took over along with UNIX and Linux systems. For file sharing across these various systems, I relied on NFS (Network File System) in UNIX environments and later Samba to bridge the gap between UNIX and Windows systems that used SMB (Server Message Block) protocol. Both solutions were plagued with performance issues due to file locking issues. I spent countless hours troubleshooting “stale file handles” and unexpected disconnections that plagued these early networked file systems.
Databases
My database journey began on mainframe systems with IBM’s VSAM (Virtual Storage Access Method), which wasn’t a true database but provided crucial B-Tree indexing for efficient file access. I also worked with IBM’s IMS, a hierarchical database that organized data in parent-child tree structures. The relational databases were truly revolutionary at the time and I embraced systems like IBM DB2, Oracle, and Microsoft SQL Server. In my college, I took a number of courses in theory of relational databases and appreciated its strong mathematical foundations. However, most of those relational databases were commercial and expensive and I looked at open source projects like MiniSQL but it lacked critical enterprise features like transaction support.
In mid 1990s, I saw object-oriented databases gained popularity along with object-oriented programming that promised to eliminate the “impedance mismatch” between object models and relational tables. I evaluated ObjectStore for some projects and ultimately deployed Versant to manage complex navigation data for traffic mapping systems—predecessors to today’s Google Maps services. These databases elegantly handled complex object relationships and inheritance hierarchies, but introduced their own challenges in querying, scaling, and integration with existing systems. The relational databases later absorbed object-oriented concepts like user-defined types, XML support, and JSON capabilities. Looking back, it taught me that systems built on strong theoretical foundations with incremental adaptation tend to outlast revolutionary approaches.
Security and Authentication
Early in my career, I worked as a UNIX system administrator and relied on /etc/passwd files for authentication that were world-readable, containing password hashes generated with the easily crackable crypt algorithm. For multi-system environments, I used NIS (Network Information Service) to centrally manage user accounts across server clusters. We also commonly used .rhosts files to allow password-less authentication between trusted systems. I later used Kerberos authentication systems to provide stronger single sign-on capabilities for enterprise environments. When working at a large airline, I used Netegrity SiteMinder to implement single sign-on based access. While consulting for a manufacturing company, I built SSO implementations using LDAP and Microsoft Active Directory across heterogeneous systems. The Java ecosystem brought its own authentication frameworks and I worked extensively with JAAS (Java Authentication and Authorization Service) and later Acegi Security before moving to SAML (Security Assertion Markup Language) and OAuth based authentication standards.
Applications & Development Tools
Desktop Applications (Pre-Web)
My early word processing was done in WordStar with its cryptic Ctrl-key commands, before moving to WordPerfect, which offered better formatting control. For technical documentation, I relied on FrameMaker that supported sophisticated layout for complex documents. For spreadsheets, I initially used VisiCalc, which was the original “killer app” on Apple II but later Lotus 1-2-3, which revolutionized common keyboard shortcuts that still exist in Excel today. When working for a marketing company, I used Lotus Notes, a collaboration tool that functioned as an email client, calendar, document management system, and application development platform. On UNIX workstations, I preferred text-based applications like elm and pine for email and lynx text browser when accessing remote machines on telnet.
Chat & Communication Tools
On early UNIX systems at work, I used the simple ‘talk’ command to chat with other users on the system. At home during the pre-internet era, I immersed myself in the Bulletin Board System (BBS) culture. I also hosted my own BBS, learning firsthand about the challenges of building and maintaining online communities. I used CompuServe for access to group forums and Internet Relay Chat (IRC) through painfully slow dial-up and later SLIP/PPP connections. My fascination with IRC led me to develop my own client application, PlexIRC, which I distributed as shareware. As graphical interfaces took over, I adopted ICQ and Yahoo Messenger for personal communications. These platforms introduced status indicators, avatars, and file transfers that we now take for granted. While AOL Instant Messenger dominated the American market, I deliberately avoided the AOL ecosystem, preferring more open alternatives. My professional interest gravitated toward Jabber, which later evolved into the XMPP protocol standard with its federated approach to messaging—allowing different servers to communicate like email. I later implemented XMPP-based messaging solutions for several organizations, appreciating its extensible framework and standardized approach.
Development Environments
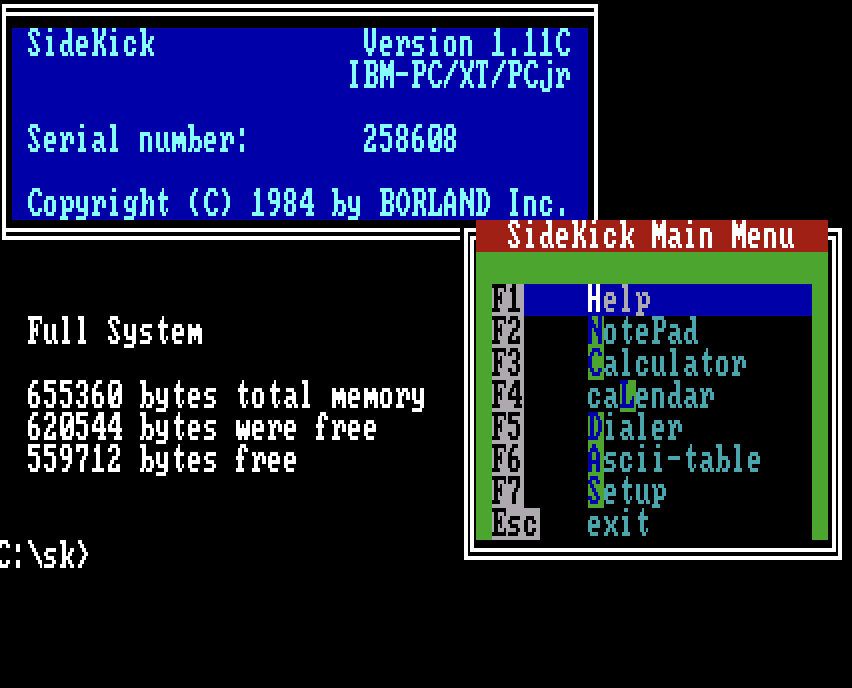
On UNIX systems, I briefly wrestled with ‘ed’—a line editor so primitive by today’s standards that its error message was simply a question mark. I quickly graduated to Vi, whose keyboard shortcuts became muscle memory that persists to this day through modern incarnations like Vim and NeoVim. In the DOS world, Borland Sidekick revolutionized my workflow as one of the first TSR (Terminate and Stay Resident) applications. With a quick keystroke, Sidekick would pop up a notepad, calculator, or calendar without exiting the primary application. For debugging and system maintenance, I used Norton Utilities that provided essential tools like disk recovery, defragmentation, and a powerful hex editor that saved countless hours when troubleshooting low-level issues. I learned about the IDE (Integrated Development Environment) through Borland’s groundbreaking products like Turbo Pascal and Turbo C that combined fast compilers with editing and debugging in a seamless package. These evolved into more sophisticated tools like Borland C++ with its application frameworks. For specialized work, I used Watcom C/C++ for its cross-platform capabilities and optimization features. As Java gained prominence, I adopted tools like JBuilder and Visual Cafe, which pioneered visual development for the platform. Eventually, I moved to Eclipse and later IntelliJ IDEA, alongside Visual Studio. Though, I still enable Vi mode on these IDEs due to its powerful editing capabilities without the need of mouse.
Web Technologies
I experienced the early internet ecosystem in college—navigating Gopher menus for document retrieval, searching with WAIS, and participating in Usenet newsgroups. Everything changed with the release of NCSA HTTPd server and the Mosaic browser. I used these revolutionary tools on Sun workstations in college and later at a high-energy physics laboratory on UNIX workstations. I left my cushy job to find web related projects and secured a consulting position at a financial institution building web access for credit card customers. I used C/C++ with CGI (Common Gateway Interface) to build dynamic web applications that connected legacy systems to this new interface. These early days of web development were like the Wild West—no established security practices, framework standards, or even consistent browser implementations existed. During a code review when working at a major credit card company, I discovered a shocking vulnerability: their web application stored usernames and passwords directly in cookies in plaintext, essentially exposing customer credentials to anyone with basic technical knowledge. These early web servers used a process-based concurrency model, spawning a new process for each request—inefficient by modern standards but there wasn’t much user traffic at the time. On the client side, I worked with the Netscape browser, while server implementations expanded to include Apache, Netscape Enterprise Server, and Microsoft’s IIS.
I also built my own Model-View-Controller architecture and templating system because there weren’t any established frameworks available. As Java gained traction, I migrated to JSP and the Struts framework, which formalized MVC patterns for web applications. This evolution continued as web servers evolved from process-based to thread-based concurrency models, and eventually to asynchronous I/O implementations in platforms like Nginx, dramatically improving scalability. Having witnessed the entire evolution—from hand-coded HTML to complex JavaScript frameworks—gives me a unique perspective on how rapidly this technology landscape has developed.
Distributed Systems Development
My journey with distributed systems began with Berkeley Sockets—the foundational API that enabled networked communication between applications. After briefly working with Sun’s RPC (Remote Procedure Call) APIs, I embraced Java’s Socket implementation and then its Remote Method Invocation (RMI) framework, which I used to implement remote services when working as a consultant for an enterprise client. RMI offered the revolutionary ability to invoke methods on remote objects as if they were local, handling network communication transparently and even dynamically loading remote classes. At a major travel booking company, I worked with Java’s JINI technology, which was inspired by Linda memory model and TupleSpace that I also studied during my postgraduate research. JINI extended RMI with service discovery and leasing mechanisms, creating a more robust foundation for distributed applications. I later used GigaSpaces, which expanded the JavaSpaces concept into a full in-memory data grid for session storage.
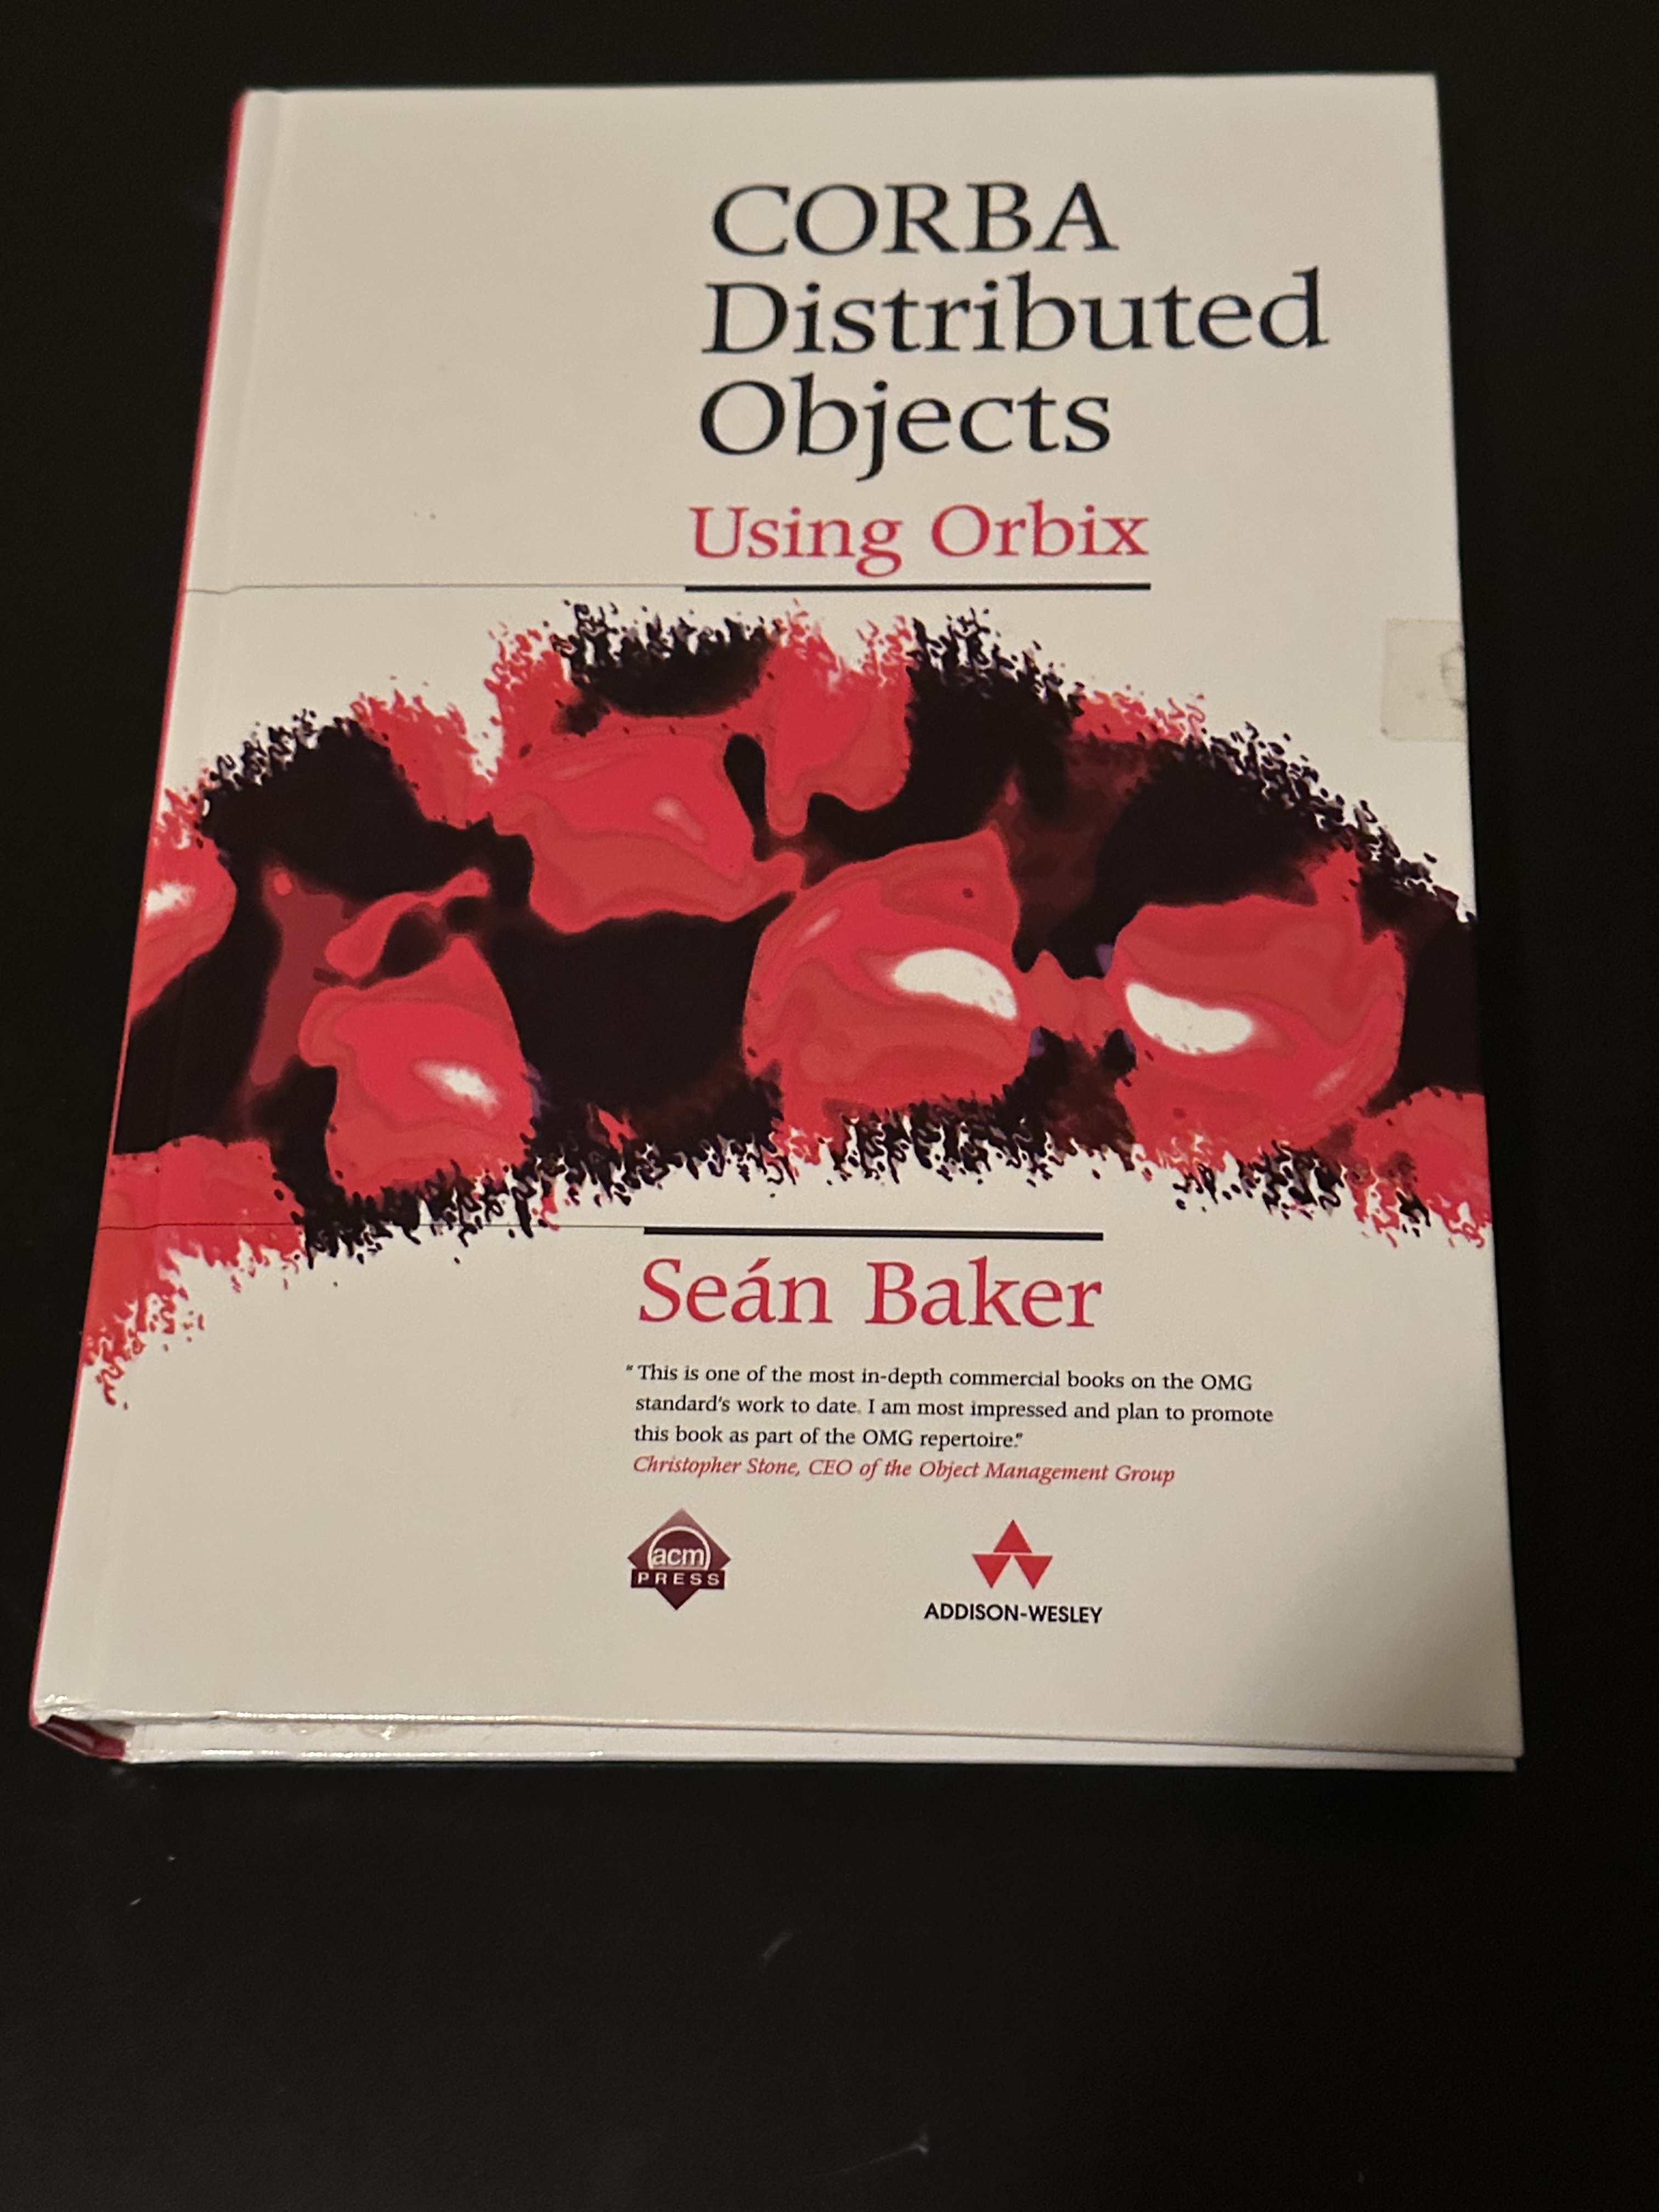
For personal projects, I explored Voyager, a mobile agent platform that simplified remote object interaction with dynamic proxies and mobile object capabilities. Despite its technical elegance, Voyager never achieved widespread adoption—a pattern I would see repeatedly with technically superior but commercially unsuccessful distributed technologies. While contracting for Intelligent Traffic Systems in the Midwest during the late 1990s, I implemented CORBA-based solutions that collected real-time traffic data from roadway sensors and distributed it to news agencies via a publish-subscribe model. CORBA promised language-neutral interoperability through its Interface Definition Language (IDL), but reality fell short—applications typically worked reliably only when using components from the same vendor. I had to implement custom interceptors to add the authentication and authorization capabilities CORBA lacked natively. Nevertheless, CORBA’s explicit interface definitions via IDL influenced later technologies like gRPC that we still use today. The Java Enterprise (J2EE) era brought Enterprise JavaBeans and I implemented these technologies using BEA WebLogic for another state highway system, and continued working with them at various travel, airline, and fintech companies. EJB’s fatal flaw was attempting to abstract away the distinction between local and remote method calls—encouraging developers to treat distributed objects like local ones. This led to catastrophic performance problems as applications made thousands of network calls for operations that should have been local.
I read Rod Johnson’s influential critique of EJB that eventually evolved into the Spring Framework, offering a more practical approach to Java enterprise development. Around the same time, I transitioned to simpler XML-over-HTTP designs before the industry standardized on SOAP and WSDL. The subsequent explosion of WS-* specifications (WS-Security, WS-Addressing, etc.) created such complexity that the diagram of their interdependencies resembled the Death Star. I eventually abandoned SOAP’s complexity for JSON over HTTP, implementing long-polling and Server-Sent Events (SSE) for real-time applications before adopting the REST architectural style that dominates today’s API landscape. Throughout these transitions, I integrated various messaging systems including IBM WebSphere MQ, JMS implementations, TIBCO Rendezvous, and Apache ActiveMQ to provide asynchronous communication capabilities. This journey through distributed systems technologies reflects a recurring pattern: the industry oscillating between complexity and simplicity, between comprehensive frameworks and minimal viable approaches. The technologies that endured longest were those that acknowledged and respected the fundamental challenges of distributed computing—network unreliability, latency, and the fallacies of distributed computing—rather than attempting to hide them behind leaky abstractions.
Client & Mobile Development
Terminal & Desktop GUI
My journey developing client applications began with CICS on mainframe systems—creating those distinctive green-screen interfaces for 3270 terminals once ubiquitous in banking and government environments. The 4th generation tools era introduced me to dBase and Paradox, which I used to build database-driven applications through their “query by example” interfaces, which allowed rapid development of forms and reports without extensive coding. For personal projects, I developed numerous DOS applications, games, and shareware using Borland Turbo C. As Windows gained prominence, I transitioned to building GUI applications using Borland C++ with OWL (Object Windows Library) and later Microsoft Foundation Classes (MFC), which abstracted the complex Windows API into an object-oriented framework. While working for a credit protection company, I developed UNIX-based client applications using OSF/Motif. Motif’s widget system and resource files offered sophisticated UI capabilities, though with considerable implementation complexity.
Web Clients
The web revolution transformed client development fundamentally. I quickly adopted HTML for financial and government projects, creating browser-based interfaces that eliminated client-side installation requirements. For richer interactive experiences, I embedded Flash elements into web applications—creating animations and interactive components beyond HTML’s capabilities at the time. Java’s introduction brought the promise of “write once, run anywhere,” which I embraced through Java applets that you could embed like Flash widgets. Later, Java Web Start offered a bridge between web distribution and desktop application capabilities, allowing applications to be launched from browsers while running outside their security sandbox. Using Java’s AWT and later Swing libraries, I built standalone applications including IRC and email clients. The client-side JavaScript revolution, catalyzed by Google’s demonstration of AJAX techniques, fundamentally changed web application architecture. I experimented with successive generations of JavaScript libraries—Prototype.js for DOM manipulation, Script.aculo.us for animations, YUI for more component sets, etc.
Embedded and Mobile Development
As Java had its roots in embedded/TV systems, it introduced a wearable smart Java ring with an embedded microchip that I used for some personal security applications. Though the Java Ring quickly disappeared from the market, its technological descendants like the iButton continued finding specialized applications in security and authentication systems. The mobile revolution began in earnest with the Palm Pilot—a breakthrough device featuring the innovative Graffiti handwriting recognition system that transformed how we interacted with portable computers. I embraced Palm development, creating applications for this pioneering platform and carrying a Palm device for years. As mobile technologies evolved, I explored the Wireless Application Protocol (WAP), which attempted to bring web content to the limited displays and bandwidth of early mobile phones but failed to gain widespread adoption. When Java introduced J2ME (Java 2 Micro Edition), I invested heavily in mastering this platform, attracted by its promise of cross-device compatibility across various feature phones. I developed applications targeting the constrained CLDC (Connected Limited Device Configuration) and MIDP (Mobile Information Device Profile) specifications.
The entire mobile landscape transformed dramatically when Apple introduced the first iPhone in 2007—a genuine paradigm shift that redefined our expectations for mobile devices. Recognizing this fundamental change, I learned iOS development using Objective-C with its message-passing syntax and manual memory management. This investment paid off when I developed an iOS application for a fintech company that significantly contributed to its acquisition by a larger trading firm. Early mobile development eerily mirrored my experiences with early desktop computing—working within severe hardware constraints that demanded careful resource management. Despite theoretical advances in programming abstractions, I found myself once again meticulously optimizing memory usage, minimizing disk operations, and carefully managing network bandwidth. This return to fundamental computing constraints reinforced my appreciation for efficiency-minded development practices that remain valuable even as hardware capabilities continue expanding.
Development Methodologies
My first corporate experience introduced me to Total Quality Management (TQM), with its focus on continuous improvement and customer satisfaction. This early exposure taught me a crucial lesson: methodology adoption depends more on organizational culture than on the framework itself. Despite new terminology and reorganized org charts, the company largely maintained its existing practices with superficial changes. Later, I worked with organizations implementing the Capability Maturity Model (CMM), which attempted to categorize development processes into five maturity levels. While this framework provided useful structure for improving chaotic environments, its documentation requirements and formal assessments often created bureaucratic overhead that impeded actual development. Similarly, the Rational Unified Process (RUP), which I used at several companies, offered comprehensive guidance but it turned into waterfall development model in many projects. The agile revolution emerged as a reaction against these heavyweight methodologies. I applied elements of Feature-Driven Development and Spiral methodologies when working at a major airline, focusing on iterative development and explicit risk management. I explored various agile approaches during this period—Crystal’s focus on team communication, Adaptive Software Development’s emphasis on change tolerance, and particularly Extreme Programming (XP), which introduced practices like test-driven development and pair programming that fundamentally changed how I approached code quality. Eventually, most organizations where I worked settled on customized implementations of Scrum and Kanban—frameworks that continue to dominate agile practice today.
Development Methodologies & Modeling
Earlier in my career, approaches like Rapid Application Development (RAD) and Joint Application Development (JAD) emphasized quick prototyping and intensive stakeholder workshops. These methodologies aligned with Computer-Aided Software Engineering (CASE) tools like Rational Rose and Visual Paradigm, which promised to transform software development through visual modeling and automated code generation. On larger projects, I spent months creating elaborate UML diagrams—use cases, class diagrams, sequence diagrams, and more. Some CASE tools I used could generate code frameworks from these models and even reverse-engineer models from existing code, promising a synchronized relationship between design and implementation. The reality proved disappointing; generated code was often rigid and difficult to maintain, while keeping models and code in sync became an exercise in frustration. The agile movement ultimately eclipsed both heavyweight methodologies and comprehensive CASE tools, emphasizing working software over comprehensive documentation.
DevOps Evolution
Version Control System
My introduction to version control came at a high-energy physics lab, where projects used primitive systems like RCS (Revision Control System) and SCCS (Source Code Control System). These early tools stored delta changes for each file and relied on exclusive locking mechanisms—only one developer could edit a file at a time. As development teams grew, most projects migrated to CVS (Concurrent Versions System), which built upon RCS foundations. CVS supported networked operations, allowing developers to commit changes from remote locations, and replaced exclusive locking with a more flexible concurrent model. However, CVS still operated at the file level rather than treating commits as project-wide transactions, leading to potential inconsistencies when only portions of related changes were committed. I continued using CVS for years until Subversion emerged as its logical successor. Subversion’s introduction of atomic commits to ensure that either all or none of a change would be committed. It also improved branching operations, directory management, and file metadata handling, addressing many of CVS’s limitations. While working at a travel company, I encountered AccuRev, which introduced the concept of “streams” instead of traditional branches. This approach modeled development as flowing through various stages. AccuRev proved particularly valuable for managing offshore development teams who needed to download large codebases over unreliable networks and its sophisticated change management reduced bandwidth requirements.
During my time at a large online retailer in the mid-2000s, I worked with Perforce, a system optimized for large-scale development with massive codebases and binary assets. Perforce’s performance with large files and sophisticated security model made it ideal for enterprise environments. I briefly used Mercurial for some projects, appreciating its simplified interface compared to early Git versions, before ultimately transitioning to Git as it became the industry standard. This evolution of version control parallels the increasing complexity of software development itself: from single developers working on isolated files to globally distributed teams collaborating on massive codebases.
Build Systems
I have been using Make probably throughout my career across various platforms and languages. Its declarative approach to defining dependencies and build rules established patterns that influence build tools to this day. After adopting Java ecosystem, I switched to Apache Ant, which used XML to define build tasks as an explicit sequence of operations. This offered greater flexibility and cross-platform consistency but at the cost of increasingly verbose build files as projects grew more complex. I used Ant extensively during Java’s enterprise ascendancy, customizing its tasks to handle deployment, testing, and reporting. I then adopted Maven that introduced revolutionary concepts such as convention-over-configuration philosophy with standardized project structures, dependency management capabilities connected to remote repositories to automatically resolve and download required libraries. Despite Maven’s transformative nature, its rigid conventions and complex XML configuration was a bit frustrating and I later switched to Gradle. Gradle offered Maven’s dependency management with a Groovy-based DSL that provided both the structure of declarative builds and the flexibility of programmatic customization.
The build process expanded beyond compilation when I implemented Continuous Integration using CruiseControl, an early CI server developed by ThoughtWorks. This system automatically triggered builds on code changes, ran tests, and reported results. Later, I worked extensively with Hudson, which offered a more user-friendly interface and plugin architecture for extending CI capabilities. When Oracle acquired Sun and attempted to trademark the Hudson name, the community rallied behind a fork called Jenkins, which rapidly became the dominant CI platform. I used Jenkins for years, creating complex pipelines that automated testing, deployment, and release processes across multiple projects and environments. Eventually, I transitioned to cloud-based CI/CD platforms that integrated more seamlessly with hosted repositories and containerized deployments.
Summary
As I look back across my three decades in technology, these obsolete systems and abandoned platforms aren’t just nostalgic relics—they tell a powerful story about innovation, market forces, and the unpredictable nature of technological evolution. The technologies I’ve described throughout this blog didn’t disappear because they were fundamentally flawed. Pascal offered cleaner syntax than C, BeOS was more elegant than Windows, and CORBA attempted to solve distributed computing problems we still grapple with today. Borland’s superior development tools lost to Microsoft’s ecosystem advantages. Object-oriented databases, despite solving real problems, couldn’t overcome the momentum of relational systems. Yet these extinct technologies left lasting imprints on our industry. Anders Hejlsberg, who created Turbo Pascal, went on to shape C# and TypeScript. The clean design principles of BeOS influenced aspects of modern operating systems. Ideas don’t die—they evolve and find new expressions in subsequent generations of technology.
Perhaps the most valuable lesson is about technological adaptability. Throughout my career, the skills that have remained relevant weren’t tied to specific languages or platforms, but rather to fundamental concepts: understanding data structures, recognizing patterns in system design, and knowing when complexity serves a purpose versus when it becomes a hurdle. The industry’s constant reinvention ensures that many of today’s dominant technologies will eventually face their own extinction event. By understanding the patterns of the past, we gain insight into which current technologies might have staying power. This digital archaeology isn’t just about honoring what came before—it’s about understanding the cyclical nature of our industry and preparing for what comes next.
Distributed systems inherently involve multiple components such as services, databases, networks, etc., which are spread across different machines or locations. These systems are prone to partial failures, where one part of the system may fail while others remain operational. A common strategy for building fault-tolerant and resilient systems is to recover from transient failures by retrying failed operations. Here are some common use cases for implementing retries to maintain reliability in such environments:
Recover from Transient Failures such as network glitches, dropped packets, or temporary unavailability of services. These failures are often short-lived, and a simple retry may succeed without any changes to the underlying system.
Recover from Network Instability due to packet loss, latency, congestion, or intermittent connectivity can disrupt communication between services.
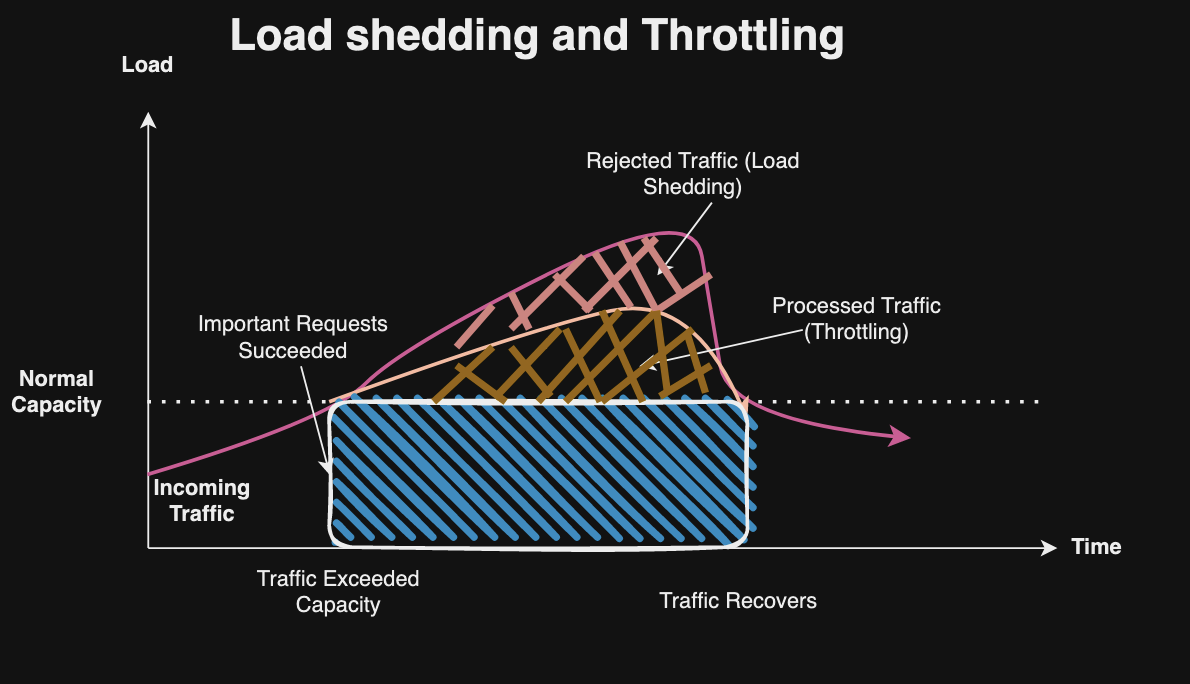
Recover from Load Shedding or Throttling where services may experience momentary overloads and are unable to handle incoming requests.
Asynchronous Processing or Eventual Consistency models may take time to converge state across different nodes or services and operations might fail temporarily if the system is in an intermediate state.
Fault Isolation in microservices architectures, where services are loosely coupled but depend on one another. The downstream services may fail temporarily due to a service restart, deployment or scaling activities.
Service Downtime affects availability of services but client application can use retries to recover from minor faults and maintain availability.
Load Balancing and Failover with redundant Zones/Regions so that when a request to one zone/region fails but can be handled by another healthy region or zone.
Partial Failures where one part of the system fails while the rest remains functional (partial failures).
Build System Resilience to allow the system to self-heal from minor disruptions.
Race Conditions or timing-related issues in concurrent systems can be resolved with retries.
Challenges with Retries
Retries help in recovering from transient or partial failures by resending requests, but they can worsen system overloads if not managed carefully. Here are some challenges associated with retries:
Retry Storms: A retry storm occurs when multiple clients or services simultaneously retry failed requests to an overloaded or recovering service. This flood of retries can exacerbate the problem and can lead to performance degradation or a self-inflicted Denial of Service (DoS) attack.
Idempotency and Data Consistency: Some operations are not idempotent and performing them multiple times can lead to inconsistent or incorrect results (e.g., processing a financial transaction multiple times).
Cascading Failures: Retrying can propagate failures upstream or to dependent services. For instance, when a service fails and clients retry excessively, which can overwhelm downstream services.
Latency Amplification: Retrying failed operations can increase end-to-end latency, as each retry adds a delay before successful resolution.
Amplified Resource Consumption: Retried operations consume additional CPU, memory, and bandwidth, potentially depleting resources at a faster rate. Even when services eventually succeed, the increased load from retries can harm the overall system.
Retry Loops or Infinite Retries: If a failed operation is retried continuously without ever succeeding, it can potentially lead to system crashes.
Threads and connections starvation: When a service invokes multiple operations and some fail, it may retry all operations, leading to increased overall request latency. If high timeouts are set, threads and connections remain occupied, blocking new traffic.
Unnecessary Retries on Non-Retryable Failures: Retrying certain types of failures, like authorization errors or malformed requests is unnecessary and wastes system resources.
Timeout Mismatch Between Services: If the timeout settings for retries between services are not aligned, a downstream service may still be processing a request while the upstream service retries or times out that can result in conflicting states.
Considerations for Retries
Here are some key considerations and best practices for implementing more effective and safer retry mechanisms in distributed systems, enhancing resilience while safeguarding system stability during periods of stress or failure:
Timeouts: Implement timeouts to prevent clients from waiting indefinitely for a response and reduce resource exhaustion (e.g., memory or threads) caused by prolonged waiting. The challenge lies in selecting the appropriate timeout value: if set too high, resources are wasted; if set too low, it can trigger excessive retries, which increases the risk of outages. It’s recommended to set timeouts that are tightly aligned with performance expectations, ideally less than 2-times your maximum response time to avoid thread starvation. Additionally, monitor for early warning signs by setting alarms when performance degrades (e.g., when P99 latency approaches 50% of the timeout value).
Timeout Budgeting: In complex distributed systems, timeout budgeting ensures that the total time taken by a request across multiple services doesn’t exceed an acceptable limit. Each downstream service gets a portion of the total timeout, so failure in one service doesn’t excessively delay the entire request chain.
Exponential Backoff: Implement exponential backoff to spread out retry attempts by gradually increasing the delay between retries, reducing the risk of overwhelming a failing component and allowing time for recovery. It’s important to cap the backoff duration and limit the total number of retries. Without these limits, the system might continue retrying unnecessarily even after the underlying issue has been resolved.
Jitter: Adding randomness (jitter) to the backoff process helps prevent synchronized retries that could lead to overload spikes. Jitter is useful for spreading out traffic spikes and periodic tasks to avoid large bursts of traffic at regular intervals for improving system stability.
Idempotency: Operations that are retried must be idempotent, meaning they can be safely repeated without causing unintended side effects (e.g., double payments or duplicated data).
Retry Limits: Retries should be capped at a certain limit to avoid endlessly retrying a failing operation. Retries should stop beyond a certain number of attempts and the failure should be escalated or reported.
Throttling and Rate Limiting: Implement throttling or rate limiting and control the number of requests a service handles within a given time period. Rate limiting can be dynamic, which is adjusted based on current load or error rates, and avoid system overloads during traffic spikes. In addition, low-priority requests can be shed during high load situations.
Error Categorization: Not all errors should trigger retries and use an allowlist for known retryable errors and only retry those. For example, 400 Bad Request (indicating a permanent client error) due to invalid input should not be retried, while server-side or network-related errors with a 500 Internal Server Error (a likely transient issue) can benefit from retrying.
Targeting Failing Components Only: In a partial failure, not all parts of the system are down and retries help isolate and recover from the failing components by retrying operations specifically targeting the failed resource. For example, if a service depends on multiple microservices for an operation and one of the service fails, the system should retry the failed request without repeating the entire operation.
Intelligent and Adaptive Retries: Design retry logic to take the system’s current state into account, such as checking service health or load conditions before retrying. For example, increase retry intervals if multiple components are detected as failing or retry quickly for timeout errors but back off more for connection errors.. This prevents retries when the system is already known to be overloaded.
Retrying at Different Levels: Retries can be implemented at various levels to handle partial failures such as application level, middleware/proxy (load-balancer or API gateway), transport level (network). For example, a distributed system using a load balancer can detect if a specific instance of a service is failing and reroute traffic to a healthy instance that triggers retries only for the requests that target the failing instance.
Retry Amplification: In multi-tiered architectures, if retries are implemented at each level of nested service calls, it can lead to increased latency and exponentially higher traffic. To mitigate this, implement retries only at critical points in the call chain, and ensure that each service has a clear retry policy with limits. Use short timeouts to prevent thread starvation when calls to downstream services take too long. If too many threads hang, new traffic will be blocked.
Retry Budget: Implementing a global limit on the number of retries across all operations helps prevent system overload. For example, using an algorithm like Leaky Bucket can regulate the number of retries within a specified time period. This ensures that retries are distributed evenly and don’t exceed system capacity, preventing resource exhaustion during high failure rates.
Retries with Circuit Breakers: The circuit breaker pattern can be combined with retries to avoid overwhelming a failing component. When a service starts failing, the circuit breaker opens, temporarily halting requests to that service until it is healthy again. Retries can be configured to happen only after the circuit breaker transitions to a half-open state, which allows a limited number of retries to test if the service has recovered.
Retries with Failover Mechanisms: Retries can be designed with failover strategies where the system switches to a backup service, region, or replica in case of partial failure. If a service in one region fails then the retries can redirect requests to a different region or zone for ensuring availability.
Latency Sensitivity: Services with strict latency requirements might not tolerate long backoff periods or extended retries so they should minimize number of retries and cap backoff times.
Sync Calls: For synchronous calls, retry once immediately to handle temporary network issues and avoid multiple retries that could lead to thread starvation. Avoid excessive sleeping of threads between retries, which can lead to thread starvation. Also, a Circuit Breaker can be used to prevent retrying if a high percentage of calls fail.
Async Calls: Use exponential backoff with jitter for asynchronous operations and use Circuit Breakers to stop retries when failure rates are high. Asynchronous APIs can queue requests for later retries, but should incorporate health checks to ensure that retry attempts don’t add excessive load to downstream services during recovery periods.
Retrying on Overload Responses: Recognize overload indicators (e.g., HTTP 503 responses) and avoid retries when the response indicates overload.
Fail-Fast: Detect issues early and fails quickly rather than continuing to process failing requests or operations to avoid wasting time on requests that are unlikely to succeed.
Graceful Degradation: Provide an alternative method of handling requests when a service fails. For example, if a primary service is down, a cached result or a simpler backup service can be used instead.
Downstream Bugs: Rather than implementing retry-based workarounds, prioritize having downstream service owners address and resolve the underlying issues.
Monitor and Analyze Retry Patterns: Implement monitoring for retry attempts and success rates, and analyze the data to gain insights into system behavior during failures. Use these insights to optimize retry strategies, such as adjusting backoff intervals and fine-tuning timeouts for improved system performance.
SLAs with Downstream Services: Establish clear service-level agreements (SLAs) with downstream services about call frequency, failure rates, and latency expectations.
Availability Over Consistency: Prioritize service availability over consistency where possible, especially during retries or failure handling. In such cases, retries might return stale data or cause inconsistency issues, so it’s crucial to align retry policies with system design.
Chaos Engineering: Chaos engineering involves intentionally injecting failures, such as server crashes or network disruptions, into a system to test its resilience under adverse conditions. By simulating real-world failures, teams can identify weaknesses and ensure that the retry policies are working as expected.
Bulkhead Pattern: The bulkhead pattern isolates different parts of a system to prevent a failure in one part from affecting the rest of the system. The bulkheads can be implemented by limiting the number of resources (threads, memory, connections) allocated to each service or subsystem so that if one service becomes overloaded or fails, it won’t exhaust resources that other services need.
System Design: It’s essential to design APIs to minimize unnecessary communication with the server. For instance, in an event-driven architecture, if an event is missing a required attribute, the application might need to make additional requests to retrieve that data, increasing system load. To avoid this, ensure that events are fully populated with all necessary information upfront.
Summary
Retries are an essential mechanism for building fault-tolerant distributed systems and to recover from transient failures such as network issues, service unavailability, and partial system outages. A well-implemented retry strategy improves system resilience by ensuring that temporary failures don’t lead to full-blown outages. Techniques such as exponential backoff with jitter, idempotency, token buckets to limit retries locally, and circuit breakers help manage retries effectively, preventing issues like retry storms, resource exhaustion, and latency amplification.
However, retries need careful management because without proper limits, retries can overwhelm services that are already struggling or exacerbate issues like cascading failures and thread starvation. Incorporating timeouts, retry limits, and adaptive retry mechanisms based on system health can prevent these negative side effects. By analyzing retry patterns and adopting error-specific handling strategies, distributed systems can strike a balance between availability and resource efficiency, and ensures robust performance even in the face of partial failures.
Building and maintaining distributed systems is challenging due to complex intricacies of production environments, configuration differences, data and traffic scaling, dependencies on third-party services, and unpredictable usage patterns. These factors can lead to outages, security breaches, performance degradation, data inconsistencies, and other operational issues that may negatively impact customers [See Architecture Patterns and Well-Architected Framework]. These risks can be mitigated with phased rollouts with canary releases, leveraging feature flags for controlled feature activation, and ensuring comprehensive observability through monitoring, logging, and tracing are crucial. Additionally, rigorous scalability testing, including load and chaos testing, and proactive security testing are necessary to identify and address potential vulnerabilities. The use of blue/green deployments and the ability to quickly roll back changes further enhance the resilience of your system. Beyond these strategies, fostering a DevOps culture that emphasizes collaboration between development, operations, and security teams is vital. The following checklist serves as a guide to verify critical areas that may go awry when deploying code to production, helping teams navigate the inherent challenges of distributed systems.
Build Pipelines
Separate Pipelines: Create distinct CI/CD pipelines for each microservice, including infrastructure changes managed through IaC (Infrastructure as Code). Also, set up a separate pipeline for config changes such as throttling limits or access policies.
Securing and Managing Dependencies: Identify and address deprecated and vulnerable dependencies during the build process and ensure third party dependencies are vetted and hosted internally.
Build Failures: Verify build pipelines with comprehensive suite of unit and integration tests, and promptly resolve any flaky tests caused by concurrency, networking, or other issues.
Automatic Rollback: Automatically roll back changes if sanity tests or alarm metrics fail during the build process.
Phased Deployments: Deploy new changes in phases gradually across multiple data centers using canary testing with adequate baking period to validate functional and non-functional behavior. Immediately roll back and halt further deployments if error rates exceed acceptable thresholds [See Mitigate Production Risks with Phased Deployment].
Avoid Risky Deployments: Deploy changes during regular office hours to ensure any issues can be promptly addressed. Avoid deploying code during outages, availability issues, when 20%+ hosts are unhealthy, or during special calendar days like holidays or peak traffic periods.
IAM Best Practices: Follow IAM best practices such as using multi-factor authentication (MFA), regularly rotating credentials and encryption keys, and implementing role-based access control (RBAC).
Authentication and Authorization: Verify that authentication and authorization policies adhere to the principle of least privilege.
Defense in Depth: Implement admission controls at every layer including network, application and data.
Vulnerability & Penetration Testing: Conduct security tests targeting vulnerabilities based on the threat model for the service’s functionality.
Encryption: Implement encryption at rest and in-transit policies.
Test Plan: Ensure test plan accurately simulate real use cases, including varying data sizes and read/write operations.
Scalability Assessment: Conduct load tests to assess the scalability of both your primary service and its dependencies.
Testing Strategies: Conduct load tests using both mock dependent services and real services to identify potential bottlenecks.
Resource Monitoring: During load testing, monitor for excessive logs, events, and other resources, and assess their impact on latency and potential bottlenecks.
Autoscaling Validation: Validate on-demand autoscaling policies by testing them under increased load conditions.
Service Unavailability: Test scenarios where the dependent service is unavailable, experiences high latency, or results in a higher number of faults.
Monitoring and Alarms: Ensure that monitoring, alarms and on-call procedures for troubleshooting and recovery are functioning as intended.
Canary Testing and Continuous Validation
This strategy involves deploying a new version of a service to a limited subset of users or servers with real-time monitoring and validation before a full deployment.
Canary Test Validation: Ensure canary tests based on real use cases and validate functional and non-functional behavior of the service. If a canary test fails, it should automatically trigger a rollback and halt further deployments until the underlying issues are resolved.
Continuous Validation: Continuously validate API behavior and monitor performance metrics such as latency, error rates, and resource utilization.
Edge Case Testing: Canary tests should include common and edge cases such as large request size.
Resilience and Reliability
Idle Timeout Configuration: Set your API server’s idle connection timeout slightly longer than the load balancer’s idle timeout.
Load Balancer Configuration: Ensure the load balancer evenly distributes requests among servers using a round-robin method and avoids directing traffic to unhealthy hosts. Prefer this approach over least-connections method.
Backward Compatibility: Ensure API changes are backward compatible that are verified through Contract-based testing, and forward compatible by ignoring unknown properties.
Correlation ID Injection: Inject a Correlation ID into incoming requests, allowing it to be propagated through all dependent services for logging and tracing purposes.
Graceful Degradation: Implement graceful degradation to operate in a limited capacity even when dependent services are down.
Idempotent APIs: Ensure APIs especially those that create resources are implemented with idempotent behavior.
Request Validation: Validate all request parameters and fail fast any requests that are malformed, improperly sized, or contain malicious data.
Single Points of Failure: Eliminate single points of failure, bottlenecks, and dependencies on shared resources to minimize the blast radius.
Cold Start Optimization: Ensure that cold service startup time is limited to just a few seconds.
Performance Optimization
Latency Reduction: Identify and optimize parts of the system with high latency, such as database queries, network calls, or computation-heavy tasks.
Pagination: Implement pagination for list operations, ensuring that pagination tokens are account-specific and invalid after the query expiration time.
Thread and Queue Management: Set up the number of threads, connections, and queuing limits. Generally, the queue size should be proportional to the number of threads and kept small.
Resource Optimization: Optimize resource usage (e.g., CPU, memory, disk) by tuning configuration settings and optimizing code paths to reduce unnecessary overhead.
Caching Strategy: Review and optimize caching strategies to reduce load on databases and services, ensuring that cached data is used effectively without becoming stale.
Database Indexing: Regularly review and update database indexing strategies to ensure queries run efficiently and data retrieval is optimized.
Web Application Firewall: Consider implementing Web application firewall integration with your services’ load balancers to enhance security, traffic management and protect against distributed denial-of-service (DDoS). Confirm WAF settings and assess performance through load and security testing.
Testing Throttling Limits: Test throttling and rate limiting policies in the test environment.
Granular Limits: Implement tenant-level rate limits at the API endpoint level to prevent the noisy neighbor problem, and ensure that tenant context is passed to downstream services to enforce similar limits.
Aggregated Limits: When setting rate limits for both tenant-level and API-levels, ensure that the tenant-level limits exceed the combined total of all API limits.
Graceful degradation: Cache throttling and rate limit data to enable graceful degradation with fail-open if datastore retrieval fails.
Unauthenticated requests: Minimize processing for unauthenticated requests and safeguard against large payloads and invalid parameters.
Dependent Services
Timeout and Retry Configuration: Configure connection and request timeouts, implement retries with backoff and circuit-breaker, and set up fallback mechanisms for API clients with circuit breakers when connecting to dependent services.
Monitoring and Logging: Monitor and log failures and latency of dependent services and infrastructure components such as load balancers, and trigger alarms when they exceed the defined SLOs.
Scalability of Dependent Service: Verify that dependent services can cope with increased traffic loads during scaling traffic.
Compliance and Privacy
Below are some best practices for ensuring compliance:
Compliance: Ensure all data compliance to local regulations such as California Consumer Privacy Act (CCPA), General Data Protection Regulation (GDPR), Health Insurance Portability and Accountability Act (HIPAA), and other privacy regulations [See NIST SP 800-122].
Privacy: Identify and classify Personal Identifiable Information (PII), and ensure all data access is protected through Identity and Access Management (IAM) and compliance based PII policies [See DHS Guidance].
Privacy by design: Incorporate privacy by design principles into every stage of development to reduce the risk of data breaches.
Audit Logs: Maintain logs for all administrative actions, access to sensitive data and changes to critical configurations for compliance audit trails.
Monitoring: Continuously monitor of compliance requirements to ensure ongoing adherence to regulations.
Data Management
Data Consistency: Evaluate requirements for the data consistency such as strong and eventual consistency. Ensure data is consistently stored across multiple data stores, and implement a reconciliation process to detect any inconsistencies or lag times, logging them for monitoring and alerting purposes.
Schema Compatibility: Ensure data schema changes are both backward and forward compatible by implementing a two-phase release process. First, deploy an intermediate version that can read the new schema format but continues to write in the old format. Once this intermediate version is fully deployed and stable, proceed to roll out the new code that writes data in the new format.
Retention Policies: Establish and verify data retention policies across all datasets.
Unique Data IDs: Ensure data IDs are unique and do not overflow especially when using 32-bit or smaller integers.
Auto-scaling Testing: Test auto-scaling policies triggered by traffic spikes, and confirm proper partitioning/sharding across scaled resources.
Data Cleanup: Clean up stale data, logs and other resources that have expired or are no longer needed.
Divergence Monitoring: Implement automated processes to identify divergence from data consistency or high lag time with data synchronization when working with multiple data stores.
Data Migration Testing: Test data migrations in isolated environments to ensure they can be performed without data loss or corruption.
Backup and Recovery: Test backup and recovery processes to confirm they meet defined Recovery Point Objective (RPO) and Recovery Time Objective (RTO) targets.
Data Masking: Implement data masking in non-production environments to protect sensitive information.
Stale Cache Handling: Handle stale cache data by setting appropriate time-to-live (TTL) values and ensuring cache invalidation is correctly implemented.
Cache Preloading: Pre-load cache before significant traffic spikes so that latency can be minimized.
Cache Validation: Validate the effectiveness of your cache invalidation and clearing methods.
Negative Cache: Implement caching behavior for both positive and negative use cases and monitor the cache hits and misses.
Peak Traffic Testing: Assess service performance under peak traffic conditions without caching.
Bimodal Behavior: Minimize reliance on caching to reduce the complexity of bimodal logic paths.
Disaster Recovery
Backup Validation: Regularly test backup and recovery processes to ensure they meet defined Recovery Point Objective (RPO) and Recovery Time Objective (RTO) targets.
Failover Testing: Test failover procedures for critical services to validate that they can seamlessly switch over to backup systems or regions without service disruption.
Chaos Engineering: Incorporate chaos engineering practices to simulate disaster scenarios and validate the resilience of your systems under failure conditions.
Configuration and Feature-Flags
Configuration Storage: Prefer storing configuration changes in a source code repository and releasing them gradually through a deployment pipeline including tests for verification.
Configuration Validation: Validate configuration changes in a test environment before applying them in production to avoid misconfigurations that could cause outages.
Feature Management: Use a centralized feature flag management system to maintain consistency across environments and easily roll back features if necessary.
Testing Feature Flags: Test every combination of feature flags comprehensively in both test and pre-production environments before the release.
Observability
Observability allows instrumenting systems to collect and analyze logs metrics and trace for monitoring system performance and health. Below are some best practices for monitoring, logging, tracing and alarms [See USE and RED methodologies for Systems Performance]:
Monitoring
System Metrics: Monitor key system metrics such as CPU usage, memory usage, disk I/O, network latency, and throughput across all nodes in your distributed system.
Application Metrics: Track application-specific metrics like request latency, error rates, throughput, and the performance of critical application functions.
Server Faults and Client Errors: Monitor metrics for server-side faults (5XX) and client-side errors (4XX) including those from dependent services.
Service Level Objectives (SLOs): Define and monitor SLOs for latency, availability, and error rates. Use these to trigger alerts if the system’s performance deviates from expected levels.
Health Checks: Implement regular health checks to assess the status of services and underlying infrastructure, including database connections and external dependencies.
Dashboards: Use dashboards to display real-time and historical graphs for throughput, P9X latency, faults/errors, data size, and other service metrics, with the ability to filter by tenant ID.
Logging
Structured Logging: Ensure logs are structured and include essential information such as timestamps, correlation IDs, user IDs, and relevant request/response data.
Log API entry and exits: Log the start and completion of API invocations along with correlation IDs for tracing purpose.
Log Retention: Define and enforce log retention policies to avoid storage overuse and ensure compliance with data regulations.
Log Aggregation: Use log aggregation tools to centralize logs from different services and nodes, making it easier to search and analyze them in real-time.
Log Levels: Properly categorize logs (e.g., DEBUG, INFO, WARN, ERROR) and ensure sensitive information (such as PII) is not logged.
Tracing
Distributed Tracing: Implement distributed tracing to capture end-to-end latency and the flow of requests across multiple services. This helps in identifying bottlenecks and understanding dependencies between services.
Trace Sampling: Use trace sampling to manage the volume of tracing data, capturing detailed traces for a subset of requests to balance observability and performance.
Trace Context Propagation: Ensure that trace context (e.g., trace IDs, span IDs) is propagated across all services, allowing complete trace reconstruction.
Alarms
Threshold-Based Alarms: Set up alarms based on predefined thresholds for key metrics such as CPU/memory/disk/network usage, latency, error rates, throughput, starvation of threads and database connections, etc. Ensure that alarms are actionable and not too sensitive to avoid alert fatigue.
Anomaly Detection: Implement anomaly detection to identify unusual patterns in metrics or logs that might indicate potential issues before they lead to outages.
Metrics Isolation: Keep metrics and alarms from continuous canary tests and dependent services separate from those generated by real traffic.
On-Call Rotation: Ensure that alarms trigger appropriate notifications to on-call personnel, and maintain a rotation schedule to distribute the on-call load among team members.
Runbook Integration: Include runbooks with alarms to provide on-call engineers with guidance on how to investigate and resolve issues.
Rollback and Roll Forward
Rolling back involves redeploying a previous version to undo unwanted changes. Rolling forward involves pushing a new commit with the fix and deploying it. Here are some best practices for rollback and roll forward:
Immutable infrastructure: Implement immutable infrastructure practices so that switching back to a previous instance is simple.
Automated Rollbacks: Ensure rollbacks are automated so that they can be executed quickly and reliably without human intervention.
Rollback Testing: Test rollback changes in a test environment to ensure the code and data can be safely reverted.
Critical bugs: To prevent customer impact, avoid rolling back if the changes involve critical bug fixes or compliance and security-related updates.
Schema changes: If the new code introduced schema changes, confirm that the previous version can still read and update the modified data.
Roll Forward: Use rolling forward when rollback isn’t possible.
Avoid rushing Roll Forwards: Avoid roll forward if other changes have been committed that still being tested.
Testing Roll Forwards: Make sure the new changes including configuration updates are thoroughly tested before the roll forward.
Documentation and Knowledge Sharing
Operational Runbooks: Maintain comprehensive runbooks that document operational procedures, troubleshooting steps, and escalation paths for common issues.
Postmortems: Conduct postmortems after incidents to identify root causes, share lessons learned, and implement corrective actions to prevent recurrence.
Knowledge Base: Build and maintain a knowledge base with documentation on system architecture, deployment processes, testing strategies, and best practices for new team members and ongoing reference.
Training and Drills: Regularly train the team on disaster recovery procedures, runbooks, and incident management. Conduct disaster recovery drills to ensure readiness for actual incidents.
Continuous Improvement
Feedback Loops: Establish feedback loops between development, operations, and security teams to continuously improve deployment processes and system reliability.
Metrics Review: Regularly review metrics, logs, and alarms to identify trends, optimize configurations, and enhance system performance.
Automation: Automate repetitive tasks, such as deployments, monitoring setup, and incident response, to reduce human error and increase efficiency.
Conclusion
Releasing software in distributed systems presents unique challenges due to the complexity and scale of production environments, which cannot be fully replicated in testing. By adhering to the practices outlined in this checklist—such as canary releases, feature flags, comprehensive observability, rigorous scalability testing, and well-prepared rollback mechanisms—you can significantly reduce the risks associated with deploying new code. A strong DevOps culture, where development, operations, and security teams work closely together, ensures continuous improvement and adaptability to new challenges. By following this checklist and fostering a culture of collaboration, you can enhance the stability, security, and scalability of each release for your platform.
I recently read “The Engineering Executive’s Primer“, a comprehensive guide for helping engineering leaders navigate challenges like strategic planning, effective communication, hiring, and more. Here are the key highlights from the book, organized by chapter:
1. Getting the Job
This chapter focuses on securing an executive role and successfully navigating the executive interview process.
Why Pursue an Executive Role?
The author suggests reflecting on this question personally and then reviewing your thoughts with a few peers or mentors to gather feedback.
One of One
While there are general guidelines for searching an executive role, each executive position and the process are unique and singular.
Finding Internal Executive Roles
Finding an executive role internally can be challenging, as companies often look for executives with skill sets that differ from those currently in place and peers may feel slighted for not getting the role.
Finding External Executive Roles
The author advises leveraging your established network to find roles before turning to executive recruiters, as many highly respected executive positions often never make it to recruiting firms or public job postings.
Interview Process
The interview process for executive roles is generally a bit chaotic and the author recommends STAR method to keep answers concise and organized. Other advice includes:
Ask an interviewer for feedback on your presentation before the session.
Ask what other candidates have done that was particularly well received.
Make sure to follow the prompt directly.
Prioritize where you want to spend time in the presentation.
Leave time for questions.
Negotiating the Contract
The aspects of negotiation include:
Equity
Equity acceleration
Severance package
Bonus
Parental leave
Start date
Support
Deciding to Take the Job
The author recommends following steps before finalizing your decision:
Spend enough time with the CEO
Speak to at least one member of the board
Speak with members of the executive team
Speak with finance team to walk through the recent P&L statement
Make sure they answered your questions
Reasons of previous executive departure
2. Your First 90 Days
This chapter emphasizes the importance of prioritizing learning, building trust, and gaining a deep understanding of the organization’s health, technology, processes, and overall operations.
What to Lean First?
The author offers following priorities as a starting place:
How does the business work?
What defines the culture and its values? How recent key decisions were made?
How can you establish healthy relationships with peers and stakeholders?
Is the Engineering team executing effectively on the right work?
Is technical quality high?
Is it a high-morale, inclusive engineering team?
Is the place sustainable for the long haul?
Making the Right System Changes
Senior leaders must understand the systems first and then make durable improvements towards organization goals by making right changes. The author cautions against judging without context and reminiscing about past employers.
You Only Learn When You Reflect
The author recommends learning well through reflection and ask for help using 20-40 rule (spend at least 20-minutes but no more than 40-minutes before asking for help).
Tasks for Your First 90 Days
Learning and building trust
Ask your manager to write their explicit expectations for you
Figure out if something is really wrong and needs immediate attention
Go on a listening tour
Set up recurring 1:1s and skip-level meetings
Share what you’re observing
Attend routine forums
Shadow support tickets
Shadow customer/partner meetings
Find business analytics and learn to query the data
Create an External Support System
The author recommends building a network of support of folks in similar roles, getting an executive coach and creating a space for self-care.
Managing Time and Energy
Understanding organization Health and Process
Document existing organizational processes
Implement at most one or two changes
Plan organizational growth for next year
Set up communication pathways
Pay attention beyond the product engineering roles within your organization
Spot check organizational inclusion
Understanding Hiring
Track funnel metrics and hiring pipelines
Shadow existing interviews, onboarding and closing calls
Decide whether an overhaul is ncessary
Identify three or fewer key missing roles
Offer to close priority candidates
Kick off Engineering brand efforts
Understanding Systems of Execution
Figure out whether what’s happening now is working and scales
Establish internal measures of Engineering velocity
Establish external measures of Engineering velocity
Consider small changes to process and controls
Understanding the Technology
Determine whether the existing technology is effective
Learn how high-impact technical decisions are made
Build a trivial change and deploy it
Do an on-call rotations
Attend incident reviews
Record the technology history
Document the existing technology strategy
3. Writing Your Engineering Strategy
The defines an Engineering strategy document as follows:
The what and why of Engineering’s resource allocation against its priorities
The fundamental rules that Engineering’s team must abide by
The author recommends following risk management process for writing an Engineering strategy:
Commit to writing this yourself!
Focus on writing for the Engineering team’s leadership (executive and IC).
Identify the full set of stakeholders you want to align the strategy with.
From within that full set of stakeholders, identify 3-5 who will provide early rapid feedback.
Write your diagnosis section.
Write your guiding policies.
Now share the combined diagnosis and guiding policies with the full set of stakeholders.
Write the coherent actions.
Identify individuals who most likely will disagree with the strategy.
Share the written strategy with the Engineering organization.
Finalize the strategy, send out an announcement and commit to reviewing the strategy’s impact in two months.
When to Write the Strategy
The author recommends asking three questions to ask before getting started:
Are you confident in your diagnosis or do you trust the wider Engineering organization to inform your diagnosis?
Are you willing and able to enforce the strategy?
Are you confident the strategy will create leverage?
Dealing with Missing Company Strategies
Many organizations have Engineering strategies but they are not written. The author recommends focusing on non-Engineering strategies that are most relevant to Engineering and documenting their strategies yourself. Some of the questions that should be in these draft strategies include:
What are the cash-flow targets?
What is the investment thesis across functions?
What is the business unit structure?
Who are products’ users?
How will other functions evaluate success over the next year?
What are most important competitive threats?
What about the current strategy is not working?
Establishing the Diagnosis
The author offers following advice on writing an effective diagnosis:
Don’t skip writing the diagnosis.
When possible, have 2-3 leaders diagnose independently.
Diagnose with each group of stakeholder skeptics.
Be wary when your diagnosis is particular similar to that of your previous roles.
Structuring Your Guiding Policies
The author recommends starting with following key questions:
What is the organization’s resource allocation against its priorities (And why)?
What are the fundamental rules that all teams must abide by?
How are decisions made within Engineering?
Maintaining Your Guiding Policies’ Altitude
To ensure your strategy is operating at the right altitude, the author recommends asking if each of your guiding policies is applicable, enforced and creates leverage with multiplicative impact.
Selecting Coherent Actions
The author recommends three major categories of coherent actions:
Enforcement
Escalations
Transitions to the new state
4. How to Plan
This chapter discusses the default planning process, phases of planning and exploring frequent failure modes.
The Default Planning Process
Most organizations have yearly, quarterly or mid-year documented planning process where teams manage their own execution against the quarter and have a monthly execution review.
Planning’s Three Discrete Phases
Effective planning process requires doing following actions well:
Set your company’s resource allocation, across functions, as documented in an annual financial plan.
Refresh your Engineering strategy’s resource allocation, with a particular focus on Engineering’s functional portfolio allocation between functional priorities and business priorities.
Partner with your closes cross-functional partners to establish a high-level quarter or half roadmap.
Phase 1: Establishing Your Financial Plan
The financial plan includes three specific documents:
A P&L statement showing revenue and cost, broken own by business line and function.
A budget showing expenses by function, vendors, and headcount.
A headcount plan showing the specific roles in the organization.
The Reasoning behind Engineering’s Role in the Financial Plan
The author recommends segmenting Engineering expenses by business line into three specific buckets:
Headcount expenses within Engineering
Production operating costs
Development costs
Why should Financial Planning be an Annual Process?
Adjusting your financial plan too frequently makes it impossible to grade execution.
Making significant adjustments to your financial plan requires intensive activity.
Like all good constraints, if you make the plan durable, then it will focus teams on executing effectively.
Attributing Costs to Business Units
Attributions get messy as you dig in so author recommends a flexible approach with Finance.
Why can Financial Planning be so Contentious?
The author recommends escalation with CEO if financial planning becomes contentious.
Should Engineering Headcount Growth Limit Company Headcount Growth?
The author recommends constraining overall headcount growth based on their growth rate for Engineering.
Incoming Organizational Structure
Divide your total headcount into teams of eight with a manager and a mission.
Group those teams into clusters of four to six with a focus area.
Continue recursively grouping until you get down to 5-7 groups, which will be your direct reports.
Aligning the Hiring Plan and Recruiting Bandwidth
The author recommends comparing historical recruiting capacity against the current hiring plan.
Phase 2: Determining Your Functional Portfolio Allocation
This phase involves allocating the functional portfolio and deciding how much engineering capacity should be dedicated to stakeholder requests versus internal priorities each month over the next year. The author recommends following approach:
Review full set of Engineering investments, their impact and the potential investment.
Update this list on a real-time basis as work completes.
As the list is updated, revise target steady-state allocation to functional priorities.
Spot fixing the large allocations that are not returning much impact.
Why do we need Functional Portfolio Allocation?
The functional planning is best done by the responsible executive and team but you can do it in partnership with your Engineering leadership. The author recommends adding compliance, security, reliability into the functional planning process.
Keep the Allocation Fairly Steady
The author recommends continuity and narrow changes over continually pursuing an ideal allocation. This approach minimizes disruption and avoids creating zero-sum competition with peers.
Be Mindful of Allocation Granularity
Using larger granularity empowers teams to make changes independently, while more specific allocations to specific teams will require greater coordination.
Don’t Over-index on Early Results
Commit to a fixed investment in projects until they reach at least one inflection point in their impact curve.
Phase 3: Agreeing on the Roadmap
The author highlights key issues that lead to roadmapping failures:
Roadmapping with Disconnected Planners
When roadmap is not aligned with all stakeholders such as Sales and Marketing.
Roadmapping Concrete and Unscoped Work
During planning process, executives may ask for new ideas, but these are often unscoped and unproven. The author suggests establishing an agreed-upon allocation between scoped and unscoped initiatives, and maintaining a continuous allocation for validating projects.
Roadmapping in Too Much Detail
The author references Melissa Perri, who recommends against roadmapping that is focused narrowly on project to-do items rather than on desired outcome.
Timeline for Planning Processes
Annual budget should be prepared at the end of the prior year.
Functional planning should occur on a rolling basis throughout the year.
Quarterly planning should occur in the several weeks proceeding each quarter.
Pitfalls to Avoid
Planning as ticking checkboxes
Planning is a ritual rather than part of doing work.
Planning is focused on format rather than quality.
Planning as inefficient resource allocator
Planning creates a budget, then ignores it.
Planning rewards the least efficient organization.
Planning treats headcount as a universal curve – when focused on rationalizing heacount rather than most important work.
Planning as rewarding shiny projects
Planning is anchored on work the executive team finds most interesting.
Planning only accounts for cross-functional requests.
Planning as diminishing ownership
Planning is narrowly focused on project prioritization rather than necessary outcome.
Planning generates new projects.
5. Creating Useful Organizational Values
This chapter delves into organizational values, exploring how to establish them and assess their effectiveness.
What Problems Do Values Solve?
Values increase cohesion across the new and existing team as the organization grows.
Formalize cultural changes so it persists over time.
Prevent conflict when engineers disagree on existing practices and patterns.
Should Engineering Organization Have Values?
Some values aren’t as relevant outside of Engineering and other values might work well for an entire company.
What Makes a Value Useful?
Reversible: It can be rewritten to have a different or opposite perspective without being nonsensical.
Applicable: It can be used to navigate complex, real scenarios, particularly when making trade-offs.
Honest: It accurately describe real behavior.
How are Engineering Values Distinct from a Technology Strategy?
Some guiding principles from an engineering strategy might resemble engineering values, but guiding principles typically address specific circumstances.
When and How to Roll Out Values
The author advises focusing on honest values and rolling them out gradually by collaborating with stakeholders, testing, and iterating as needed. The author also recommends integrating values into the hiring process, onboarding, promotions and meetings.
Some Values I’ve Found Useful
The author shares some of the values:
Create capacity (rather than capture it).
Default to vendors unless it’s our core competency.
Follow existing patterns unless there’s a need for order of magnitude improvements.
Optimize for the [whole, business unit, team].
Approach conflict with curiosity.
6. Measuring Engineering Organizations
This chapter focuses on measuring Engineering organizations to build software more effectively.
Measuring for Yourself
The author recommends following buckets:
Measure to Plan – track the number of shipped projects by team and their impact.
Measure to Operate – track the number of incidents, downtime, latency, cost of APIs.
Some things are difficult to measure, so only measure those if you will incorporate that data into your decision making.
Some things are easy to measure, so measure those to build trust with your stakeholders.
Whenever possible, only take on one new measurement task at a time.
Antipatterns
Focusing on measurement when the bigger issue is a lack of trust.
Letting perfect be the enemy of good.
Using optimization metrics to judge performance.
Measuring individuals rather than teams.
Worrying too much about measurements being misused.
Deciding alone rather than in community.
Building Confidence in Data
Review the data on a weekly cadence.
Maintain a hypothesis for why the data changes.
Avoid spending too much time alone with the data.
Segmenting data to capture distinct experiences.
Discuss how the objective measurement corresponds with the subjective experience.
7. Participating in Mergers and Acquisitions
This chapter explores the incentives for acquiring another company, developing a shared vision, and the processes involved in engineering evaluation and integration.
Complex Incentives
Mergers and acquisitions often involve miscommunication about the technology being acquired and its integration or replacement within the existing stack. This can lead to misaligned incentives, such as the drive to increase revenue if the integration process is overly complex.
Developing a Shared Perspective
The author recommends following tools to evaluate an acquisition:
Business strategy
Acquisition thesis
Engineering evaluation
Business Strategy
The author recommends asking following questions:
What are your business lines?
What are your revenue and cash-flow expectations for each business line?
How do you expect M&A to fit into these expectations?
Are you pursuing acquihires, product acquisitions or business acquisitions?
What kinds and sizes of M&A would you consider?
Common M&Q strategies include:
Acquring revenue or users for your core business.
Entering new business lines via acquisition.
Driving innovation by acquiring startups in similar spaces.
Reducing competition.
Acquisition Thesis
Acquisition thesis is how a particular fits into your company’s business strategy including product capabilities, intellectual property, revenue, cash flow and other aspects.
Engineering Evaluation
The author recommends following approach:
Create a default template of topics and questions to cover in every acquisition.
For each acquisition, for that template and add specific questions for validation.
For each question or topic, ask the Engineering contact for supporting material.
After reviewing those materials, schedule discussion with the Engineering contact for all yet-to-be-validated assumptions.
Run the follow-up actions.
Sync with the deal team on whether it makes sense to move forward.
Potentially interview a few select members of the company to be acquired.
Recommended Topics for an Engineering Evaluation Template
Product implementation
Intellectual property
Security
Compliance
Integration mismatches
Costs and scalability
Engineering culture
Making an Integration Plan
The author recommends following approach:
Commit to running the acquired stack “as is” for first six months and consolidate technologies wherever possible.
Bring the acquired Engineering team over and combine vertical teams.
Be direct and transparent with any senior leaders about roles where they could step in.
Three important questions to work through are:
How will you integrate the technology?
How will you integrate the teams?
How will you integrate the leadership?
Dissent Now or Forever Hold Your Peace
The author recommends anchoring feedback to the company’s goals rather than Engineering’s.
8. Developing Leadership Styles
This chapter covers leadership styles and how to balance across those styles.
Why Executives Need Several Leadership Styles
The author recommends working with the policy as it empowers the organization to move quickly but you still need to guide operations to handle exceptions.
Leading with Policy
It involves establishing a documented and consistent process for decision-making such as determining promotions. The core mechanics are:
Identify a decision that needs to be made frequently.
Examine how decisions are currently being made and structure your process around the most effective decision-makers.
Document that methodology into a written policy with feedback from the best decision makers.
Roll out the policy.
Commit to revisiting the policy with data after a reasonable period.
Leading from Consensus
It involves gathering the relevant stakeholders to collaboratively identify a unified approach to addressing the problem. The core mechanics include:
It is specially applicable when there are many stakeholders and none of them has the full and relevant context.
Evaluate whether it’s important to make a good decision (one-way vs two-way).
Identify the full set of stakeholders to include the decision.
Write a framing document capturing the perspectives that are needed from other stakeholders.
Identify a leader to decide how group will work together on the decision and deadline for the decision.
Follow that leader’s direction on building consensus.
Leading with Conviction
It involves absorbing all relevant context, carefully considering the trade-offs, and making a clear, decisive choice. The core mechanics include:
Identify an important decision to make a high-quality decision.
Figure out the individuals with the most context and deep dive them to build a mental model of the problem space.
Pull that context into a decision that you write down.
Test the decision widely with folks who have relevant context.
Tentatively make the decision that will go into effect a days in the future.
Finalize the decision after your timeout and move forward to execution.
In order to show how you reach the decision, write down your decision making process.
Development
The author recommends following steps to get comfortable with leadership styles:
Set aside an hour to collect the upcoming problems once a month.
Identify a problem that might require using a style that you don’t use frequently.
Do a thought exercise of solving that scenario using that leadership style.
Review your thoughts exercise with someone.
Think about how scenario can be solved using a style you’re more comfortable with.
If the alternative isn’t much worse and stakes aren’t exceptionally high, then use the style you’re less comfortable with.
9. Managing Your Priorities and Energy
This chapter discusses prioritization, energy management and being flexible.
“Company, Team, Self” Framework
The author suggests using this framework to ensure engineers don’t create overly complex software solely for career progression but also acknowledges that engineers can become demotivated if they’re not properly recognized for addressing urgent issues.
Energy Management is Positive-Sum
Managers may get energy from different activities such as writing software, mentoring, optimizing existing systems, etc. However, energizing work needs to avoid creating problems for other teams.
Eventual Quid Pro Quo
The author cautions against becoming de-energized or disengaged in any particular job and offers “eventual quid pro quo” framework:
Generally, prioritize company and team priorities over my own.
If getting de-energized, prioritize some energizing work.
If the long-term balance between energy and priorities can’t be achieved, work on solving it.
10. Meetings for an Effective Engineering Organization
This chapter digs into the need of meetings and how to run meetings effectively.
Why Have Meetings?
Meetings help distribute context down the reporting hierarchy, communicate culture and surface concerns from the organizations.
Six Essential Meetings
Weekly Engineering Leadership Meeting
This meeting is a working session for your leadership team to accomplish things together. It allows teams to share context with others and support each other with a “first team” (See The Five Dysfunctions of a Team). Authors offers following suggestions:
Include direct reports and key partners.
Maintain a running agenda in a group-editable document.
Meet weekly.
Weekly Tech Spec Review and Incident Review
This meeting is a weekly session for discussing any new technical specs or incidents. The author offers following suggestions:
All reviews should be anchored to a concise, clearly written document.
Reading the written document should be a prerequisite to providing feedback on it (start with 0 minutes to read the document).
Good reviews are anchored to feedback from the audience and discussion between the author and the audience.
Document a simple process for getting your incident writeup or tech spec scheduled.
Measure the impact of these review meetings by monitoring participation.
Find dedicated owner for each meeting.
Monthlies with Engineering Managers and Staff Engineers
The format of this meeting includes:
Ask each member to share something they’re working on or worried about.
Present a development topic like P&L statement.
Q&A
Monthly Engineering Q&A
Have a good tool for taking questions.
Remind folks the day before the meeting.
Highlight individuals doing important work.
What About Other Meetings?
1:1 meetings
Skip-level meetings
Execution meetings
Show-and-tells
Tech talks or Lunch-and-Learns
Engineering all-hands
Scaling Meetings
Scale operational meetings to optimize for right participants.
Scale development meetings to optimize for participant engagements.
Keep the Engineering Q&A as a whole organization affair.
11. Internal Communication
This chapter covers practices to improve quality of internal communication.
Maintain the Drip
The author recommends sending a weekly update to let the team know what you are focused on. You can maintain a document that accumulate weekly documents and then compile them into an email. The weekly update is generally structured as follows:
1-2 sentences that energized me this week.
One sentence summarizing any key reminders for upcoming deadlines.
One paragraph for each important topic that has come up over the course of the week, e.g., product launch, escalation, planning updates.
A bulleted list of brief updates like incident reviews, a tech spec or product design.
Invitation to reach out with questions and concerns.
Test Before Broadcasting
The author recommends proofreading and asking for feedback from individuals before sharing the updates widely.
Build the Packet
The author recommends following structure for important communication:
Summary
Canonical source of information
Where to ask questions
Keep it short
Use Every Channel
Email and chat
Meetings
Meeting minutes
Weekly notes
Decision log
12. Building Personal and Organizational Prestige
This chapter covers building prestige, brand and an audience.
Brand Versus Prestige
A brand is a carefully constructed, ongoing narrative that defines how you’re widely known. Prestige, on the other hand, is the passive recognition that complements your brand. The author suggests the following methods to build prestige:
As an individual – attend a well-respected university, join well-known company.
As a company – problem that is attractive to software engineer.
Manufacturing Prestige with Infrequent, High-Quality Content
The author recommends following approach:
Identify a topic where you have a meaningful perspective.
Pick a format that feels the most comfortable for you.
Create the content!
Develop an explicit distribution plan for sharing your content.
Make it easy for interested parties to discover your writing.
Repeat this process two to three times over the next several years.
Measuring Prestige is a Minefield
Pageviews
Social media followers
Sales
Volume
13. Working with Your CEO, Peers, and Engineering
This chapter discusses topics related to building effective relationships.
Are You Supported, Tolerated, or Resented?
You can check the status of your relationship with other parts of your company:
Supported – when others proactively support your efforts.
Tolerated – when others are indifferent to your work.
Resented – when other view your requests as a distraction.
Navigating the Implicit Power Dynamics
The author recommends listening closely to the CEO, the board and peers but be open to other perspectives who are doing the actual work.
Bridging Narratives
The author suggests taking time to consider a variety of perspectives and adopting a company-first approach before rushing to solve a problem.
Don’t Anchor to Previous Experience
The author advises against simply applying lessons from previous companies. Instead, they recommend first understanding how others solve problems and then asking why they chose that approach.
Fostering an Alignment Habit
The author suggests asking for feedback on what you could have done better or what you might have avoided altogether.
Focusing on Small Number of Changes
In order to retain the support of your team and peers, the author recommends focusing on delivering a small number of changes with meaningful impact.
Having Conflict is Fine, Unresolved Conflict is Not
Conflict isn’t inherently negative but you should avoid unresolved, recurring conflict. The author recommends structured escalation such as:
Agree to resolve the conflict with the counterparty.
Prioritize time with the counterparty to understand each other’s perspective.
Perform clean escalation with a shared document.
Commit to following the direction from whomever both parties escalated to.
14. Gelling Your Engineering Leadership Team
The Five Dysfunctions of a Team introduces the concept of your peers being your “first team” rather than your direct reports. This alignment is difficult and this chapter discusses gelling your leadership into an effective team.
Debugging and Establishing the Team
When starting a new executive role, the author recommends asking following questions:
Are there members of the team who need to move on immediately?
Are there broken relationship pairs within your leadership team.
Does your current organizational structure bring the right leaders into your leadership team?
Operating Your Leadership Team
Operating team effectively requires following:
Define team values
Establish team structure
Find space to interact as individuals
Referee defection from values
Expectations of Team Members
The author recommends set explicit expectations on following for the team members.
Leading their team.
Communicating with peers.
Staying aligned with peers.
Creating their own leadership team.
Learning to navigate you, their executive, effectively.
Competition Amongst Peers
The author lists following three common causes of competition:
A perceived lack of opportunity
The application of poor habits from bureaucratic companies
The failure of a leader to referee their team
15. Building Your Network
This chapter covers building and leveraging your network effectively.
Leveraging Your Network
The author recommends reaching out your network when you can’t solve a problem with your team and peers.
What’s the Cheat Code?
Building your network has no shortcuts; it takes time, and you’ll need to be valuable to others within it.
Building the Network
The author advises being deliberate in expanding your network, with a focus on connecting with those who have the specific expertise you’re seeking.
Working together in a large company in a central tech hub.
Cold outreach with a specific question.
Community building
Writing and speaking
Large communities
What doesn’t work – ambiguous or confusing requests or lack of mutual value.
Other Kinds of Networks
Founders
Venture Capitalists
Executive Recruiters
16. Onboarding Peer Executive
This chapter breaks down onboarding peer executives.
Why This Matters
A high-performing executive ensures their peers excel by providing support, including assistance with onboarding.
Onboarding Executives Versus Onboarding Engineers
When onboarding engineers, you share a common field of software engineering. However, when onboarding executives, they may come from different fields. Your goal should be to help them understand the current processes and the company’s landscape by involving them in a project or addressing critical issues.
Sharing Your Mental Framework
Where can the new executive find real data to inform themselves?
What are the top to three problems they should immediately spend time fixing?
What is your advice to them regarding additional budget and headcount requests?
What are areas in which many companies struggle but are currently going well here?
What is your honest but optimistic read on their new team?
What do they need to spend time with to understand the current state of the company?
What is going to surprise them?
What are the key company processes?
Partnering with an Executive Assistant
When to hire
Leveraging support
Managing time
Drafting communications
Coordinating recurring meetings
Planning off-site sessions
Coordinating all-hands meetings
Define Your Roles
What are your respective roles?
How do you handle public conflict?
What is the escalation process for those times when you disagree?
Trust Comes with Time
Spend some time knowing them as a person
Hold a weekly hour-long 1:1, structured around a shared 1:1 document
Identify the meetings where your organization partner together to resolve prioritization
17. Inspected Trust
This chapter covers how relying on trust heavily can undermine leadership and and using tools instead of relying exclusively on trust.
Limitations of Managing Through Trust
A new hire begins with a reserve of trust, but if they start burning it, their manager might not provide the necessary feedback. A good manager should prioritize accountability over relying too heavily on trust.
Trust Alone isn’t a Management Technique
Trust cannot distinguish between the good and bad variants of work:
Good errors – Good process and decisions, bad outcome
Bad errors – Bad process and decision, bad outcome
Good success – Good process and decision, good outcome
Bad successes – Bad process and decisions, good outcome
Why Inspected Trust is Better
The author recommends inspected trust instead of blind trust.
Inspection Tools
Inspection forums – weekly/monthly metric review forum
Learning spikes
Engaging directly with data
Handling a fundamental intolerance for misalignment
Incorporating Inspection in Your Organization
Don’t expand everywhere all at once; instead focus on 1-2 critical problems.
Figure out your peer executives’ tolerance for inspection forums.
Explain to your Engineering leadership what you are doing?
18. Calibrating Your Standards
This chapter covers standards can cause friction and matching your standards with your organization standards.
The Peril of Misaligned Standards
You may want to hire folks with very high standards but organizations only tolerate a certain degree of those expectations.
Matching Your Organization’s Standards
The author argues that a manager is usually aware of an underperformer’s issues but often fails to address them, which is a mistake. In some companies, certain areas may operate with lower standards due to capacity constraints or tight deadlines.
Escalate Cautiously
When your peers are not meeting your standards, the author recommends leading escalation with constructive energy directed toward a positive outcome.
Role Modeling for Your Peers
The author suggests following playbook to improve an area that you care about:
Model – Identify the area and demonstrate a high-standards approach through role modeling.
Document – Document the approach once it is working.
Share – Send the documented approach to the teams you want to influence.
Adapting Your Standards
The author suggests taking time to determine what matters most to you when your standards exceed those of the organization.
19. How to Run Engineering Processes
This chapter explores patterns for managing processes and how companies evolve through them.
Typical Pattern Progression
The author defines following patterns for running Engineering:
Business Unit Local – Engineering reports into each business unit’s leadership
Patterns Pros and Cons
Early Startup
Pros: Low cost and low overhead
Cons: Quality is low and valuable stuff doesn’t happen
Baseline
Pros: Modest specialization to focus on engineering; Unified systems to inspect across functions
Cons: Outcomes depend on the quality of centralized functions
Specialized Engineering Roles
Pros: Specialized roles introduce efficiency and improvements
Cons: More expensive and freeze a company in a given way of working and specialists incentivized to improve processes instead of eliminating them
Company Embedded Roles
Pros: Engineering can customize its process and approach
Cons: Expensive to operate and quality depends on embedded individuals
Business Unit Local
Pros: Aligns Engineering with business priorities
Cons: Engineering processes and strategies require consensus across many leaders
Early Startup
Pros: Low cost and low overhead
Cons: Quality is low and valuable stuff doesn’t happen
20. Hiring
This chapter covers hiring process, managing headcounts, training and other related topics.
Establish a Hiring Process
The author recommends a hiring process with following components:
Application Tracking System (ATS)
Interview definition and rubric – set of questions for each interview
Interview loop documentation – for every role
Leveling framework – based on interview performance
Hiring role definitions
Job description template
Job description library
Hiring manager and interviewer training
Pursue Effective Rather than Perfect
The author warns against implementing overly burdensome processes that consume significant energy without yielding much impact, such as adding extra interviews in hopes of a clearer signal. Instead, the author recommends setting a high standard for any additions to your hiring process.
Monitoring Hiring Process and Problems
The author offers following mechanisms for monitoring and debugging hiring:
Include Recruiting in your weekly team meeting
Conduct a hiring review meeting
Maintain visibility into hiring approval
Approve out-of-band compensation
Review monthly hiring statistics
Helping Close Key Candidates
An executive can help secure senior candidates by sharing the Engineering team’s story and highlighting why it offers compelling and meaningful work.
Leveling Candidates
The author recommend executives to level candidate before they start the interview process. The approach for leveling decision includes:
A final decision is made by the hiring manager.
Approval is done by the hiring manager’s manager for senior roles.
Determining Compensation Details
The recruiter calculates the offer and shares it into a private channel with the hiring manager.
Offer approvers are added to the channel to okay the decision.
Offers following standard guidelines.
Any escalation occur within the same private chat.
Managing Hiring Prioritization
The author suggests a centralized decision-making process for evaluating prioritization by assigning headcount and recruiters to each sub-organization, allowing them to optimize their priorities.
Training Hiring Managers
The author recommends training hiring managers to avoid problems such unrealistic demands, non-standard compensation, being indecisive, etc.
Hiring Internally and Within Your Network
The author advises distancing yourself from the decision-making process when hiring within your network. Additionally, the author recommends exercising moderation when hiring, whether internally, externally, or within your own network.
Increasing Diversity with Hiring
The author warns against placing the responsibility for diversity solely on Recruiting, emphasizing that Engineering should also be held accountable for diversity efforts.
Should You Introduce a Hiring Committee?
Hiring committees can be valuable, but the author cautions against relying on them as the default solution, as they can create ambiguity about accountability and distance from the team the candidate will join. An alternative approach is to implement a Bar Raiser, similar to Amazon’s hiring process.
21. Engineering Onboarding
The chapter examines key components of effective onboarding, focusing on the roles of the executive sponsor, manager, and buddy in a typical process. It explores how these positions contribute to successfully integrating new employees into an organization.
Onboarding Fundamentals
A structured onboarding process defines specific curriculum based on roles:
Roles
Executive sponsor – select the program orchestrator to operate the program.
Program orchestrator – Develop and maintain the program’s curriculum.
Why Onboarding Programs Fail
The onboarding programs often due to lack of sustained internal engagement or the program becomes stale and bureaucratic.
22. Performance and Compensation
This chapter covers designing, operating and participating in performance and compensation processes.
Conflicting Goals
A typical process at a company tries to balance following stakeholders:
Individuals – they want to get useful feedback so they can grow.
Managers – provide fair and useful feedback to their team.
People team (or HR) – ensure individuals receive valuable feedback.
Executives – decide who to promote based on evaluations.
Performance and Promotions
Feedback Sources
The feedback generally comes from peers and the manager. However, peer feedback can take up a significant amount of time and often is inconsistent.
Titles, Levels, and Leveling Rubrics
The author outlines a typical career progression in software engineering: Entry-level, Software Engineer, Senior Software Engineer, and Staff Software Engineer. They recommend creating concise leveling rubrics that describe expectations for each level, favoring broad job families over narrow ones. These guidelines aim to provide clear career paths while maintaining flexibility across different company structures.
Promotions and Calibration
A common calibration process looks like:
Managers submit their tentative ratings and promotion decisions.
Managers in a sub-organization meet together to discuss tentative decisions.
Managers re-review tentative decisions for the entire organization.
The Engineering executive reviews the final decisions and aligns with other executives.
Compensation
Build compensation bands by looking at aggregated data from compensation benchmarking companies.
Compensation benchmarking is always done against a self-defined peer group.
This chapter covers reading survey results and taking actions on survey data.
Reading Results
The author outlines following approach for reviewing survey data:
Verify your access level: company-wide or Engineering report only. If limited to Engineering, raise the issue at the next executive team meeting to request broader access.
Create a private document to collect your notes on the survey.
Get a sense of the size of your population in the report.
Skim through the entire report and group insights into: things to celebrate, things to address and things to acknowledge.
Focus on highest and lowest absolute ratings.
Focus on ratings that are changing the fastest.
Identify what stands out when you compare across cohorts.
Read every single comment and add relevant comments to your document.
Review findings with a peer.
Taking Action on the Results
The author outlines following standard pattern around taking action:
Identify serious issues, take action immediately.
Use analysis notes to select 2-3 areas you want to invest in.
Edit your notes and new investment areas into a document that can be shared.
Review this document with direct reports.
For the areas to invest, ensure you have verifiable actions to take.
Share the document with your organization.
Follow up on a monthly cadence on progress against your action items
Mention these improvements in the next cultural surveying.
24. Leaving the Job
This chapter covers the decision to leave, negotiating the exit package and transitioning out.
Succession Planning Before a Transition
The planing may look like:
In performance reviews, provide feedback to your direct reports to focus on.
Talk to the CEO about the growth you are seeing in your team.
Every quarter, run an audit of the meetings you attend and delegate each meeting to someone on your team.
Go on a long vacation each year and avoid chiming in on email and chat.
Deciding to Leave
The author recommends asking following questions when executives grapple with intersection of identify and frustration:
Has your rate of learning significantly decreased?
Are you consistently de-energized by your work?
Can you authentically close candidates to join your team?
Would it be more damaging to leave in six months than today?
Am I Changing Jobs Too Often?
If it’s less than three months, just delete it from your resume.
If it’s more than two years, you will be able to find another role as some of your previous roles have been 3+ years.
As long as there’s strong narrative, any duration is long enough.
If a company reaches out to you, there is no tenure penalty.
Telling the CEO
The discussion with CEO should include:
Departure timeline
What you intend to do next
Why you are departing?
Recommended transition plan
Negotiating the Exit Package
You may get better exit package if your exit matches the company’s preference and you have a good relationship with the CEO.
Establish the Communication Plan
A shared description of why you are leaving.
When each party will be informed of your departure.
Drafts of emails and announcements to be made to larger groups.
Transition Out and Actually Leave
A common mistake is to try too hard to help, instead author recommends getting out of the way and supporting your CEO and your team.
I recently read “Become a Great Engineering Leader” (currently in beta version B5.0), which introduces tools, techniques, and secrets for engineering leadership roles. The book is divided into three parts: “The Roles Defined,” “Tools, Techniques, and Time,” and “Strategy, Planning, and Execution.” Here are the key insights from the book, organized by chapter:
1. VP, Director, What?
This chapter introduces first part about the roles defined. It lays out the career tracks where a career track for an individual contributor might looks like:
Software Engineer
Senior Software Engineer
Staff Engineer
Principal Engineer
A similar career track for manager may look like:
Engineering Manager
Senior Engineering Manager
Director of Engineering
VP of Engineering
CTO
Many skills are common to both tracks and both tracks are viable options for individuals. The author cites three levels of warfare for defining responsibilities for above roles:
Strategic
Operational
Tactical
The author defines scope and impact for leadership roles where the scope describes the boundaries of responsibilities and impact describes the effect the person holding the role is having. As an individual progresses through the senior roles, the impact increases that will increase the opportunities for increase of scope.
The author lists several competencies that are required to be successful in a particular role. These include:
Professional experience
Technical knowledge
Mentorship
Conflict resolution
Communication
Influence
2. Your Place in the Org Chart
In this chapter, the author describes how humans have become the dominant species by applying division of labor and collaboration to achieve a shared goals. The author describes org charts to show different teams, divisions and people. The org chart can help clarify who is accountable and responsible for what, relative levels of investment, encourage collaboration and avoid duplication. The author describes best practices to look shape of org chart at the tactical, operational and strategic levels.
Span of control is the number of people that report to a manager. Some of the considerations for determining the span of control includes practical limits, the seniority of manager, the seniority of the reports, and the type of work that the team does.
Tactical: The Engineering Manager – typically has five to ten individual contributors as direct reports.
Senior Engineering Manager – typically has five to ten Engineering Managers as direct reports who are responsible for a larger product or service. In some cases, senior individual contributors also report to them.
Operational: The Director of Engineering – typically has five to ten direct reports and focus around an operational area.
Strategic: The VP of Engineering and CTO – typically has five to ten directors as direct reports who form the implementation of the strategy that the VP defines.
Structural Antipatterns
The author defines a number of structural antipatterns including:
Spans and Modes of Operation: A manager with one or two direct reports is effectively redundant in their role. A manager with a large large becomes effectively a coordinator but a manager with fifteen or more becomes ineffective.
Making Yourself Redundant: Managers with very few reports or low-span managers are redundant. Instead of deep hierarchy, hire an Engineering Manager to run one of the sub-teams and then run the other team by Senior Manager or Director.
Rigidity and Self-Selection: When org charts are not periodically updated in order to match the current investment. Instead, periodically review your org chart to ensure that it is still fit for the priorities.
Flows of Communication and Collaboration
Conway’s Law
It states that “any organization that designs a system (defined broadly) will produce a design whose structure is a copy of the organization’s communication structure.” It can be used to facilitate the right collaboration and communication between teams.
Dunbar’s Number
It is a cognitive limit to the number of people that an individual can maintain stable social relationships with, which is estimated to be around 150. It can be applied to structure teams and types of collaboration and communication between them.
Team Topologies
Matthew Skelton and Manuel Pais in 2019 published team topology model with following four types:
Stream-aligned teams: typically called “product teams”, which are autonomous and cross-functional teams.
Enabling teams: support the stream-aligned teams by owning and developing shared platforms, frameworks, and tools.
Platform teams: enable the stream-aligned teams to work autonomously by reducing the cognitive load.
Complicated subsystem teams: own and develop the most complex parts of the system that require specialist knowledge.
The team topology model defines three modes of interaction: Collaboration, X-as-a-service, Facilitating. The team topologies model can also be fractal. Using the org chart, you can refactor it to define the interactions between teams so that ownership of user experience, critical infrastructure and other areas is clear.
3. Time: Observed, Spent, and Allocated
This is the first chapter for the second part of the book that focus on “Tools, Techniques and Time” and discusses how time and capacity is managed and other tools can be leveraged for better time management.
A Lens of Longtermism
The author asserts that humans can be extremely short-sighted that leads to poor decisions. The Longtermism allows making decisions that reduce major risks in the long-term future.
The author suggests following practices for longtermism:
Ensuring that you organization’s vision and strategy is aligned with the long-term future.
Hiring and developing the right people.
Developing future leaders.
Working on scalability, resilience, and reliability.
Reducing technical debt.
Your Time Is Not Your Own
Senior leaders should spend time wisely based on the organization needs such as reviewing metrics and projects for tracking their progress, connecting and collaborating with peers and reports, strategic work, etc. The author suggests spending about 10% of time on yourself and not overcommit.
Your Capacity: Your Most Important Resource
Before managing time, you need to evaluate your capacity and the author cautions against allocating workload to your full capacity as you will need to handle escalations, meetings and other interruptions.
Managing Your Energy
The capacity is not a constant but it is a function of your energy levels. The capacity depletes when you are spending time on tasks that drain your energy and it replenishes when you work on tasks that energize you.
Input Versus Output: The Tug of War
The inputs may come from emails, meetings and interruptions and outputs are things where you add value. The author recommends keeping balance between those so that you are not in a constant state of reactivity.
Time Management: Models, Tools, and Techniques
In this section, the author goes over a number of different models, tools, and techniques for managing your time effectively.
The Eisenhower Matrix
The Eisenhower Matrix consists of following 4×4 matrix:
Saying No
As your capacity is finite, and you need to ensure that you are spending it on the right things. You will have to explain the reasons for saying now and decide if it can be delegated.
Getting Executive Assistance
The executive assistance may use the Eisenhower Matrix to organize your tasks and help manage your energy.
Deadlines and Cadences: The Greatest Trick You Can Play on Yourself
Due to self-directed and future-facing work, you may fall into the trap of never getting things done. The author recommends artificial boundaries and deadline that exploits Parkinson’s Law. You can use these recurring synthetic deadlines as cadences to set goals that can be shared with the team in a sustainable way.
Using Accountability Partners
An accountability partner is someone that you trust that you can share your goals with. Your accountability partner who can also be a group (mastermind group) becomes part of your cadence.
Your Calendar: Wielding a Double-Edged Sword
This section refers to your calendar as a double-edged sword because it become a tool that others use to control you.
Blocking Time
The author recommends blocking time to ensure that you have the space to work on the things that matter. For example, you can create recurring focus time in your calendar so that others know that you are busy.
Getting the Most out of Focus Blocks
Creating the Right Environment
You can set your status to busy on any applications that support it and disable all unnecessary notifications. You can set a goal in the focus block.
The Pomodoro Technique
The Pomodoro Technique is a time management technique that was developed by Francesco Cirillo. It breaks work into intervals, typically 25 minutes in length.
Things To Focus On
You can plan on things to focus such as making progress on your goals, review the work of others or other longtermist activities. Though, the author recommends against using this time for working with your inbox but you can setup a dedicated time a few times a day to organize your inbox based on the Eisenhower Matrix.
The Power of Nothing
You can also use the focus time to brainstorm ideas, spending time using the product, read design docs or latest research.
Meetings: Crisp, Clear, and with a Purpose
Meetings are essential for certain types of communication and collaboration but they can drain your time and capacity. Some of the tips for controlling meetings include:
To Meet or Not to Meet: That Is the Question
The author offers following venn diagram for meetings:
The author recommends meeting if all three properties are present: high-bandwidth communication, the need to build trust and rapport, and the need for everyone to be present at the same time. The speed of a decision should not be limited by the availability of the person with the busiest calendar.
Clear Agendas, Clear Outcomes, Clear Actions
A meeting agenda should be written before the event and shared with all attendees. The agenda should include purpose and talking points including ideal outcome.
Calendar Stagnation: Blowing It All Up
The author suggests resetting calendar at various points of the year and delete recurring meetings to make sure everyone is using their time wisely.
Syncs, Status Updates, and Other Ways to Die
The author offers alternatives to various types of meetings such as:
Chat updates instead of standups.
Weekly updates that is shared asynchronously instead of weekly group syncs.
Enforce strict agenda for staff meetings that focus on critical issues the team is facing.
Instead of unfacilitated brainstoring, consider getting participants to sketch ideas beforehand and share them asynchronously.
Auditing Your Time
In High Output Management, Andy Grove categorizes the activities of a senior manager into four buckets:
Information gathering
Decision-making
Nudging
Being a role model
4. The Games We Play and How to Win Them
This chapter focuses on fundamentals of managing senior people and other techniques for achieving goals.
Management 101: The Fundamentals
Coaching Versus Directing
Instead of directing managers and senior individual contributors, you will be coaching them. The author recommends GROW model that stands for:
What is Goal?
What is current Reality or situation?
What are Obstacles?
What are Options available?
Way-forward for next steps, decisions and actions.
This model is similar coaching and can be used for directive coaching or following interests where you listen to them on what they should do.
Delegation
The essential principle of delegation is to assign the responsibility of a task to others while still retaining accountability for its completion and ensuring it meets the expected high standards. The key to effective delegation is to clearly define where you stand on the accountability scale, and to specify who is accountable and who is responsible for the task.
1:1s 101
1:1s is the backbone of your relationship with your direct reports and you should treat 1:1s with the utmost priority.
Contracting
The author suggests an exercise called contracting for effective 1:1s that asks questions such as:
What are the areas that you would like support with?
How would you like to receive feedback and support from me?
What could be a challenge of us working together?
How might we know if the support I’m offering isn’t going well?
How confidential is the content of our meetings?
Focus and Format
The author recommends a clear focus and format for 1:1s by having a shared agenda, being mindful of time, using time to coach, summarizing and agreeing to next steps.
Brag Docs: The Greatest Gift You’ll Ever Receive
The brag docs track of what your direct reports are doing by maintaining a shared document that regularly updates their achievements, challenges, and goals. The author suggests structure for a bag doc such as choosing a period of time, broad goals, link achievements to wider goals, and review it regularly.
It’s All Just Leadership After All
The author recommends using same strategy for managing senior managers and senior individual contributors.
Control at the Intersection
The author recommends delegation model to manage senior staff that report to you, regardless of their role. Senior individual contributors demonstrate leadership by leading technical initiatives such as leading a project or a technical area.
From the Swamp to Infinity: Achieving Together
The author recommends building relationship with your staff that leads working together towards the same goal.
The Swamp
Senior managers often face a constant influx of tasks, resulting in a reactionary and disorganized situation that the author refers to as “the swamp.” The author suggests a mental model to make sense of the issues as managers wade through the muddy water.
Finite games: These are games with a clear beginning and end. They follow a set of agreed-upon rules, and the objective is to win. Each game has an entry criteria or the problem to solve, rules or constraints, and exit criteria or the success. As a manager, you need to minimize number of active finite games to prevent context-switching and reducing entropy in the organization.
Infinite games: These games have no defined start or finish. Players come and go, the rules constantly change, and the goal is to continue playing. Finite games can be played within infinite games, e.g., product roadmap may require finite games from engineering, sales, marketing and other organizations. Infinite games require maintaining stability to keep players happy, motivated, growing, learning, and, most importantly, preventing burnout.
5. Become a Great Engineering Leader
This chapter classifies the type of work for individual contributors so that senior managers benefit from a close relationship with individual contributors.
Individual Contributors: The Higher Rungs
As Senior Engineers advance in their careers, they can choose between the managerial track to become a manager or the technical track to become a Staff or Principal Engineer.
The Tech Lead who closely works with a single team.
The Architect who is responsible for ongoing design, scalability and quality of the system.
The Solver who solves complex issues.
The Right-Hand who partners with a senior manager to increase their bandwidth.
Deploying Senior Individual Contributors
The scope of Engineering Manager typically a single team and Tech Lead archetype fits for this role.
The scope of Senior Engineering Manager is broader with multiple teams and it can deploy multiple archetypes such as the Tech Lead, the Solver and the Architect.
At the Director and VP level, the Right-Hand archetype becomes a viable option typically Staff/Principal Engineer when reporting to the Directory and Distinguished Engineer when reporting to the VP.
The Technical Shadow Organization
The group of senior individual contributors forms a kind of technical shadow organization that influences and guides the work being done.
Your Technical Council
The Technical Council is a group of senior individual contributors who meet regularly to discuss and guide the organization’s technical direction. The Technical Council can be utilized to discuss and make decisions on various topics, including the technical roadmap, technical standards, technical debt, deep dives, and reviews.
Building Connections Across the Organization
The author encourages the Technical Council to establish connections across the organization to prevent knowledge silos and better serve the broader organization.
6. The Tragedy of the Common Leader
In this chapter, the author demonstrates how middle managers can combat entropy when they are continually reacting and receiving without reciprocation from others.
But We Didn’t Want This to Become a Dumpster Fire
The author introduces the tragedy of the commons, where individuals acting in their own self-interest deplete a shared resource, leading to complex shared codebases or infrastructure that no one wants to take ownership of. The tragedy of the commons opposes longtermism, the principle of selflessly investing in a shared future, even if it requires sacrificing in the present.
Up and Down but Not Sideways
The middle managers reporting to the common leader often look up and down the org chart but not sideways. Protecting your team while competing for the manager’s time, focus, and favor can create a hostile and competitive environment.
Magnetism and Polarity: Pulling Peers Together
The author suggests strengthening relationships with peers to achieve collective goals. By connecting with peers, both you and your peers can gain valuable benefits from the relationship.
Attraction, Repulsion, and the Middle Ground
The author introduces a concept of polarity similar to magnets, where positive polarity creates value for other teams by attracting, negative polarity creates conflict by repelling, and neutral polarity creates neither value nor conflict for other teams.
Polarity-Led Relationships
The author defines following relationship traits based on polarity:
Positive: Your team enables or collaborates with the other team. You can share knowledge and focus on ways to improve collaboration.
Negative: You team has difficulty collaborating with the other team or your team’s direction collides with the other team strategically. You can build trust and empathy with the other team to improve the collaboration.
Neutral: You team rarely interact with the other team. You can build trust and rapport with the other team.
Actually, It’s All on You: Do It Yourself
The author recommends proactively establishing connections with your peer group and continually nurturing them to demonstrate that you are a trusted partner and collaborator, helping to fight entropy of competing with manager’s time. To combat the tragedy of the commons, the author reiterates lessons from longtermism and infinite games, advocating for a positive-sum game instead of a zero-sum game.
Your Manager Is Not Your Single Point of Contact
In some organizations a set of peers only communicate with each other through their manager who becomes a bottleneck. This is an antipattern that encourages a lack of transparency, politics and snide behavior. Instead, the author recommends fostering open communication among peer groups through a chat channel, regular meetings, and seeking discussions proactively.
The Best Way to Build Trust: Deliver Something Awesome
Some peer groups may be quick to spot and escalate problems but rarely take action to fix them. The author recommends dedicating 10 percent of your capacity to initiatives that improve the organization such as codifying best practices, and unifying reporting on health of the code and production environment.
7. Of Clownfish and Anemone
This chapter focuses on developing a productive, symbiotic relationship with your manager.
Teenage Rebellion: Raging Against the Machine
In a senior leadership role, you are expected to be self-sufficient and an expert in your domain, with a unique leadership style or perspective on the organization. This can sometimes lead to friction with your manager and disappointment when they don’t meet your standards.
The Reporting to Peter Principle
The Peter Principle states that “in a hierarchy every employee tends to rise to their level of incompetence.” The author introduces the Reporting to Peter principle, which suggests that in every organization, you will eventually reach a point where you experience significant internal conflict with how your manager performs their job. The author recommends embracing these differences, viewing them as strengths, and using them as opportunities to learn from each other and develop a symbiotic relationship.
Prescriptions Don’t Work: Tools Do
The author advises against relying on prescriptive advice. Instead, they suggest observing and understanding both your own strengths and weaknesses, as well as those of your manager, and using this insight to build a mutually beneficial relationship.
Symbiosis: Defined, Observed, and Applied
The author recommends recognizing additive and subtractive actions and cultivating symbiotic relationships with your manager that benefit both parties.
Skip to the End: Defining the Relationship
The author distinguishes between additive and subtractive actions in relationships:
Additive actions: These explicitly benefit your relationships and can be undertaken by both parties.
Subtractive actions: These can cause friction in your relationship and should be transformed into additive actions.
To build a mutually beneficial virtuous cycle, the author recommends transforming subtractive actions into additive ones. For example, if regular one-on-one meetings are frequently cancelled at the last minute (a subtractive action), this can be transformed into an additive action by implementing weekly written status updates.
How Do You Actually Want to Be Managed?
As a high-growth individual, you may desire more autonomy than your manager is comfortable giving, or, particularly at senior levels, you might want more frequent check-ins than your manager provides. The key to resolving this misalignment is self-awareness: understand your preferred working style, clearly communicate your expectations to your manager, and work together to find a mutually satisfactory arrangement.
When the Stuff Hits the Fan
This section addresses how to handle adverse situations, including escalations, intense scrutiny (the “eye of Sauron”), and unexpected negative events.
Escalations
Well-managed escalations can be highly productive, fostering trust among you, your manager, and other involved parties, while leading to improved outcomes for the entire organization. The author provides following recipe for dealing with escalations:
Identify the problem.
Have all parties involved in the escalation agree to it being escalated.
Collaborate with all involved parties to identify the problem, explore potential solutions, and evaluate the trade-offs of each option.
Make a recommendation.
Escalate!
Don’t take it personally.
The Eye of Sauron
The Eye of Sauron refers to situations involving external events or intense internal scrutiny, often triggered by a major incident, a sudden increase in oversight, or a change in direction from an executive. The author offers following recipe for handling the Eye of Sauron:
Remain calm.
Listen to all inputs.
Come up with a communication plan.
Coach others to see these situations as a learning opportunity.
Retrospect after the situation is over.
Unpleasant Surprises
Unpleasant surprises are situations that catch both you and your manager off guard. The author offers following recipe for handling unpleasant surprises:
Assess and confirm the situation.
Come up with a clear plan.
Execute on the plan.
Retrospect after the situation is over.
8. Trifectas, Multifectas, and Allies
This chapter explores trifectas (three people from different disciplines collaborating), multifectas (teams with more than three disciplines), and allies (supportive individuals from other disciplines).
Omne Trium Perfectum
The author asserts that the number three frequently appears, as in the iron triangle where decisions has three options: scope, resources, and time, allowing for only two out of the three. Having three variables creates the ideal amount of tension for decision-making.
Trifectas: Your Own Perfect Triplet
A trifecta is a team of three individuals from different disciplines collaborating to achieve a goal, typically involving engineering, product, and UX. Different parts of the department may have varied trifecta members. For instance, a platform team might include engineering, product, and developer relations instead. The author outlines the following responsibilities for a team’s trifecta:
Ensure strategic alignment.
Define the team’s roadmap.
Make decisions.
Drive up the execution of their individual crafts.
Resolve escalations and blockers.
Communicate with stakeholders.
Trifectas Should Go All the Way Up
Many organizations structure their reporting lines by discipline, causing trifectas to disappear and resulting in dysfunctional behaviors like lack of visibility, accountability, and clear escalation paths. The author recommends maintaining a trifecta organizational structure independent of reporting lines to ensure clear accountability, quick resolution of escalations, and alignment with the roadmap and project approvals.
Setting the Stage for Your Trifecta
The author offers following tips for a healthy trifecta relationship:
Start a private chat channel.
Consider a regular meeting.
Consider office hours or regular syncs with front-line trifectas.
Develop a process for project approvals.
Develop a process for reporting on progress.
Extending to Multifectas
Bringing a new feature to market requires more than just a trifecta; it involves additional stakeholders such as marketing, sales, support, developer relations, legal, and security. These groups form a multifecta that can be organized for sustained collaboration.
Snow Melts at the Periphery
In High Output Management, Andy Grove wrote that “the snow melts at the periphery first.” The author recommends a concerted effort to be connected to outside world where you allies come in. When identifying your allies, author recommends forming a symbiotic relationship by sharing useful information, engaging with customers, resolving issues, and providing coaching.
9. Communication at Scale
This chapter focuses on large-scale communication, communication patterns, and building a communication architecture.
Standing on the Shoulders of Scribbles
In this section, the author emphasizes the role of communication in enabling organizational progress and learning.
Patterns of Communication
The author defines following patterns of communication:
Synchronous versus asynchronous
Stateless versus stateful
One-to-one, one-to-many, many-to-many
The Spectrum of Synchronousness
As you advance in seniority and your organization grows, efficient synchronous communication becomes more challenging so you have rely on asynchronous communication.
Artifacts: One-to-One, One-to-Many, Many-to-Many
When designing data pipelines, you must consider the relationships between data sources, sinks, and the transformations in between. The author recommends similar scrutiny for senior leaders for the design of communication so that communication artifacts (documents, emails, meeting notes) support organizational learning and progress. Moving these ideas from transient, informal thoughts to formal, documented communication ensures they contribute to lasting organizational success.
Optimizing for Decision Speed
Creating shareable and permanent artifacts is a great start, but the ultimate goal is to facilitate decision-making. As a leader, you should focus on optimizing decision speed without compromising decision quality and distinguish between:
One-way doors: Irreversible decisions, like making breaking changes to an API or firing an employee require careful consideration and often higher-level approval.
Two-way doors: Reversible decisions, like choosing a temporary UI component that can be made quickly and adjusted later if needed.
The author describes following protocol when making decisions:
Identify the type of decision (one-way or two-way).
Make two-way door decisions as close to the front line as possible and empowering teams to decide autonomously.
Escalate one-way door decisions to the appropriate level to ensure critical decisions have top-level buy-in.
Following this protocol allows 90% of decisions to be made quickly and safely, while the remaining 10% receive the necessary scrutiny, balancing speed and careful consideration.
Parkinson’s Law: It’s Real, So Use It
Parkinson’s Law states that “work expands so as to fill the time available for its completion.” Without deadlines, projects often take longer and suffer from feature creep and scope bloat. The author recommends setting challenging deadlines to achieve better results by managing the Iron Triangle of scope, resources, and time. Additionally, implementing a weekly reporting cadence helps maintain discipline and energy.
Leadership Is Writing
Much of leadership involves writing and as you advance in seniority, you will spend an increasing amount of time reading and writing.
The Paper Triangle
Writing is the most efficient way to communicate complex ideas to other people.
Writing is the most efficient way to communicate complex ideas, as reading is faster than listening. Writing is also the process of thinking itself and aids in organizing and structuring thoughts. The author recommends following steps to communicate effectively:
Write to think: Jot down thoughts without worrying about clarity.
Interrogate your thoughts: Review and question your initial writing to identify gaps.
Edit to read: Refine the text for clarity and conciseness for others.
This process, akin to the Iron Triangle of scope, resources, and time, ensures clear communication and aids in organizational progress.
What Is Your Recommendation?
The author recommends guiding conversations with clear recommendations rather than strong opinion, loosely held when making decisions. When reviewing documents or discussing problems, always start with a recommendation so that it fosters a culture where every communication aims to move the organization forward.
Building Your Second Brain
As writing helps organizing thoughts, the author recommends creating personal artifacts besides creating artifacts for others. At higher organizational levels, dealing with vast information is routine and the concept of a “second brain” can be beneficial in managing information. A second brain is an interconnected system to capture, process, and recall information. Popular tools include Roam Research, Notion, Obsidian, and Logseq for creating and linking notes, forming a knowledge graph. The author offers following recipe for starting with a second brain:
Create a Daily Note.
Link Important Concepts.
Use Proactively as a Reference.
Regularly Review Your Knowledge Graph.
The Grand Commit Log of History
The organization’s state can be viewed as a function of past ideas, decisions, and actions, forming a “commit log of history.” This section looks at the communication architecture framework based on tactical, operational and strategic level.
The Tactical Level
At the tactical level (frontline teams), key elements include:
Codebase artifacts include:
Good commit messages
Architecture Decision Records (ADRs)
Documentation
Projects: Each team should have:
A project container such as Github or JIRA project.
Statuses for their projects.
Design documents
Regular updates
Communication: Each team should have:
A private team chat
A public team chat
An announcement mechanism
Metrics: Each team should have:
Key Performance Indicators (KPIs)
Operational health metrics
Logs of incidents and post-mortems
Meetings: a variety of meetings that they attend
At the operational level
At the operational level (director level), key elements include:
Communication: Each operational grouping should have:
An optional private department chat
A public department chat
Discipline-specific private chats such as engineering managers or product mangers
An internal announcement mechanism
An external announcement mechanism
Projects: Each operational grouping should have:
Rollup dashboards
Clearly visible statuses
Approval information
Metrics: Each operational grouping should have:
Department KPIs
Operational health metrics
Rollup of incidents and post-mortems
Meetings: Each operational grouping should have:
A regular all-hands
Office hours
Project syncs
At the strategic level:
At the strategic level (executive level), key elements include:
Communication:
Ownership of the system of truth, deciding what tools are used.
The vision
The mission
Discipline leadership chats
Projects:
High-level dashboards
Flags for projects that are at risk
Metrics:
Company or Department-wide KPIs
Budgets and forecasts
Rollup of high-critical issues
Meetings:
Town halls
Regular business reviews
Project syncs
Board or investor interactions
10. Performance Management: Raising the Bar
This chapter examines the overarching concepts of performance management and explores the calibration process to ensure fairness and consistency in evaluations.
The Rising Tide: Why We’re Doing This
The goal of performance management is to improve everyone in the organization and keep raising the bar. Key elements of a good performance management system includes:
A well-defined set of competencies that outlines expectations for all employees.
A regular performance review process.
A calibration process.
A PIP process.
A compensation process
Performance Management of Senior Staff
In High Output Management, Andy Grove describes the output of a manager as being the output of their organization plus the output of the neighboring organizations under their influence. This output can be measured by:
Self-assessment: Subjective, Qualitative (self-awareness about their impact), Quantitative.
360 feedback: Negative, Neutral, Positive.
Metrics or KPIs: Defined, Progressed for the period, Achieved or Exceeded.
Your own observations: Negative, Neutral, Positive.
The author recommends starting a brag doc, mentoring, and writing a monthly detailed update for their area.
Calibrations: Converging on Fairness
Calibration is typically run by HR and ensures that performance management is fair and consistent across the entire organization. It can be broken into three phases:
Preparation: Generates all of the supporting evidence for each person.
Calibration: Reviews the aggregate performance of staff in the organization.
Actions: Such as follow-ups with managers.
Debugging Common Performance Management Issues
Your Lowest Performer Is the Performance Bar You Accept
Current Performance Is Not Historical Performance
Brilliant Jerks Are Not Worth It
Keeping job title inflation under control is extremely important
Being Held Hostage
Gather Data When You Disagree With One of Your Managers
11. Strategy 101
This is first chapter for third part of the book that focuses on strategy, planning and execution. It defines a strategy and focus on engineering strategies.
What on Earth Is a Strategy, Anyway?
A strategy encompasses the initiatives an organization undertakes to create value for itself and its stakeholders while gaining a competitive market advantage. It defines the specific approaches the organization will employ to position itself so that it can achieve both short-term and long-term objectives.
A Strategy Is Not a Plan
Professor Roger Martin defines strategy as “an integrative set of choices that positions you on a preferred playing field in a way that enables you to win.” Martin notes that leaders often default to planning instead of strategizing because it’s easier. This tendency stems from two factors:
Strategy focuses on outcome such as acquiring and satisfying customers, who are external to the organization.
Planning deals with internal resources and costs, which are controllable, and where the organization itself is the customer.
Engineering Strategy: Your Piece of the Puzzle
The engineering strategy is a vital subset of the overall company strategy but companies often lack a well-documented and communicated engineering strategy. As an engineering leader, you navigate two distinct worlds: the nontechnical senior executives who struggle to understand engineering complexities and the engineers who seek clarity on how their work aligns with the company’s goals. Balancing these needs is challenging, but a well-crafted strategy will address both groups effectively.
Let’s Build an Engineering Strategy Together
The author breaks down strategy into four parts:
Initiatives – What are we hoping to achieve and why?
Success metrics
Investments in teams and technology
Processes and ways of working
12. Company Cycles
This chapter looks at the calendar and how the year is broken up into cycles that serve as the rhythm of the business.
The Calendar Is Dead, Long Live the Calendar
Regardless of the estimation framework used by engineering, it must ultimately translate into concrete commitments that the entire organization can use for accountability.
Different Departments, Different Cycles
Typically, departments divide the year into four quarters (Q1..Q4). As a senior leader, you need to align your efforts effectively with the broader business cycles. You need to balance continuous delivery with the ability to support major launches or unveilings. Effective communication with the rest of the business is key to translate your team’s work into terms that make sense to other departments. The author recommends increasing the awareness of financial cycles so that you can understand and justify your spending.
Sales: Can’t Live With Them, Can’t Live Without Them
In order to support the sales team, a senior leader must generate certainty about future developments, provide support to the sales team and handle urgent customer demands.
Removing Uncertainty: The Tip of the Iceberg
The engineering leadership as being about managing and reducing uncertainty as building large scale software often involves complex tasks that others may not be visible like building an infrastructure. In order to shift your team’s focus from deadlines to reducing uncertainty, you must prototype, design, code and ship incrementally. You must prioritize tackling the most uncertain aspects first to either validate their feasibility or explore alternative solutions. The author recommends incorporating following:
Defining success metrics and key performance indicators upfront.
Prototyping to validate ideas quickly and efficiently.
Creating technical design documents to refine approaches before coding begins.
Structuring a Roadmap Based on Uncertainty
As uncertainty in a project decreases over time, you can structure your roadmap to reflect this progression. In business cycles, you can:
Be certain about the next month
Be fairly certain about the next quarter
Be less certain about the next half-year
Be even less certain about the next yea
Your roadmap should include:
Feature
Stage such as Rollout, Build, Prototype, Design
Expected delivery date or quarter
Initiative with links to relevant strategy documents
Owner
Latest update
Latest demo
Dependencies
Marketing: Big Bangs Without the Bang
The author recommends following to ensure alignment between marketing and engineering:
Clear Roadmap
Feature Flags
Feature flags offer several benefits:
Continuous Delivery
Early Testing
Simplified Testing
Easy Rollbacks
Internal Visibility
A/B Testing
Beta Programs
Early Access
Two Worlds Collide: Troubleshooting and Solutions
Misselling: The Tail Wagging the Dog
One of the most common frustrations arises when salespeople sell products or features that don’t yet exist. To address this, the author offers the following advice:
Understand how this happens in the first place.
Build better connections at the periphery and at the top of sales.
Set aside resource allocation for these surprises.
Make it clear what suffers as a result of reprioritization.
No Feature, No Deal
The ideal roadmap focuses on features that enhance the product for a broad audience, saying “no” more often than “yes.” The author cautions against building niche features for a few customers, as this can dilute your product’s vision, clutter your roadmap, and create long-term maintenance challenges. Adding too many specialized features can lead to a “death by a thousand papercuts,” where minor adjustments accumulate into significant complications over time.
Full-On Feature Factory Grind
The engineering department may feel like a “feature factory,” constantly producing new features without addressing technical debt, resiliency, scalability, or developer efficiency. The author recommends allocating engineering resources wisely for long-term stability and performance. Here are some strategies:
Educate the Business that speed and stability are features
Allocate Time for Engineering-Led Work
Highlight the Cost of Neglect
Celebrate Engineering Wins
Remember, They’re Smart Too
The author offers the following advice if there’s a pervasive culture where engineers believe they are smarter than the rest of the business:
Be clear that this is unacceptable.
Help your teams understand that transparency buys them more time to do engineering work.
Be clear that the rest of the business is incredibly smart too.
13. Money Makes the World Go Round
This chapter covers the basics of company finance and managing a large budget.
Finance 101: The Basics of Company Finance
A company operates like a flywheel, where money (input) is converted into products and services (output) that generate more money than the cost to produce them. This process creates a self-sustaining cycle that drives growth. Each department functions as a subsystem, with the executive and finance teams allocating resources to maximize output. Expenditures fall into two categories: capital expenditure (capex) and operating expenditure (opex). In order to accelerate the company’s growth, the gap between revenue (top line) and profit (bottom line) should be maximized.
Modes of Operation: Bootstrapping, Venture Capital, and More
Startups have different ways to fund their growth such as:
Bootstrapping
Venture Capital
Angel Investment
Debt Financing
The funding method influences how a company operates and allocates resources.
Cost Centers and Profit Centers
A cost center is a department that incurs expenses but doesn’t directly generate revenue, like HR. A profit center generates revenue, such as the sales department. Engineering can be either a cost or profit center, depending on the company and even specific teams within it.
SaaS Jargon Busting: Acronym Soup
Author introduces key metrics for SaaS startups such as:
MRR (Monthly Recurring Revenue)
ARR (Annual Recurring Revenue)
LTV (Lifetime Value)
CAC (Customer Acquisition Cost)
LTV:CAC Ratio – profitability from customer acquisition (ratio of 3:1 or higher is considered strong)
Churn Rate
Do You Need to Make a Profit?
Many fast-growing, venture capital-backed technology companies operate at a loss, prioritizing rapid market capture over immediate profitability. This rapid growth strategy can lead to substantial returns for investors when the company eventually goes public or is acquired.
Managing a Large Budget: Levers and Dials
The author defines following kinds of costs for engineering departments:
People – largest cost where you have to solve a multivariate optimization problem around allocation with following criteria:
Alignment with strategy
Alignment with increasing the power curve of capabilities
Alignment with the mode of operation
Infrastructure – next largest cost
Opex infrastructure
Capex infrastructure
Software and Hardware
Essential
Productivity gains
Temporary services (contractors) – Opex
Rule of Thumb
A useful rule of thumb for people is to track the revenue per employee.
Software and Hardware Spend as a Percentage of Revenue.
Temporary services – Estimate the cost of not using them.
Common Dilemmas: Patterns to Follow
Build Versus Buy
The trade-offs include:
You can build it to your exact specifications but it will take time and effort to build.
Up and running quickly but it costs money.
Dealing with Vendors: Never Trust the Book Price
Always negotiate
Consider contract length – the longer the contract, the better the deal
Consider volume – the more you buy, the better the deal
Consider competition
Top Line Versus Bottom Line: The Eternal Struggle
Budget management involves balancing top-line growth with bottom-line costs. Key metrics to track:
Revenue per employee (should increase over time)
Infrastructure spend as % of revenue (should decrease over time)
Software and hardware spend as % of revenue (should decrease over time)
Cost of distraction from top-line focus (minimize based on company phase)
14. Boom and Bust
This chapter covers the phenomenon of boom and bust cycles and categorizes the operations of a company along a scale.
Spend! Invest! Grow! Crash! Burn! Rebuild!
Technology companies thrive on innovation, which is inherently risky. Rapid growth is crucial for long-term success, fueled by investment capital and driven by network effects. This leads to two outcomes: success (continued growth, acquisition, or going public) or failure (downsizing or closure). These outcomes contribute to the industry’s boom-bust cycles, characterized by periods of rapid expansion and hiring alternating with widespread layoffs and company closures.
ZIRP, QE, and the Tech Industry
The author discusses key macroeconomic factors influencing tech industry boom and bust cycles:
Quantitative easing (QE)
Low interest rates (ZIRP – Zero Interest Rate Policy)
Low inflation
Peacetime and Wartime: A Spectrum
In The Hard Thing About Hard Things, Ben Horowitz introduces the concepts of peacetime (boom periods) and wartime CEOs (survival). Understanding where a company stands on this spectrum helps leaders adopt the appropriate strategy to guide their organization effectively.
Concentric Circles of Trust
The author introduces a model of concentric circles of trust:
Confidential – most sensitive information (NDA)
Sensitive
Open
Leading Through Peacetime: Invest, Spend, Grow
In peacetime, growth is the agenda, which is governed by following activities:
Hiring, Onboarding, and Ramping Up – onboarding and contribution curve.
Incubating New Products – ensure that there are clear tripwires for success and failure.
Mergers and Acquisitions (M&A) – technical due diligence, talent assessment, organizational fit
Leading Through Wartime: Cut, Save, Rebuild
In wartime, your company is focused primarily on survival.
Reforecasting, Restrategizing, and Reorganizing
Understand drivers such as revenue targets, funding, costs, product-market fit
Enumerate options – hiring, auditing software and services, negotiating with vendors, layoffs
Layoffs: The Worst Part Comes First
Become a Great Engineering Leader
Maximizes the chances of the department and company surviving
Retains the best talent
Complies with labor laws
A Line in the Sand – all your efforts within the inner circles of trust are brought out into the open
15. Tarzan Swings from Vine to Vine
This chapter offers guidelines for steering your career using Tarzan method.
The Fallacy of the Straight Line
Focus on what you can control, and let go of what you can’t.
The Tarzan Method
The direct path to a lofty career goal, like becoming the CTO might not exist or be clear. Instead, think of your career like Tarzan swinging through the jungle—moving from one opportunity to the next, guided by instincts and a general sense of direction.
The Trajectory of Your Swing
The author reiterates the concept of scope and impact:
Scope refers to the breadth of responsibility, such as team size, budget, and influence.
Impact refers to the depth of responsibility, such as the results of your work and the effectiveness of decisions.
Career growth can be visualized in a quadrant where:
Stagnating (low scope, low impact) means being in an unchallenging role with little satisfaction
Stepping Up (high scope, low impact) involves taking on more responsibility
Skyrocketing (high scope, high impact) is the ideal state, often in a fast-growing startup
Skilling Up (low scope, high impact) follows a period of stepping up, focusing on improving skills
Earn, Learn, or Quit
Y Combinator CEO Garry Tan suggests that “at every job, you should either learn or earn.” To progress in your career, it’s essential to consider how much you want to earn, what you want to learn, and how you can expand your scope and impact.
Putting It All Together
Writing Your Strategy
The author recommends answering the following questions:
What kind of role might you see yourself in if you could achieve everything you wanted?
What kind of environment do you want to work in?
What sort of products or services is the company creating?
What kind of people do you want to work with?
What kind of impact do you want to have?
What does all of the above mean for other aspects of your life?
The Next Vine Swing
The author recommends considering the following:
Where are you right now in the quadrant?
How long have you been in this quadrant?
Is there a route to the top-right quadrant from where you are right now?
At this moment, are you learning, earning, or both?
What sort of opportunity would tempt you if it arrived tomorrow?
I recently read Leading Effective Engineering Teams by Addy Osmani, which shares the author’s experiences at Google and presents best practices for achieving engineering excellence. Here are the key takeaways from the book, organized by chapter:
1. What Makes a Software Engineering Team Effective?
In this chapter, author introduces Project Aristotle that studied nearly 200 Google teams over two years to identify the factors for building effective teams. The researchers studied following factors that might impact team effectiveness such as team dynamics, personal traits, and skill sets. Project Aristotle identified five key dynamics that contribute to the effective teams:
Psychological safety so that team members can express opinions and ideas freely.
Dependability so that individuals trust each other to be dependable.
Structure and clarity about the goals, roles and responsibilities.
Meaning or purpose of their work.
Impact on how their work makes an impact to the organization or society.
The author shares numerous other insights from Project Aristotle and various studies, including:
Smaller teams are more effective, as evidenced by Amazon’s two-pizza team rule.
Diversity can be beneficial.
Clear communication based on psychological safety is vital.
Collaboration drives innovation, as evidenced by studies from Harvard, Stanford, and others.
The author recommends using motivation and intrinsic rewards to enhance performance, citing Daniel H. Pink’s book Drive, which identifies three key elements that motivate people:
Autonomy
Mastery
Purpose
The author outlines the following steps for building an effective team:
Assemble the right people, focusing on hiring for effectiveness and determining the optimal team size for the project/product. To foster a shared engineering mindset for an effective team, the author recommends looking for the following qualities:
Cares about the user and comprehends the problem domain, business context, priorities, and relevant technology.
Is a good problem solver.
Can keep things simple but cares about quality.
Can build trust over time, leading to increased autonomy and enhanced social capital.
Understand team strategy.
Can prioritize appropriately and execute independently.
Can think long term.
Can leave software projects in better shape.
Is comfortable taking on new challenges.
Can communicate effectively.
Promotes diversity and inclusion, fostering an environment where all opinions are valued equally based on psychological safety.
Enable a sense of team spirit with following foundation:
Define clarity on roles, and responsibilities.
Establish a shared purpose and communicate the overall project purpose and goals.
Foster trust among team members by encouraging open communication and feedback.
Lead effectively as highlighted by the Project Oxygen and leader should inspire, influence and guide team toward a shared goal. Leaders should prioritize strategic visibility by effectively communicating the team’s accomplishments and their impact on the business.
Sustain effectiveness (Growth culture) by supporting the factors of agility, purpose, and impact. Leaders should enhance learning and development opportunities for team members. Author recommends agile strategies, including adopting agile practices, promoting cross-functional collaboration, prioritize communication, building a culture of adaptability and implementing continuous integration and delivery. Additionally, the author emphasizes continuous improvement by fostering continuous learning and monitoring key performance indicators to evaluate team performance.
2. Efficiency Versus Effectiveness Versus Productivity
The author defines following key terms:
Efficiency is about doing things right to minimize waste and maximize output. It enhances productivity by measuring factors such as time to complete a task, resource utilization, bug fix rate, defect density, and quality.
Effectiveness is about doing the right thing and delivering the right outcome. Team effectiveness can be measured by customer satisfaction, business value, user adoption rate, ROI, and time to market.
Productivity is a measure of output over input. The team productivity can be measured by lines of code, function points, story points, and DevOps metrics.
The author repeats factors from the first chapter that are imperative for achieving higher efficiency and effectiveness such as team size, diversity, role clarity, communication, work environment, tools and technology and code health. Further, author differentiates between output and outcome:
An output is a deliverable resulting from engineering tasks. It can be measured by metrics such as throughput, velocity, quality, capacity, and code health.
An outcome is the actual result of the work done. It can be measured by metrics including business value, investment, user adoption rate. However, measuring outcome is challenging because accurate measurement is difficult. Other factors such as focusing too much on output, unreasonable deadline and burnout can diminish the outcome.
The author defines effective efficiency as “do the right things right” and suggests following practices:
Asking questions
Following standards
Collaborating
Using the right tools
Managing tradeoffs based on project timelines, budgets, long-term maintainability and user needs.
The author suggests following metrics for tracking productivity, which is a subset of efficiency:
Time to receive valuable user feedback and insights.
Collaborate through asynchronous communication.
Focus blocks
Novel problem solving
Code and bug fixing
Security and vulnerability
Upskilling
Automated testing
Context switching
Subjective well being
Meeting culture
At the individual level, the author recommends SMART goals and at the team level, the author recommends two techniques for defining productivity metrics:
Goal-question-metric (GQM) for driving goal-oriented measurement such as code quality, process efficiency, and team performance.
Objectives and key results (OKRs) for setting specific and measurable objectives and then identifying a set of key results that monitor how to get the objectives.
3. The 3E’s Model of Effective Engineering
In this chapter, the author introduces following stages to install effectiveness:
Enable effectiveness by defining what it means to your team or organization. General steps to define effectiveness include:
Identify team’s goals and objectives.
Determine what metrics are relevant to measuring success.
Set targets for each metric.
Define effectiveness in terms of outcomes.
Involve key stakeholders.
Keep the definitions simple and review them regularly.
Empower teams to shape standards.
Practice servant leadership.
Empower teams to adopt effectiveness. The author shares following methods for empowering teams:
Feed opportunities, starve problems with continuous delivery and feedback loops, kanban boards, and delegation.
Expand to scale effectiveness for larger teams. The shares following methods for expanding effectiveness:
Empowerment through trust by delegating responsibilities.
Effective delegation.
Streamlining communication.
Fostering a culture of autonomy.
Setting priorities and boundaries.
Mentoring and developing leaders.
Reflective practices.
In order to empower team effectiveness, the author suggests several strategies to improve individual effectiveness including:
Using delegation as a tool, not a retreat.
Building a culture of trust and transparency.
Using process optimization beyond command-and-control.
The author cites following habits from the Peter Drucker’s Effective Executive:
Know where your time goes.
Focus on what you uniquely can contribute to your organization.
Build on your own strengths, the strengths of your colleagues, and the team.
Concentrate on a few major areas where superior performance will produce outstanding results.
Make effective decisions.
Author then describes team effectiveness models such as:
Lencioni’s model
Patrick Lencioni’s model focus on the five dysfunctions that can hinder team effectiveness:
Absence of trust.
Fear of conflict
Lack of commitment
Avoidance of accountability
Inattention to results when team members put the needs of individuals above those of the group.
Tuckman’s model
The author cites the Bruce Tuckman’s model to describe the stages teams go through as they mature:
Forming when the team is coming together.
Storming when they get to know each other.
Norming when they find a relative groove.
Performing where the magic happens.
Adjourning when the team disbands after completing the objectives.
The author also cites other strategies from a data team from Gitlab, Andy Grove’s book and his experience from Google including:
Using the right tools and processes
Reducing meetings and protecting the team
Securing executive buy-in and resources
Hiring and employee development
Planning for growth
Focusing on core business value
Being mindful of career path and priorities
Identifying high-leverage activities as defined by Grove in his book that can enable individuals and organizations to do more with less.
Standardize and share
Reuse
Automate right things
The Three Always of Leadership
In order to expand effectiveness, the author describes several challenges such as people, broader domain, distractions and complications. The author cities Ben Collins-Sussman’s techniques called the three always of leadership:
Always be deciding to make timely and well-informed decisions. A three-step approach by Ben Collins-Sussman include:
Identify the blinders or mental blocks.
Identify the key trade-offs.
Decide, then iterate.
Always be leaving by reducing the “bus factor” and ensuring that you don’t become the single point of faiure (SPOF). A leader can divide the problem space and delegate the subproblems to future leaders.
Always be scaling is about protecting precious resources such as time, attention, and energy. The author suggests being proactive instead of reactive from escalations, embracing the cycle of struggle and success, managing energy by self-care and recharge regularly.
The author cites Jeff Bezos lessons about making high-quality and high-velocity decisions. Though, the author does not mention Jeff Bezos’ advice on one-way vs two-way decisions but I have found it to be very valuable when making decisions.
4. Effective Management: Research from Google
In this chapter, the author describes findings from Project Oxygen and Project Aristotle.
Project Oxygen
Project Oxygen studied the behavior of high-performing managers and identified following key behaviors:
is a good coach who offers thoughtful feedback and guidance. Other attributes include regular one-on-ones, tailed coaching, asking good questions to help people think, demonstrate empathy, motivate by setting high standards and lead by example.
Empower team without micromanaging. A good manager offers stretch assignments, intervenes judiciously, allows autonomy, encourages innovation, advocates for the team and provides constructive feedback.
Creates an inclusive team environment, showing concern for success and well-being. A good manager makes new team member feel welcomed, builds rapport within the team, is an enthusiastic cheerleader to support the team, upholds civility, cres about the well-beings of team members, shows support and creates psychological safety on the team.
Is productive and results oriented and drives team achieving goals by assembling a diverse team, translating the vision/strategy into measurable goals, structuring the team, defining clear expectations and ownership, removing any roadblocks, and planning for potential risks.
Is a good communicator who encourages open discussion, aims to be responsive, shares information from leaders honestly, behaves calmly, and listens to other team members.
Supports career development and discusses performance. A good manager communicates performance expectations, gives employees fair performance evaluations, explains how compensation is tied to performance, advices employees on career prospects, and helps team members to grow. For example, Google uses GROW (Goal, Reality, Option, Will) model to structure career development conversations.
Has a clear vision/strategy for the team. A good manager creates a vision/strategy to inspire team members, aligns the team’s visions/strategy with the company’s, involves the team in creating the vision where it makes sense, clearly communicates the vision, helps the team understand how the overall strategy translates to its work. Google recommends defining core-values, purpose, mission, strategy and goals for the teams.
Has key technical skills to help advice the team. A good manager helps the team navigate technical complexity, understands the challenges of the work, uses technical skills to help solve problems, learns new skills to meet business needs, bridges the gap between technical and non-technical stakeholders.
Collaborates across company by doing: Prioritize collective goals and outcomes, seek opportunities to partner with other teams, role-model collaboration across teams, hold team accountable for following company practices/policies, and take art in the company’s culture and community.
Project Oxygen helped increased employee performance, satisfaction, better decision making and collaboration, and reduced employee turnover.
Project Aristotle
As mentioned in chapter 1, the Project Aristotle found the five critical dynamics in building successful teams:
Psychological Safety for feeling safe to speak up, which was first proposed by Amy Edmondson, which is distinct from “group cohesiveness” that is about getting along with each other as a group. In order to promote psychological safety in the teams, a manager should approach conflict as a collaborator, not an adversary, speak human to human, anticipate reactions and plan countermoves, replace blam with curiosity, ask for feedback on delivery, and measure psychological safety.
Dependability for fostering trust. Dependable team members demonstrate genuine intentions, accountability by taking ownership of their tasks and responsibility for their actions, sound thinking, and consistent contribution. As a leader, you can lead by example, promote collaboration and interdependence, clearly define roles and expectations, encourage open communication, and provide supportive feedback.
Structure and clarity so that team members understand what is expected of them. At Google, teams are encouraged to align their OKRs with the company’s overarching goals. The teams identify key results that would have the greatest impact on advancing the organizational OKRs. The author also suggests RACI matrix to bring structure an clarity to assigning responsibilities to various roles. It stands for Responsible (who do the work), Accountable (who owns the work to be done), Consulted (who reviews the work), and Informed (stakeholders). In past, I have used the single-threaded-leader (STL) or Directly-Responsible-Individual (DRI) roles for defining similar structure for ownership of the overall project.
Meaning refers to a sense of purpose, fulfillment, and progress at work.
Impact of the work that can highlighted by connection to organization objectives, working toward a team vision, understanding the impact on clents and users, and linking performance to outcomes.
Project Aristotle taught empathy and showed team wants to feel that their work matters.
5. Common Effectiveness Antipatterns
In this chapter, the author reviews antipatterns to effectiveness categorized by individual, practice-related, structural and leadership.
Individual Antipatterns
Following are the most common individual antipatterns:
The specialist when a person is strongly identified with a particular module or feature. It is a high-risk antipattern that leads to higher bus-factor and limits professional growth. A leader should encourage team members to develop expertise in different areas, document exceptional cases and set learning goals.
The generalist arises when team members spreads themselves too thin and dilute expertise. A leader must task the generalist with a specific area of the project, focus on honing their expertise in areas that aligns with their strengths, foster a collaborative environment and promote continuous learning and pursuit of master within specialized domain.
The hoarder antipattern occurs when a team member does not trust their team and does not share the work consistently. It disrupts team’s collaborative rhythm, hampers feedback loop and hoarder becomes a bottleneck during the code review stages. A leader should encourage frequent commits that show ongoing progress, promote daily stand-up meetings, advocate for early and frequent code reviews.
The relentless guide when an engineer offers assistance beyond its intended scope and other team members may ask engineer’s guidance, even for minor tasks. A leader should encourage team members to attempt problem-solving independently, foster peer learning by pairing individuals, organize regular knowledge-sharing sessions, and assign the guide to challenging tasks.
The trivial tweaker when an individual consistently indulges in minor code changes and refactoring. A leader should assign challenging task to the trivial tweaker, encourage the engineer to evaluate the potential impact of code changes, and align code changes with the project’s objectives.
Practice-Related Antipatterns
Practice-related antipatterns include:
Last-minute heroics when issues and challenges are often addressed hastily and heroically just before a release. It can lead to lack of feedback, hidden technical debt, decreased quality, and dependency on heroes. A leader should encourage effective planning, transparent communication, prioritized backlog, and sustainable pace.
PR Process Irregularities such as rubber-stamping, self-merging, long-running PRs, and last-minute PRs can introduce inefficiencies, decrease code quality and hinder collaboration. A leader should promote thorough review and accountability, diverse approvals, timely feedback and closure, and intermediate checkpoints.
Protracted Refactoring when the refactor stretches beyond its expected timeline due to escalating scope and causes progress delays, resource drain and diluted focus. A leader should identify the cause, set time constraints, implement peer review and closure, and foster open communication.
Retrospective Negligence when teams skip retrospectives due to time constraints, shorten sessions, lacks structure, avoid discussing conflicting viewpoints, lack follow-ups, and surface-level analysis. A leader should prioritize retrospectives regularly, allocate adequate time, embrace structure (start, stop, continue or mad, sad, glad), encourage diverse participation, implement action items, and focus on root causes.
Structural Antipatterns
Structural antipatterns include:
Isolated clusters where subteams or groups form within a larger team, leading to insular pockets of collaboration. It can lead to knowledge fragmentation, missed insights, stagnant growth, and reduced cohesion. A leader must encourage interdisciplinary sessions, rotating roles, cross-domain initiatives, and open communication channels.
Knowledge Bottlenecks where vital knowledge and expertise is concentrated to a limited individuals leading to higher bus factor, single point of failure, dependency, knowledge silos, and communication gaps. A leader should promote cross-training, knowledge sharing, pair programming, rotation of responsibilities, and mentorship.
Leadership Antipatterns
There are cases when the leader’s actions become antipatterns such as:
Micromanagement where managers exert unnecessary control that leads to perfectionist bottleneck, prescriptive direction, guardians of information, stiffled innovation, low morale, slow progress, limited growth, and uninformed decisions. In order to remedy these issues, leaders should increase ownership, enhance creativity, improve morale, foster innovation and act as a glass barriers to shield their teams.
Scope Mismanagement where leaders struggle to manage the scope of a project due to incessant change requests, lack of prioritization, inflated workload, delayed deliverables, and reduced quality. A leader should change evaluation process, promote effective communication, introduce scope freeze periods, regular reviews, empower decision making, and escalation.
Planning Overkill where excessive time and effort are invested in planning due to overanalysis, endless design iterations, extensive documentation, delayed development, and inflexibility. A leader should instead promote realistic scope, iterative refinement, flexibility in execution, progressive elaboration, and risk management.
Skeptical Leadership where leaders develop unwarranted insecurities about the team’s competence. A skeptical leader can build insecurities with unfounded fears, insecure technology decisions, passing the pain, constant reassurances, diminished confidence, and slowed progress. A leader must restore productive collaboration with evidence-based decisions, effective communication, transparency, time management, and confidence building.
Passive Leadership is characterized by maintaining the status quo, avoiding disruptions, stagnation, lack of direction, missed opportunities, limited accountability, and resistance to change. Leaders should instead set clear expectations and promote open communication, empowerment, innovative culture, and accountability
Underappreciation when leaders fail to acknowledge and celebrate commendable actions. Leaders should implement a practice of regular recognition, timely feedback, and appreciate publicly.
6. Effective Managers
This chapter focuses on the operational role of a manager and provides tips for time management, people management and project management.
From Engineering to Management
Transitioning from an engineering to a management position can be challenging and new managers may fail to empower team members, micromanage or find difficulty with prioritizing people management over technical expertise.
Getting Started
Following tasks are recommended for a new manager:
Meeting with team members
Project assessment
Understand the tech stack
Address immediate concerns
Identify quick wins
Start networking
Start prioritizing
Setup essential communication channels
Reflect and engage in self-care
Manage imposter syndrome
Defining a Strategy
A new manager can focus on:
Long-term strategic vision based on OKRs or other frameworks.
Transparent tracking of objectives.
Data-driven decision making.
Calculated risk management. You may use SWOT (Strengths, Weaknesses, Opportunities, and Threats) to assess a decision.
Managing Your Time
The author recommends following techniques:
Planning by time blocking, chunking similar tasks (Pomodoro), planning communication by using labels and filters to prioritize and categorize messages.
Execution by mentoring your team members to handle specific tasks, delegation, learn to say “no”.
Assessment by calendar audits, reflect and adjust.
Understanding and Setting Expectations
Leaders can elaborate key components of the expectations from the team members.
What results are expected from me? Critical factors include regular and open communication, setting goals (OKR or SMART), prioritization, and self-assessment by evaluating performance against the expectations.
What results do I expect from team members? The author suggests clear communication, individual meetings, goal alignment, and documenting expectations.
Communication Essentials
To ensure consistent communication, the author suggests a clear management strategy with various methods of communication.
Team meetings where frequency depends on the overall duration planned for the project. Each meeting should have clear objectives, is focused and time-bound and promote active participation and inclusivity.
One-on-Ones should focus on the team members and their needs. You should provide specific, useful and actionable feedback (both positive and negative).
Messaging may use various channels such as email, instant messaging, and task management software.
Nonverbal Communication based on body language, facial expressions, and physical proximity.
People Management
People management poses several challenges such as tech talent competition, skill diversification, remote work dynamics and expectations. The author suggests following areas for people management:
Hiring by clearly defining job roles and essential skills.
Performance evaluation that includes career goals, professional development, additional responsibilities, challenges and achievements, feedback and improvement, and work-life balance.
Attrition Management by understanding the reasons, using feedback from exit interviews, and smooth transition of knowledge and responsibilities.
Mentorship and Coaching that can avoid attrition by better cultural fit and alignment, cost and time savings, and employee development and morale.
Managing Challenging Projects
The author suggests following key considerations for navigating through challenging projects:
Agile approach
Scope management
Prototype
Decisive but flexible
Quality control
Work-life balance
Communication
Removing blockers
Celebrating successes
Managing Team Dynamics
These challenges include:
Individual idiosyncrasies and diverse teams
Remote teams
Conflict Resolution
Enabling Mastery and Growth
A manager can facilitate growth by following:
Harnessing downtime for growth
Empowering growth amid high-workload periods
Networking Essentials
The author suggests following techniques for building relationships:
Knowledge-exchange
Problem-solving
Professional growth
Collaboration opportunities
Other things to network effectively include:
Be genuine
Listen actively
Follow up
Maintain regular contact
Diversify your network
7. Becoming an Effective Leader
Leadership involves mentorship, coaching and setting a visionary course. The author cites John Kotter who distinguishes leadership from management where leadership produces change and movement, while management produces order and consistency. The author defines following focus areas for effective leaders and managers.
Effective leaders focuses on establishing direction, align people, motivate and inspire.
Effective managers plan and budget, bring organization structural, and control and problem-solving.
The author suggests following approaches to combine managerial responsibilities with leadership qualities are as follows:
Strategic vision by ensuring decisions are directed towards the correct long-term goals.
Motivational leadership by understanding what motivates each team member.
Empowerment and trust.
Adaptability and change management.
Leadership Roles
The author defines following different types of leadership roles:
Technical Lead who provides technical guidance and direction to the engineering team. The key responsibilities include guide technical design and architecture, set coding standards and best practices, lead troubleshooting of complex bugs and issues, make key technical decisions with engineering trade-offs, do hands-on coding alongside the team, serve as a mentor for development skills, and ensure deliverables meet the quality bar.
Engineering Manager oversees a team of engineers, ensuring delivery of projects. The key responsibilities include people management, manage processes, align team with organizational priorities, unblock resources, technical oversight, stakeholder interaction, and strategic work prioritization.
Tech Lead Manager (TLM) oversee a group of engineers at Google. The key responsibilities include blending people management with hands-on technical leadership, coach and develop engineers on coding skills, establish technical standards and architecture, help unblock developers when they are stuck, focus on higher-priority technical work, advocate for the team while coordinating cross-functionality, make technical decisions weighing various constraints, and provide mentorship and guidance.
Assessing Your Leadership Skills
The author defines a list of critical and desirable traits that distinguish exceptional leaders.
Critical Traits
Technical expertise is a critical skill for both engineer and team leaders.
Agility refers to ability to learn, unlearn and adapt to changing conditions.
Clear Communication is essential to share vision. You can practice active listening and seek feedback from the team.
Empathy by putting yourself in your team members’ shoes to understand their perspectives.
Develop a clear and compelling vision
Delegation
Integrity
Desirable Leadership Traits
Self-Motivation
Drive to maintain focus on the end goals and avoid distractions
Integrity by being honest, truthful, and ethical
Fairness to ensure that all individuals in the group are treated fairly and impartially.
Humility
Courage (virtue between cowardice and rashness)
Accountability by taking ownership of the decisions and outcomes
Influence to motivate and inspire team members
Caring for others
Self-awareness
Leading Effectively
The author describes practices and principles for effective leadership:
Leadership Style
Transformative leadership to inspire and motivate team to achieve extraordinary results.
Democratic leadership emphasizes involving team members in the decision-making process.
Servant Leadership prioritizes the needs and well-beings of team members based on empathy, humility, and stewardship.
Combining different styles
Also known as situational leadership based on the specific situation.
Environment-based leadership
Leadership based on size, scope, and complexity of the organization, product, or project.
Strategizing
Strategizing provides a clear roadmap that aligns team’s efforts with organizational goals.
Visualizing the future
It allows you to anticipate challenges and make informed decisions. The author recommends pointers to 360-degree visualization such as environmental scanning, scenario scanning, risk assessment and diverse perspectives.
Defining a strategic roadmap
It involves outlining a clear and cohesive plan including initiatives to be launched and milestones. The author recommends:
Do maintain clarity and simplicity.
Do set measurable milestones.
Do build flexibility and adaptability into the roadmap.
Don’t treat the roadmap as static document.
Don’t lack stakeholder involvement.
Immersive strategic thinking
Immersive strategic thinking is a dynamic and deliberate cognitive process that involves dedicated and uninterrupted periods for deep reflection and data analysis. You can use strategic retreats, digital detox or quiet spaces to facilitate this process.
Ruthless prioritization
It encourages to say “no” so that you maintain a clear and unwavering focus on what truly matters.
Playing the Part
Here are a few things to continuously apply:
Relentless communication
The author recommends regular communicating following aspects:
Long-term goals
Focus areas
Context for tasks
Milestones and achievements
Challenges and roadblocks
Changes in strategy or direction
Opportunities for learning and development
Organizational updates
Structuring for innovation
This involves the following:
Flatten unnecessary hierarchy
Informed decisions
Emphasized speed
Adopt minimal viable processes
Create innovation time
Facilitate ideation sessions
Psychological safety
It involves proactive measures to allow unconventional ideas and celebrate failures as learning opportunities.
Leading diverse teams
A few strategies for this include the following:
Address unconscious bias
Promote diverse hiring practices
Cultivate an inclusive work culture
Identifying potential and developing capability
Recognize that talent development is not a one-size-fits-all approach.
Understand that there is value in small gains.
Cultivate a diverse and vibrant collective of individuals.
Provide effective feedback, which is specific and actionable. Balance positive and constructive feedback. Tailor feedback to the individual. Follow up and support.
Balancing technical expertise with leadership skills
Develop technical expertise by setting aside dedicated time.
Enhance leadership skills with workshops/courses, mentorship and regular reflection. Develop strategic thinking, decision making and problem solving. Cultivate strong communication, collaboration and interpersonal skills.
Mastering the Attitude
The author recommends embracing the values and demonstrating commitment to the success of the projects. The key components include:
Trust and autonomy
You can grant autonomy via ownership, flexible work structures and decision making authority. You can establish following guardrails:
Clear communication channels and protocols
Well-defined roles and responsibilities
Regular check-ins and progress reviews
Established coding standards and best practices
Documented decision-making processes
Modeling behaviors
It involves leading by example and embodying the desired mindsets and values.
Demonstrate a growth mindset
Demonstrate inclusiveness
Demonstrate integrity
Making decisions with conviction
Avoid planning overkill antipattern and make difficult choices with conviction.
Data-driven leadership
Data-driven leadership consists of leading team based on real-time and accurate data and analytics. Some examples of metrics and KPIs include:
Velocity
Cycle time
Defect density (number of defects per unit of code or release).
Code coverage
Customer satisfaction
You must establish clear metrics and KPIs, foster data-driven culture and communicate data effectively.
Adapting to change
The author recommends 4A’s framework to lead in complex and uncertain environments:
Anticipation
Articulation
Adaption
Accountability
Evolving effectiveness into efficiency
Leaders can view leadership practices with following angles:
Team efficiency.
Process streamlining.
Strategic efforts to enhance effectiveness and balancing operational efficiency with the capacity for creative problem-solving.
Microservice architectures have gained wide adoption due to their ability to deliver scalability, agility, and resilience. However, the distributed nature of microservices also introduces new security challenges that must be addressed proactively. Security in distributed systems revolves around three fundamental principles: confidentiality, integrity, and availability (CIA). Ensuring the CIA triad is maintained is crucial for protecting sensitive data and ensuring system reliability for MicroServices.
Confidentiality ensures that sensitive information is accessible only to authorized users using encryption, access controls, and strong authentication mechanisms [NIST SP 800-53 Rev. 5].
Integrity guarantees that data remains accurate and unaltered during storage or transmission using cryptographic hash functions, digital signatures, and data validation processes [Software and Data Integrity Failures].
Availability ensures that systems and data are accessible to authorized users when needed. This involves implementing redundancy, failover mechanisms, and regular maintenance [ISO/IEC 27001:2022].
Below, we delve into these principles and the practices essential for building secure distributed systems. We then explore the potential security risks and failures associated with microservices and offer guidance on mitigating them.
Security Practices
The following key practices help establish a strong security posture:
Strong Identity Management: Implement robust identity and access management (IAM) systems to ensure that only authenticated and authorized users can access system resources. [AWS IAM Best Practices].
Fail Safe: Maintain confidentiality, integrity and availability when an error condition is detected.
Defense in Depth: Employ multiple layers of security controls to protect data and systems. This includes network segmentation, firewalls, intrusion detection systems (IDS), and secure coding practices [Microsoft’s Defense in Depth].
Least Privilege: A person or process is given only the minimum level of access rights (privileges) that is necessary for that person or process to complete an assigned operation.
Separation of Duties: This principle, also known as separation of privilege, requires multiple conditions to be met for task completion, ensuring no single entity has complete control, thereby enhancing security by distributing responsibilities.
Zero Trust Security: Not trust any entity by default, regardless of its location, and verification is required from everyone trying to access resources. [NIST Zero Trust Architecture].
Auditing and Monitoring: Implement comprehensive logging, monitoring, and auditing practices to detect and respond to security incidents [Center for Internet Security (CIS) Controls].
Following practices ensure that security is integrated throughout the development lifecycle and that potential threats are systematically addressed.
DevSecOps: Integrate security practices into the DevOps process to shift security left, addressing issues early in the software development lifecycle.
Security by Design (SbD): Incorporate security by design process to ensure robust and secure systems [OWASP Secure Product Design]. The key principles of security by design encompass Memory safe programming languages, Static and dynamic application security testing, Defense-in-Depth, Single sign-on, Secure Logging, Data classification, Secure random number generators, Limit the scope of credentials and access, Address Space Location Randomization(ASLR) and Kernel ASLR (KASLR), Encrypt data at rest optionally with customer managed keys, Encrypt data in transit, Data isolation with multi-tenancy support, Strong secrets management, Principle of Least Privilege and Separation of Duties, and Principle of Security-in-the-Open.
Threat Modeling Techniques: Threat modeling involves identifying potential threats to your system, understanding what can go wrong, and determining how to mitigate these risks. Following threat model techniques can be used for identifying and categorizing potential security threats such as
STRIDE (Spoofing, Tampering, Repudiation, Information Disclosure, Denial of Service, Elevation of Privilege) categorizes different types of threats.
PASTA (Process for Attack Simulation and Threat Analysis) a risk-centric threat modeling methodology [SEI Threat Modeling].
VAST (Visual, Agile, and Simple Threat) scales and integrates with Agile development processes.
CAPEC (Common Attack Pattern Enumeration and Classification): A comprehensive dictionary of known attack patterns, providing detailed information about common threats and mitigation techniques.
ISO/IEC 27034 (Application Security): An international standard provides guidance on information security for application services across their entire lifecycle, including design, development, testing, and maintenance.
Security incidents often result from inadequate security measures and oversight, highlighting the importance of rigorous security practices across various aspects of system management and software development.
Static Analysis of Source Code: The Heartbleed vulnerability in the OpenSSL cryptographic library allowed attackers to read sensitive memory contents and went undetected for over two years due to lack of static analysis and code reviews.
Data Classification: Improperly classifying and handling data based on its sensitivity and criticality have been source of security incidents like Equifax Data Breach (2017), which exposed personal information of over 143 million consumers and McDonald’s Data Leak (2017) that leaked personal information about 2.2 million users.
Secure Logging: Failure to implement secure logging led incidents like Apache Log4j Vulnerability (2021) that affected numerous applications and systems. Similarly, the lack of logging made it difficult to detect and investigate SolarWinds Supply Chain Attack (2020) that compromised numerous government agencies and companies.
Unauthorized Access to Production Data: Failing to implement appropriate controls and policies for governing production data use has led to significant data breaches. For example:
Uber Data Breach (2016) when an attacker gained access to production environments and stole sensitive data of over 57 million customers and drivers.
Capital One Data Breach (2019) exposed personal information of over 100 million customers due to misconfigured WAF credentials.
Filesystem Security: Failing to properly configure filesystem security led to critical issues such as Dirty Cow Vulnerability (2016) that caused privilege escalation vulnerability, and Shellshock Vulnerability (2014) that allowed remote code execution by exploiting vulnerabilities.
Memory protection with ASLR and KASLR: Failing to implement Address Space Layout Randomization (ASLR) and Kernel Address Space Layout Randomization (KASLR) led to the Linux Kernel Flaw (CVE-2024-0646), which exposed systems to privilege escalation attacks.
Data Integrity: Failure to implement data integrity verification with cryptographic hashing, digital signatures, or checksums can lead to incidents like:
Petya Ransomware Attack (2017): The Petya ransomware, specifically the “NotPetya” variant employed advanced propagation methods, including leveraging legitimate Windows tools and exploiting known vulnerabilities like EternalBlue and EternalRomance.
Bangladesh Bank Cyber Heist (2016): Hackers compromised the bank’s systems and initiated fraudulent SWIFT transactions due to the lack of appropriate data integrity controls.
Data Privacy: implementing controls to protect data privacy using data minimization, anonymization, encryption, access controls, and compliance with GDPR/CCPA regulations can prevent incidents like:
Facebook Cambridge Analytica Scandal (2018): Facebook’s lax privacy controls and data sharing practices led to the exposure of 87 million Facebook profiles to third-party companies like Cambridge Analytica.
Marriott International Data Breach (2018): A data breach at Starwood, acquired by Marriott, exposed personal information of up to 500 million guests due to inadequate privacy and security measures.
Customer Workloads in Multi-tenant environments: Failing to implement proper security controls and isolation mechanisms when executing customer-provided workloads in a multi-tenant environment can lead to incidents like:
Azure Functions Vulnerability: Researchers discovered a vulnerability in Azure Functions that allows privilege escalation bug to potentially permitting an attacker to “plant a backdoor which would have run in every Function invocation”.
Certificate Revocation Validation: Verifying that the digital certificates used for authentication and encryption have not been revoked or compromised using a certificate revocation list (CRL) or using the Online Certificate Status Protocol (OCSP) can prevent incidents like:
Secure Configuration: Failure to implement secure configurations and changes and change management can lead to incidents like AWS S3 Bucket Misconfiguration (2017) where sensitive data from various organizations was exposed due to misconfigured AWS S3 bucket permissions.
Secure communication protocols: Failure to implement secure communication protocols, such as TLS/SSL, to protect data in transit and mitigate man- in-the-middle attacks can lead to incidents like:
POODLE Attack (2014) exploited a vulnerability in the way SSL 3.0 handled padding, allowing attackers to decrypt encrypted connections.
FREAK Attack (2015) exploited a vulnerability in legacy export-grade encryption to allow attackers to perform man-in-the-middle attacks.
Secure Authentication: Failure to implement secure authentication mechanisms, such as multi-factor authentication (MFA) and strong password policies can lead to unauthorized access like:
Secure Backup and Disaster Recovery: Failure to implement secure procedures for data backup and recovery, including encryption, access controls, and offsite storage, can lead to incidents such as:
Code Spaces Data Loss (2014): The Code Spaces was forced to shut down after a catastrophic data loss incident due to a lack of secure backup and recovery procedures.
Garmin Ransomware Attack (2020): Garmin was hit by a ransomware attack that disrupted its services and operations, highlighting the importance of secure data backup and recovery procedures.
Secure Caching: Implementing proper authentication, access controls, and encryption prevent data leaks or unauthorized access like:
Cloudflare Data Leak (2017): A vulnerability in Cloudflare’s cache servers resulted in sensitive data leaking across different customer websites, exposing sensitive information.
Memcached DDoS Attacks (2018): Misconfigured Memcached servers were exploited by attackers to launch massive distributed denial-of-service (DDoS) attacks.
Privilege Escalation (Least Privilege): Improper privilege management caused Edward Snowden Data Leaks (2013) which allowed Snowden to copy and exfiltrate sensitive data from classified systems. In Capital One Data Breach (2019) breach, an overly permissive IAM policy granted broader access than necessary, violating the principle of least privilege. In addition, a contingent authorization can be granted for temporary or limited access to resources or systems based on specific conditions or events.
SPF, DKIM, DMARC: implement the email authentication such as SPF (Sender Policy Framework), DKIM (DomainKeys Identified Mail) and DMARC (Domain-based Message Authentication, Reporting, and Conformance), and anti-spoofing mechanisms for all domains.
Multitenancy: Implement secure and isolated processing of service requests in a multi-tenant environment to prevent unauthorized access or data leakage between different tenants like:
Salesforce Community Cloud Incident (2019): A misconfiguration in Salesforce’s Community Cloud allowed unauthorized users to access and modify data belonging to other tenants.
2018 Google data breach: A bug in Google+ exposed the private data of approximately 500,000 Google+ users to the public.
Identity Management in Mobile applications: Insecure authentication, authorization, and user management mechanisms can lead to incidents like:
Starbucks App Vulnerability (2014): A vulnerability in Starbucks’ mobile app endangers user information by storing their usernames, email addresses and passwords in plain text.
Venmo Mobile App Vulnerability (2016): The SMS-based feature in Venmo app allowed users to authorize payments by replying to a text message, which enabled attackers to steal money from the user’s account.
Secure Default Configuration: The systems and applications should be designed and configured to be secure by default to prevent incidents like:
MongoDB Ransomware Attacks (2016-2017): 23k MongoDB databases with default configurations were targeted by ransomware attacks due to the default configuration exposing them to the internet.
Elasticsearch Ransomware Attacks (2019): Misconfigured Elasticsearch clusters were targeted by ransomware attacks due to the default configuration allowing remote access.
CouchDB Vulnerabilities (2018): Unsecured CouchDB instances were targeted by attackers due to the default configuration exposing them to the internet.
Server-side Template Injection (SSTI): A vulnerability that occurs when user-supplied input is improperly interpreted as part of a server-side template engine, leading to the potential execution of arbitrary code.
SSTI in Apache Freemarker (2022): A SSTI vulnerability in the Apache Freemarker templating engine allowed remote code execution in various applications.
SSTI in Jinja2: Illustrates how Server-Side Template Injection (SSTI) payloads for Jinja2 can enable remote code execution.
Reverse Tabnabbing: A security vulnerability that occurs when a website you trust opens a link in a new tab and an attacker manipulates the website contents with malicious contents.
Regions and Partitions Isolation: Isolating the security and controls for each region and partition helps prevent security vulnerabilitiessuch as:
AWS US-East-1 Outage (2017): An operational issue in AWS’s US-East-1 region caused widespread service disruptions, affecting numerous customers and services hosted in that region.
Google Cloud Engine Outage (2016): A software bug in Google’s central data center caused cascading failures and service disruptions across multiple regions.
External Dependencies: Regularly reviewing and assessing external (Software-Defined Object) dependencies for potential security vulnerabilities can mitigate supply chain attacks and security breaches like:
Equifax Data Breach (2017): The breach was caused by the failure to patch a vulnerability in the Apache Struts open-source framework used by Equifax.
Log4Shell Vulnerability (2021): A critical vulnerability in the Log4j library, used for logging in Java applications, allowed attackers to execute arbitrary code on affected systems.
Circular Dependencies: Avoiding circular dependencies in software design can prevent incidents like:
Left-Pad Incident (2016): Although not a direct security breach, the removal of the “left-pad” npm package broke thousands of projects due to its circular dependencies.
Windows DLL Hijacking: Complex dependency management can lead to DLL hijacking that can execute malicious code.
Confused Deputy: The “Confused Deputy” problem, which occurs when a program inadvertently performs privileged operations on behalf of another entity, leading to security breaches:
Google Docs Phishing Attack (2017): Attackers exploited a feature in Google Docs to trick users into granting permission to a malicious app disguised as Google Docs.
Android Toast Overlay Attack (2017): A vulnerability in the Android operating system allowed malicious apps to display overlay Toast messages that could intercept user input or perform actions without user consent.
Validation Before Deserialization: Failure to validate the deserialized data can lead to security vulnerabilities, such as code execution or data tampering attacks like:
Generic Error Messages: implement proper error handling and return generic error messages rather than exposing sensitive information or implementation details.
Monitoring: Failure to implement proper logging and monitoring mechanisms can make it difficult to detect and respond to security incidents.
Uber’s Data Breach (2016): Uber failed to properly monitor and respond to security alerts, resulting in a delayed discovery of the data breach that exposed data of 57 million users and drivers.
Target Data Breach (2013): Inadequate logging and monitoring allowed attackers to remain undetected in Target’s systems for several weeks, resulting in the theft of millions of credit card records.
Secure Web Design: Implement input validation, secure session management, cross-site scripting (XSS) prevention, cross-site request forgery (CSRF) protection, and industry best practices to prevent incidents like:
Heartland Payment Systems Breach (2008): Poor input validation allowed attackers to inject malicious SQL queries, resulting in the theft of credit card data from over 100 million payment card transactions.
Panera Bread Data Leak (2018): Poor session management practices and the exposure of session tokens allowed attackers to access user data through exposed session cookies.
Yahoo Email XSS Vulnerability (2016): An XSS flaw in Yahoo’s email service allowed attackers to steal cookies and gain unauthorized access to user accounts.
Gmail CSRF Attack (2007): A vulnerability in Gmail allowed attackers to change users’ settings by tricking them into visiting malicious websites due to a lack of CSRF protection.
CSP Bypass Vulnerability in Google (2018): A vulnerability in Google’s Content Security Policy implementation allowed attackers to bypass XSS protections and execute malicious scripts.
Zoom’s Insecure Design Vulnerabilities (2020): Zoom’s rapid growth during the pandemic exposed several design flaws, including lack of end-to-end encryption and vulnerabilities that allowed unauthorized access to meetings.
Summary
Microservice architectures offer scalability, agility, and resilience but also present unique security challenges. Addressing these challenges requires adhering to the principles of confidentiality, integrity, and availability (CIA). Key security practices include strong identity management, defense in depth, principle of least privilege, zero trust security, comprehensive auditing and monitoring, and protecting data in motion and at rest. Security methodologies and frameworks like DevSecOps, Security by Design (SbD), and threat modeling techniques (e.g., STRIDE, PASTA) ensure robust security integration throughout the development lifecycle. Real-world incidents highlight the consequences of inadequate security measures. Implementing secure communication protocols, authentication mechanisms, and data backup procedures are crucial. Overall, a proactive and comprehensive approach to security, incorporating established practices and frameworks, is vital for safeguarding microservice architectures and distributed systems.
Online services experiencing rapid growth often encounter abrupt surges in traffic and may become targets of Distributed Denial of Service (DDoS) attacks orchestrated by malicious actors or inadvertently due to self-induced bugs. Mitigating these challenges to ensure high availability requires meticulous architectural practices, including implementing caching mechanisms, leveraging Content Delivery Networks (CDNs), Web Application Firewalls (WAFs), deploying queuing systems, employing load balancing strategies, implementing robust monitoring and alerting systems, and incorporating autoscaling capabilities. However, in this context, we will focus specifically on techniques related to load shedding and throttling to manage various traffic shapes effectively.
1. Traffic Patterns and Shapes
Traffic patterns refer to the manner in which user requests or tasks interact with your online service throughout a given period. These requests or tasks can vary in characteristics, including the rate of requests (TPS), concurrency, and the patterns of request flow, such as bursts of traffic. These patterns must be analyzed for scaling your service effectively and providing high availability.
Here’s a breakdown of some common traffic shapes:
Normal Traffic: defines baseline level of traffic pattern that a service receives most of the time based on regular user activity.
Peak Traffic: defines recurring period of high traffic based on daily or weekly user activity patterns. Auto-scaling rules can be set up to automatically allocate pre-provisioned additional resources in response to anticipated peaks in traffic.
Off-Peak Traffic: refers to periods of low or minimal traffic, such as during late-night hours or weekends. Auto-scaling rules can be set to scale down or consolidating resources during periods of low demand help minimize operational costs while maintaining adequate performance levels.
Burst Traffic: defines sudden, short-lived spikes in traffic that might be caused by viral contents or promotional campaigns. Auto-scaling rules can be configured to allocate extra resources in reaction to burst traffic. However, scaling resources might not happen swiftly enough to match the duration of the burst traffic. Therefore, it’s typically recommended to maintain surplus capacity to effectively handle burst traffic situations.
Seasonal Traffic: defines traffic patterns based on specific seasons, holidays or events such as Black Friday or back-to-school periods. This requires strategies similar to peak traffic for allocating pre-provisioned additional resources.
Steady Growth: defines gradual and consistent increase in traffic over time based on organic growth or marketing campaigns. This requires proactive monitoring to ensure resources keep pace with demand.
Classifying Requests
Incoming requests or tasks can be identified and categorized based on various contextual factors, such as the identity of the requester, the specific operation being requested, or other relevant parameters. This classification enables the implementation of appropriate measures, such as throttling or load shedding policies, to manage the flow of requests effectively.
Additional Considerations:
Traffic Patterns Can Combine: Real-world traffic patterns are often a combination of these shapes, requiring flexible and adaptable scaling strategies.
Monitoring and Alerting: Continuously monitor traffic patterns to identify trends early and proactively adjust your scaling strategy. Set up alerts and notifications to inform about sudden traffic surges or potential DDoS attacks so you can take timely action.
Incident Response Plan: Develop a well-defined incident response plan that outlines the steps for communication protocols, mitigation strategies, engaging stakeholders, and recovery procedures.
Cost-Effectiveness: Balance scaling needs with cost optimization to avoid over-provisioning resources during low traffic periods.
2. Throttling and Rate Limiting
Throttling controls the rate of traffic flow or resource consumption within a system to prevent overload or degradation of service. Throttling enforces quota limits and protects system overload by limiting the amount of resources (CPU, memory, network bandwidth) a single user or client can consume within a specific time frame. Throttling ensures efficient resource utilization, allowing the service to handle more users in a predictable manner. This ensures better fairness and stability while preventing a noisy neighbor problem where unpredictable spikes or slowdowns caused by heavy users. Throttling can be implemented by API Rate Limiting on the number of API requests a client can make with a given time window; by limiting maximum bandwidth allowed for various network traffic; by limiting rate of read/write; or by limiting the number of concurrent connections for a server to prevent overload.
These throttling and rate limiting measures can be applied to both anonymous and authenticated requests as follows:
Anonymous Requests:
Rate limiting: Implement rate limiting based on client IP addresses or other identifiers within a specific time window, preventing clients from overwhelming the system.
Concurrency limits: Set limits on the maximum number of concurrent connections or requests that can be processed simultaneously.
Server-side throttling: Apply throttling mechanisms at the server level, such as queue-based rate limiting or token bucket algorithms, to control the overall throughput of incoming requests.
Authenticated Requests:
User-based rate limiting: Implement rate limiting based on user identities or API keys, ensuring that authenticated users cannot exceed specified request limits.
Prioritized throttling: Apply different throttling rules or limits based on user roles, subscription tiers, or other criteria, allowing higher priority requests to be processed first during peak loads.
Circuit breakers: Implement circuit breakers to temporarily disable or throttle load from specific services or components that are experiencing high latency or failures, preventing cascading failures.
Load shedding is used to prioritize and manage system resources during periods of high demand or overload. It may discard or defer non-critical tasks or requests to ensure the continued operation of essential functions. Load shedding helps maintain system stability and prevents cascading failures by reallocating resources to handle the most critical tasks first. Common causes of unexpected events that require shedding to prevent overloading system resources include:
Traffic Spikes: sudden and significant increases in the volume of incoming traffic due to various reasons, such as viral content, marketing campaigns, sudden popularity, or events.
DDoS (Distributed Denial of Service): deliberate attempts to disrupt the normal functioning of a targeted server, service, or network by overwhelming it with a flood of traffic. A DDoS attack can be orchestrated by an attacker who commands a vast botnet comprising thousands of compromised devices, including computers, IoT devices, or servers. Additionally, misconfigurations, software bugs, or unforeseen interactions among system components such as excessive retries without exponential delays that can also lead to accidental DDoS attacks.
Here is how excessive load for anonymous and authenticated requests can be shed:
Anonymous Requests: Drop requests during extreme load conditions or when server capacity is reached, drop a percentage of incoming requests to protect the system from overload. This can be done randomly or based on specific criteria such as request types, and headers. Alternatively, service can degrade non-critical features or functionalities temporarily to reduce the overall system load and prioritize essential services.
Authenticated Requests: Apply load shedding rules based on user roles, subscription tiers, or other criteria, prioritizing requests from high-value users or critical services.
3.1 Error Response
When a request exceeds the rate limit, the server typically returns a 503 HTTP status code indicating that the request has been throttled or rate-limited due to Too Many Requests. The server may also return HTTP headers such as Retry-After, other headers specifically employed for throttling are less prevalent in the context of load shedding. Unlike throttling errors, which fall under user-errors with 4XX error codes, load shedding is categorized as a server error with 5XX error codes. Consequently, load shedding requires more aggressive monitoring and alerting compared to throttling errors. Throttling errors, on the other hand, can be considered expected behavior as a means to address noisy neighbor problems and maintain high availability.
4. Additional Techniques for Throttling and Load Shedding
Throttling, rate-limiting and load shedding measures described above can be used to handle high traffic and to prevent resource exhaustion in distributed systems. Here are common techniques that can be used to implement these measures:
Admission Control: Set up thresholds for maximum concurrent requests or resource utilization.
Request Classification and Prioritization: Classify requests based on priority, user type, or criticality and then dropping low-priority requests when the thresholds for capacity are exceeded.
Backpressure and Queue Management: Use a fixed-length queues to buffer incoming requests during high loads and applying back-pressure by rejecting requests when queues reach their limits.
Fault Isolation and Containment: Partition the system into isolated components or cells to limit the blast radius of failures.
Redundancy and Failover: Build redundancy into your infrastructure and implement failover mechanisms to ensure that your services remain available even if parts of your infrastructure are overwhelmed.
Simplicity and Modularity: Design systems with simple, modular components that can be easily understood, maintained, and replaced. Avoid complex dependencies and tight coupling between components.
Circuit Breaker: Monitor the health and performance of downstream services or components and stop forwarding requests if a service is overloaded or unresponsive. Periodically attempt to re-establish the connection (close the circuit breaker).
Noisy Neighbors: Throttle and apply rate limits to customer traffic to prevent them from consuming resources excessively, thereby ensuring fair access for all customers.
Capacity Planning and Scaling: Continuously monitor resource utilization and plan for capacity growth. Implement auto-scaling mechanisms to dynamically adjust resources based on demand.
Communication Optimization: Employ communication optimization techniques like compression, quantization to minimize network traffic and bandwidth requirements.
Privacy and Security Considerations: Incorporate privacy-preserving mechanisms like secure aggregation, differential privacy, and secure multi-party computation to ensure data privacy and model confidentiality.
Graceful Degradation: Identify and disable non-critical features or functionality during high loads.
Monitoring and Alerting: Monitor system metrics (CPU, memory, request rates, latency, etc.) to detect overload scenarios and sending alerts when thresholds are exceeded.
Defense in Depth: Implement multi-layered defense strategy to detect, mitigate, and protect customer workloads from malicious attacks, like blacklisting IP addresses or employing Geo-location filters, at the Edge Layer using CDN, Load Balancer, or API Gateway. Constrain network bandwidth and requests per second (RPS) for individual tenants at the Network Layer. Applying resource quota, prioritization and admission control at the Application Layer based on account information, request attributes and system metrics. Isolating tenants’ data in separate partitions at the Storage Layer. Each dependent service may use similar multi-layered defense to throttle based on the usage patterns and resource constraints.
Adaptive Scaling: Automatically scale resources up or down based on demand and multi-tenant fairness policies. Employ predictive auto-scaling or load-based scaling.
Fault Tolerance and Checkpointing: Incorporate fault tolerance mechanisms, redundant computation and checkpointing to ensure reliable and resilient task processing in the face of potential resource failures. The fault tolerance mechanisms can be used to handle potential failures or stragglers (slow or unresponsive devices).
Web Application Firewall (WAF): Inspects incoming traffic and blocks malicious requests, including DDoS attacks, based on predefined rules and patterns.
Load Balancing: By distributing incoming traffic across multiple servers or instances, load balancing helps prevent any single server from becoming overwhelmed.
Content Delivery Network (CDN): Distribute your content across multiple geographic locations, reducing the strain on your origin servers.
Cost-Aware Scaling: Implements a cost-aware scaling strategy like like cost modeling and performance prediction that considers the cost of different resource types.
Security Mechanisms: Incorporate various security mechanisms such as secure communication channels, code integrity verification, and runtime security monitoring to protect against potential vulnerabilities and attacks in multi-tenant environments.
SOPs and Run books: Develop well-defined procedures that outlines the steps for detecting traffic spikes, pinpointing source of malicious attack, analyzing the logs and monitoring metrics, mitigation strategies, engaging stakeholders, and recovery procedures.
5. Pitfalls with Use of Throttling and Load Shedding
Here are some potential challenges to consider when implementing throttling and load shedding:
Autoscaling Failures: If your throttling policies are too aggressive, they may prevent your application from generating enough load to trigger autoscaling policies. This can lead to under-provisioning of resources and performance degradation. Conversely, if your throttling policies are too lenient, your application may scale up unnecessarily, leading to overspending.
Load Balancer Health Checks: Some load balancers use synthetic health checks to determine the health of backend instances. If your throttling policies block these health checks, it can cause instances to be marked as unhealthy and removed from the load balancer, even though they are still capable of serving traffic.
Unhealthy Instance Overload: When instances are marked as unhealthy by a load balancer, the remaining healthy instances may become overloaded if throttling policies are not properly configured. This can lead to a cascading failure scenario where more and more instances are marked as unhealthy due to the increased load.
Sticky Sessions: If your application uses sticky sessions (session affinity) for user sessions, and your throttling policies are not consistently applied across all instances, it can lead to inconsistent user experiences or session loss.
Cache Invalidation: Aggressive throttling or load shedding policies can lead to more frequent cache invalidations, which can impact performance and increase the load on your backend systems.
Upstream Service Overload: If your application relies on upstream services or APIs, and your throttling policies are not properly coordinated with those services, you may end up overloading those systems and causing cascading failures.
Insufficient capacity of the Failover: The failover servers must possess adequate capacity to manage the entire expected traffic load from the primary servers.
Monitoring Challenges: Throttling and load shedding policies can make it more difficult to monitor and troubleshoot performance issues, as the metrics you’re observing may be skewed by the throttling mechanisms.
Delays in Updating Throttling Policies: The policy adjustments for throttling and load shedding should be capable of updating at runtime swiftly to adapt to various traffic patterns..
Balancing Load based on number of connections: When directing incoming traffic based on the host with the least number of connections, there’s a risk of unhealthy hosts will have fewer connections due to their quick error responses. Consequently, the load balancer may direct more traffic towards these hosts, resulting in a majority of requests failing. To counteract this, it’s essential to employ robust Layer 7 health checks that comprehensively assess the application’s functionality and dependencies. Layer 4 health checks, which are susceptible to false positives, should be avoided. The unhealthy host should be removed from the available pool as quickly as possible. Additionally, ensuring that error responses from the service have similar latency to successful responses can serve as another effective mitigation strategy.
To mitigate these issues, it’s essential to carefully coordinate your throttling and load shedding policies with the autoscaling, load balancing, caching, and monitoring strategies. This may involve tuning thresholds, implementing consistent policies across all components, and closely monitoring the interaction between these systems. Additionally, it’s crucial to thoroughly test your configurations under various load conditions to identify and address potential issues before they impact your production environment.
6. Monitoring Metrics and Notifications
Here are some common metrics and alarms to consider for throttling and load shedding:
6.1 Network Traffic Metrics:
Incoming/Outgoing Bandwidth: Monitor the total network bandwidth to detect abnormal traffic patterns.
Packets per Second (PPS): Track the number of packets processed per second to identify potential DDoS attacks or traffic bursts.
Connections per Second: Monitor the rate of new connections being established to detect potential connection exhaustion or DDoS attacks.
6.2 Application Metrics:
Request Rate: Track the number of requests per second to identify traffic spikes or bursts.
Error Rate: Monitor the rate of errors or failed requests, which can indicate overloading or application issues.
Response Time: Measure the application’s response time to detect performance degradation or latency issues.
Queue Saturation: Monitor the lengths of queues or buffers to identify potential bottlenecks or resource exhaustion.
6.3 System Metrics:
CPU Utilization: Monitor CPU usage to detect resource contention or overloading.
Memory Utilization: Track memory usage to identify potential memory leaks or resource exhaustion.
Disk I/O: Monitor disk read/write operations to detect storage bottlenecks or performance issues.
6.4 Load Balancer Metrics:
Active Connections: Monitor the number of active connections to the load balancer to identify potential connection exhaustion.
Unhealthy Hosts: Track the number of unhealthy or unresponsive hosts to ensure load balancing efficiency.
Request/Response Errors: Monitor errors related to requests or responses to identify issues with backend services.
6.5 Alarms and Notifications:
Set up alarms for critical metrics, such as high CPU utilization, memory exhaustion or excessive error rates. For example, send alarms when error rate > 5% or response code of 5XX for consecutive 5 seconds or data points.
Set up alarms for high latency, e.g., P90 latency exceeds 50ms for more than 30 seconds.
Establish fine-grained alarms for detecting breaches in customer service level agreements (SLAs). Configure the alarm thresholds to trigger below the customer SLAs and ensure they can identify the affected customers.
6.6 Autoscaling Policies:
CPU Utilization-based Scaling: Scale out or in based on CPU usage thresholds to handle traffic bursts or DDoS attacks.
Memory Utilization-based Scaling: Scale resources based on memory usage to prevent memory exhaustion.
Network Traffic-based Scaling: Scale resources based on incoming or outgoing network traffic patterns to handle traffic spikes.
Request Rate-based Scaling: Scale resources based on the rate of incoming requests to maintain optimal performance.
6.7 Throttling / Load Shedding Overhead:
Monitor the processing time for throttling and load shedding, accounting for any communication overhead if the target host is unhealthy. Keep track of the time to ascertain priority, identify delays in processing, and ensure that high delays only impact denied requests.
Monitor the system’s utilization and identify when it reaches its capacity.
Monitor the observed target throughput at the time of the request.
Monitor the time taken to determine if load shedding is necessary and track when the percentage of denied traffic exceeds X% of incoming traffic.
It’s essential to tailor these metrics and alarms to your specific application, infrastructure, and traffic patterns.
7. Summary
Throttling and Load Shedding offer effective means for managing traffic for online services to maintain high availability. Traffic patterns may vary in characteristics like rate of requests, concurrency, and flow patterns. Understanding these shapes, including normal, peak, off-peak, burst, and seasonal traffic, is crucial for scaling and ensuring high availability. Requests can be classified based on contextual factors, enabling appropriate measures such as throttling or load shedding.
Throttling manages traffic flow or resource usage to avoid overload, whereas load shedding prioritizes tasks during periods of high demand. These methods can complement other strategies such as admission control, request classification, backpressure management, and redundancy. However, their implementation requires careful monitoring, notification, and thorough testing to ensure effectiveness.
The architecture of Formicary, a distributed orchestration engine will be described, which is intended for the execution of background tasks, jobs, and workflows. The operation is based on a directed acyclic graph of tasks, where each task is seen as a unit of work. Execution of these tasks can be achieved through a variety of protocols, including Docker, Kubernetes, Shell, HTTP, and Messaging. The Leader-Follower model (comprising a queen-leader and ant-workers) is employed by Formicary. Tasks are scheduled by the queen-leader, and their execution is carried out by the ant-workers. The Pipes and Filter and SEDA patterns are supported, permitting the output from one task to serve as the input for another. Parallel execution and result aggregation of tasks are made possible by the Fork/Join pattern. Distribution of tasks is guided by tags, labels, and executor protocols. The following is a list of its significant features:
Declarative Task/Job Definitions: Tasks and Jobs are defined as DAGs using simple YAML configuration files, with support for GO-based templates for customization.
Authentication & Authorization: The access to Formicary is secured using OAuth and OIDC standards.
Persistence of Artifacts: Artifacts and outputs from tasks can be stored and used by subsequent tasks or as job inputs.
Extensible Execution Methods: Supports a variety of execution protocols, including Docker, Kubernetes, HTTP, and custom protocols.
Quota: Limit maximum allowed CPU, memory, and disk quota usage for each task.
Caching: Supports caching for dependencies such as npm, maven, gradle, and python.
Encryption: Secures confidential configurations in databases and during network communication.
Scheduling: Cron-based scheduling for periodic job execution.
Optional and Finalized Tasks: Supports optional tasks that may fail and finalized tasks that run regardless of job success or failure.
Child Jobs: Supports spawning of child jobs based on Fork/Join patterns.
Retry Mechanisms: Supports retrying of tasks or jobs based on error/exit codes.
Job Filtering and Priority: Allows job/task execution filtering and prioritization.
Job prioritization, job/task retries, and cancellation.
Resource based Routing: Supports constraint-based routing of workloads for computing resources based on tags, labels, execution protocols, etc.
Monitoring, Alarms and Notifications: Offers job execution reports, real-time log streaming, and email notifications.
Other: Graceful and abrupt shutdown capabilities. Reporting and statistics on job outcomes and resource usage.
2. Use-Cases
The Formicary is designed for efficient and flexible job and task execution, adaptable to various complex scenarios, and capable of scaling according to the user base and task demands. Following is a list of its major use cases:
Complex Workflow Orchestration: Formicary is specially designed to run a series of integration tests, code analysis, and deployment tasks that depend on various conditions and outputs of previous tasks. Formicary can orchestrate this complex workflow across multiple environments, such as staging and production, with tasks running in parallel or sequence based on conditions.
Image Processing Pipeline: Formicary supports artifacts management for uploading images to S3 compatible storage including Minio. It allows orchestrating a series of tasks for image resizing, watermarking, and metadata extraction, with the final output stored in an object store.
Automate Build, Test and Release Workflows: A DevOps team can use Formicary to trigger a workflow that builds the project, runs tests, creates a Release, uploads build artifacts to the release, and publishes the package to a registry like npm or PyPI.
Scheduled Data ETL Job: A data engineering team can use Formicary to manage scheduled ETL jobs that extract data from multiple sources, transform it, and load it into a data warehouse, with tasks to validate and clean the data at each step.
Machine Learning Pipeline: A data science team can use Formicary pipeline to preprocess datasets, train machine learning models, evaluate their performance, and, based on certain metrics, decide whether to retrain the models or adjust preprocessing steps.
3. Architecture
The Formicary architecture is a complex system designed for task orchestration and execution, based on the Leader-Follower, SEDA and Fork/Join patterns.
3.1 Design Patterns
Here are some common design patterns used in the Formicary architecture:
Microservices Architecture: Formicary architecture is decomposed into smaller, independent services that enhances scalability and facilitates independent deployment and updates.
Pipeline Pattern: It structures the processing of tasks in a linear sequence of processing steps (stages).
Distributed Task Queues: It manages task distribution among multiple worker nodes. This ensures load balancing and effective utilization of resources.
Event-Driven Architecture: Formicary components communicate with events, triggering actions based on event occurrence for handling asynchronous processes and integrating various services.
Load Balancer Pattern: It distributes incoming requests or tasks evenly across a pool of servers and prevents any single server from becoming a bottleneck.
Circuit Breaker Pattern: It prevents a system from repeatedly trying to execute an operation that’s likely to fail.
Retry Pattern: It automatically re-attempts failed operations a certain number of times before considering the operation failed.
Observer Pattern: Formicary uses observer pattern for monitoring, logging, and metrics collection.
Scheduler-Agent-Supervisor Pattern: The Formicary schedulers trigger tasks, agents to execute them, and supervisors to monitor task execution.
Immutable Infrastructure: It treats infrastructure entities as immutable, replacing them for each deployment instead of updating them.
Fork-Join Pattern: It decomposes a task into sub-tasks, processes them in parallel, and then combines the results.
Caching Pattern: It stores intermediate build artifacts such as npm/maven/gradle libraries in a readily accessible location to reduce latency and improves performance.
Back-Pressure Pattern: It controls the rate of task generation or data flow to prevent overwhelming the system.
Idempotent Operations: It ensures that an operation produces the same result even if it’s executed multiple times.
External Configuration Store Pattern: It manages job configuration and settings in a separate, external location, enabling easier changes and consistency across services.
Blue-Green Deployment Pattern: It manages deployment by switching between two identical environments, one running the current version (blue) and one running the new version (green).
3.2 High-level Components
The architecture of Formicary is designed to manage and execute complex workflows where tasks are organized in a DAG structure. This architecture is inherently scalable and robust, catering to the needs of task scheduling, execution, and monitoring. Here’s an overview of its key functionalities and components:
components diagram
3.2.1 Functionalities
Job Processing: Formicary supports defining workflows as Job, where each node represents a task, and edges define dependencies. It ensures that tasks are executed in an order that respects their dependencies.
Task Distribution: Tasks, defined as units of work, are distributed among ant-workers based on tags and executor protocols (Kubernetes, Docker, Shell, HTTP, Websockets, etc.).
Scalability: Formicary scales to handle a large number of tasks and complex workflows. It supports horizontal scaling where more workers can be added to handle increased load.
Fault Tolerance and Reliability: It handles failures and retries of tasks.
Extensibility: It provides interfaces and plugins for extending its capabilities.
Resource Management: Efficiently allocates resources for task execution, optimizing for performance and cost.
Resource Quotas: It define maximum resource quotas for CPU, memory, disk space, and network usage for each job or task. This prevent any single job from over-consuming resources, ensuring fair resource allocation among all jobs.
Prioritization: It prioritize jobs based on criticality or predefined rules.
Job Throttling: It implement throttling mechanisms to control the rate at which jobs are fed into the system.
Kubernetes Clusters: Formicary allows for the creation of kubernetes clusters to supports auto-scaling and termination to optimize resource usage and cost.
Monitoring and Logging: It offers extensive monitoring and logging capabilities.
Authentication and Authorization: Formicary enforces strict authentication and authorization based on OAuth 2.0 and OIDC protocols before allowing access to the system.
Multitenancy: Formicary accommodates multiple tenants, allowing various organizations to sign up with one or more users, ensuring their data is safeguarded through robust authentication and authorization measures.
Common Plugins: Formicary allows the sharing of common plugins that function as sub-jobs for reusable features, which other users can then utilize.
3.2.2 Core Components
Following are core components of the Formicary system:
API Controller
The API controller defines an API that supports the following functions:
Checking the status of current, pending, or completed jobs
Submitting new jobs for execution
Looking up or modifying job specifications
Enrolling ant workers and overseeing resources for processing
Retrieving or uploading job-related artifacts
Handling settings, error codes, and resource allocation
Delivering both real-time and historical data reports
UI Controller
The UI controller offers the following features:
Displaying ongoing, queued, or completed jobs
Initiating new job submissions
Reviewing job specifications or introducing new ones
Supervising ant workers and execution units
Accessing or submitting artifacts
Configuring settings, error codes, and resource management
Providing access to both live and archived reports
Resource Manager
The resource manager enrolls ant workers and monitors the resources accessible for processing jobs. Ant workers regularly inform the resource manager about their available capacity and current workload. This continuous communication allows the resource manager to assess the maximum number of jobs that can run simultaneously without surpassing the capacity of the workers.
Job Scheduler
The job scheduler examines the queue for jobs awaiting execution and consults the resource manager to determine if a job can be allocated for execution. When sufficient resources are confirmed to be available, it dispatches a remote command to the Job-Launcher to initiate the job’s execution. Please note that the formicary architecture allows for multiple server instances, with the scheduler operating on the leader node. Meanwhile, other servers host the job-launcher and executor components, which are responsible for executing and orchestrating jobs.
Job Launcher
The job launcher remains attentive to incoming requests for job execution and initiates the process by engaging the Job-Supervisor. The Job-Supervisor then takes on the role of overseeing the execution of the job, ensuring its successful completion.
Job Supervisor
The job supervisor initiates a job in an asynchronous manner and manages the job’s execution. It oversees each task through the Task-Supervisor and determines the subsequent task to execute, guided by the status or exit code of the previously completed task.
Task Supervisor
The task supervisor initiates task execution by dispatching a remote instruction to the ant worker equipped to handle the specific task method, then stands by for a response. Upon receiving the outcome, the task supervisor records the results in the database for future reference and analysis.
Ant Workers
An ant worker registers with the queen server by specifying the types of tasks it can handle, using specific methods or tags for identification. Once registered, it remains vigilant for task requests, processing each one asynchronously according to the execution protocols defined for each task, and then relaying the results back to the server. Before starting on a task, the ant worker ensures all required artifacts are gathered and then uploads them once the task is completed. Moreover, the ant worker is responsible for managing the lifecycle of any external containers, such as those in Docker and Kubernetes systems, from initiation to termination.
To maintain system efficiency and prevent any single worker from becoming overwhelmed, the ant worker consistently updates the queen server with its current workload and capacity. This mechanism allows for a balanced distribution of tasks, ensuring that no worker is overloaded. The architecture is scalable, allowing for the addition of more ant workers to evenly spread the workload. These workers communicate with the queen server through messaging queues, enabling them to:
Regularly update the server on their workload and capacity.
Download necessary artifacts needed for task execution.
Execute tasks using the appropriate executors, such as Docker, HTTP, Kubernetes, Shell, or Websockets.
Upload the resulting artifacts upon completion of tasks.
Monitor and manage the lifecycle of Docker/Kubernetes containers, reporting back any significant events to the server.
Executors
The formicary system accommodates a range of executor methods, such as Kubernetes Pods, Docker containers, Shell commands, HTTP requests, and Messaging protocols, to abstract the runtime environment for executing tasks. The choice of executor within the formicary is defined through designated methods, with each method specifying a different execution environment.
Note: These execution methods can be easily extended to support other executor protocols to provide greater flexibility in how tasks are executed and integrated with different environments.
Database
The formicary system employs a relational database to systematically store and manage a wide array of data, including job requests, detailed job definitions, resource allocations, error codes, and various configurations.
Artifacts and Object Store
The formicary system utilizes an object storage solution to maintain the artifacts produced during task execution, those generated within the image cache, or those uploaded directly by users. This method ensures a scalable and secure way to keep large volumes of unstructured data, facilitating easy access and retrieval of these critical components for operational efficiency and user interaction.
Messaging
Messaging enables seamless interaction between the scheduler and the workers, guaranteeing dependable dissemination of tasks across distributed settings.
Notification System
The notification system dispatches alerts and updates regarding the pipeline status to users.
3.3 Data Model
Here’s an overview of its key data model in Formicary system:
Domain Classes
3.3.1 Job Definition
A JobDefinition outlines a set of tasks arranged in a Directed Acyclic Graph (DAG), executed by worker entities. The workflow progresses based on the exit codes of tasks, determining the subsequent task to execute. Each task definition encapsulates a job’s specifics, and upon receiving a new job request, an instance of this job is initiated through JobExecution.
type JobDefinition struct {
	// ID defines UUID for primary key
	ID string `yaml:"-" json:"id" gorm:"primary_key"`
	// JobType defines a unique type of job
	JobType string `yaml:"job_type" json:"job_type"`
	// Version defines internal version of the job-definition, which is updated when a job is updated. The database
	// stores each version as a separate row but only latest version is used for new jobs.
	Version int32 `yaml:"-" json:"-"`
	// SemVersion - semantic version is used for external version, which can be used for public plugins.
	SemVersion string `yaml:"sem_version" json:"sem_version"`
	// URL defines url for job
	URL string `json:"url"`
	// UserID defines user who updated the job
	UserID string `json:"user_id"`
	// OrganizationID defines org who submitted the job
	OrganizationID string `json:"organization_id"`
	// Description of job
	Description string `yaml:"description,omitempty" json:"description"`
	// Platform can be OS platform or target runtime and a job can be targeted for specific platform that can be used for filtering
	Platform string `yaml:"platform,omitempty" json:"platform"`
	// CronTrigger can be used to run the job periodically
	CronTrigger string `yaml:"cron_trigger,omitempty" json:"cron_trigger"`
	// Timeout defines max time a job should take, otherwise the job is aborted
	Timeout time.Duration `yaml:"timeout,omitempty" json:"timeout"`
	// Retry defines max number of tries a job can be retried where it re-runs failed job
	Retry int `yaml:"retry,omitempty" json:"retry"`
	// HardResetAfterRetries defines retry config when job is rerun and as opposed to re-running only failed tasks, all tasks are executed.
	HardResetAfterRetries int `yaml:"hard_reset_after_retries,omitempty" json:"hard_reset_after_retries"`
	// DelayBetweenRetries defines time between retry of job
	DelayBetweenRetries time.Duration `yaml:"delay_between_retries,omitempty" json:"delay_between_retries"`
	// MaxConcurrency defines max number of jobs that can be run concurrently
	MaxConcurrency int `yaml:"max_concurrency,omitempty" json:"max_concurrency"`
	// disabled is used to stop further processing of job, and it can be used during maintenance, upgrade or debugging.
	Disabled bool `yaml:"-" json:"disabled"`
	// PublicPlugin means job is public plugin
	PublicPlugin bool `yaml:"public_plugin,omitempty" json:"public_plugin"`
	// RequiredParams from job request (and plugin)
	RequiredParams []string `yaml:"required_params,omitempty" json:"required_params" gorm:"-"`
	// Tags are used to use specific followers that support the tags defined by ants.
	// Tags is aggregation of task tags
	Tags string `yaml:"tags,omitempty" json:"tags"`
	// Methods is aggregation of task methods
	Methods string `yaml:"methods,omitempty" json:"methods"`
	// Tasks defines one to many relationships between job and tasks, where a job defines
	// a directed acyclic graph of tasks that are executed for the job.
	Tasks []*TaskDefinition `yaml:"tasks" json:"tasks" gorm:"ForeignKey:JobDefinitionID" gorm:"auto_preload" gorm:"constraint:OnUpdate:CASCADE"`
	// Configs defines config properties of job that are used as parameters for the job template or task request when executing on a remote
	// ant follower. Both config and variables provide similar capabilities but config can be updated for all job versions and can store
	// sensitive data.
	Configs []*JobDefinitionConfig `yaml:"-" json:"-" gorm:"ForeignKey:JobDefinitionID" gorm:"auto_preload" gorm:"constraint:OnUpdate:CASCADE"`
	// Variables defines properties of job that are used as parameters for the job template or task request when executing on a remote
	// ant follower. Both config and variables provide similar capabilities but variables are part of the job yaml definition.
	Variables []*JobDefinitionVariable `yaml:"-" json:"-" gorm:"ForeignKey:JobDefinitionID" gorm:"auto_preload" gorm:"constraint:OnUpdate:CASCADE"`
	// CreatedAt job creation time
	CreatedAt time.Time `yaml:"-" json:"created_at"`
	// UpdatedAt job update time
	UpdatedAt time.Time `yaml:"-" json:"updated_at"`
}
3.3.2 Task Definition
A TaskDefinition outlines the work performed by worker entities. It specifies the task’s parameters and, upon a new job request, a TaskExecution instance is initiated to carry out the task. The task details, including its method and tags, guide the dispatch of task requests to a compatible remote worker. Upon task completion, the outcomes are recorded in the database for reference.
type TaskDefinition struct {
	// ID defines UUID for primary key
	ID string `yaml:"-" json:"id" gorm:"primary_key"`
	// JobDefinitionID defines foreign key for JobDefinition
	JobDefinitionID string `yaml:"-" json:"job_definition_id"`
	// TaskType defines type of task
	TaskType string `yaml:"task_type" json:"task_type"`
	// Method TaskMethod defines method of communication
	Method common.TaskMethod `yaml:"method" json:"method"`
	// Description of task
	Description string `yaml:"description,omitempty" json:"description"`
	// HostNetwork defines kubernetes/docker config for host_network
	HostNetwork string `json:"host_network,omitempty" yaml:"host_network,omitempty" gorm:"-"`
	// AllowFailure means the task is optional and can fail without failing entire job
	AllowFailure bool `yaml:"allow_failure,omitempty" json:"allow_failure"`
	// AllowStartIfCompleted  means the task is always run on retry even if it was completed successfully
	AllowStartIfCompleted bool `yaml:"allow_start_if_completed,omitempty" json:"allow_start_if_completed"`
	// AlwaysRun means the task is always run on execution even if the job fails. For example, a required task fails (without
	// AllowFailure), the job is aborted and remaining tasks are skipped but a task defined as `AlwaysRun` is run even if the job fails.
	AlwaysRun bool `yaml:"always_run,omitempty" json:"always_run"`
	// Timeout defines max time a task should take, otherwise the job is aborted
	Timeout time.Duration `yaml:"timeout,omitempty" json:"timeout"`
	// Retry defines max number of tries a task can be retried where it re-runs failed tasks
	Retry int `yaml:"retry,omitempty" json:"retry"`
	// DelayBetweenRetries defines time between retry of task
	DelayBetweenRetries time.Duration `yaml:"delay_between_retries,omitempty" json:"delay_between_retries"`
	// Webhook config
	Webhook *common.Webhook `yaml:"webhook,omitempty" json:"webhook" gorm:"-"`
	// OnExitCodeSerialized defines next task to execute
	OnExitCodeSerialized string `yaml:"-" json:"-"`
	// OnExitCode defines next task to run based on exit code
	OnExitCode map[common.RequestState]string `yaml:"on_exit_code,omitempty" json:"on_exit_code" gorm:"-"`
	// OnCompleted defines next task to run based on completion
	OnCompleted string `yaml:"on_completed,omitempty" json:"on_completed" gorm:"on_completed"`
	// OnFailed defines next task to run based on failure
	OnFailed string `yaml:"on_failed,omitempty" json:"on_failed" gorm:"on_failed"`
	// Variables defines properties of task
	Variables []*TaskDefinitionVariable `yaml:"-" json:"-" gorm:"ForeignKey:TaskDefinitionID" gorm:"auto_preload" gorm:"constraint:OnUpdate:CASCADE"`
	TaskOrder int       `yaml:"-" json:"-" gorm:"task_order"`
	// ReportStdout is used to send stdout as a report
	ReportStdout bool `yaml:"report_stdout,omitempty" json:"report_stdout"`
	// Transient properties -- these are populated when AfterLoad or Validate is called
	NameValueVariables interface{} `yaml:"variables,omitempty" json:"variables" gorm:"-"`
	// Header defines HTTP headers
	Headers map[string]string `yaml:"headers,omitempty" json:"headers" gorm:"-"`
	// BeforeScript defines list of commands that are executed before main script
	BeforeScript []string `yaml:"before_script,omitempty" json:"before_script" gorm:"-"`
	// AfterScript defines list of commands that are executed after main script for cleanup
	AfterScript []string `yaml:"after_script,omitempty" json:"after_script" gorm:"-"`
	// Script defines list of commands to execute in container
	Script []string `yaml:"script,omitempty" json:"script" gorm:"-"`
	// Resources defines resources required by the task
	Resources BasicResource `yaml:"resources,omitempty" json:"resources" gorm:"-"`
	// Tags are used to use specific followers that support the tags defined by ants.
	// For example, you may start a follower that processes payments and the task will be routed to that follower
	Tags []string `yaml:"tags,omitempty" json:"tags" gorm:"-"`
	// Except is used to filter task execution based on certain condition
	Except string `yaml:"except,omitempty" json:"except" gorm:"-"`
	// JobVersion defines job version
	JobVersion string `yaml:"job_version,omitempty" json:"job_version" gorm:"-"`
	// Dependencies defines dependent tasks for downloading artifacts
	Dependencies []string `json:"dependencies,omitempty" yaml:"dependencies,omitempty" gorm:"-"`
	// ArtifactIDs defines id of artifacts that are automatically downloaded for job-execution
	ArtifactIDs []string `json:"artifact_ids,omitempty" yaml:"artifact_ids,omitempty" gorm:"-"`
	// ForkJobType defines type of job to work
	ForkJobType string `json:"fork_job_type,omitempty" yaml:"fork_job_type,omitempty" gorm:"-"`
	// URL to use
	URL string `json:"url,omitempty" yaml:"url,omitempty" gorm:"-"`
	// AwaitForkedTasks defines list of jobs to wait for completion
	AwaitForkedTasks      []string `json:"await_forked_tasks,omitempty" yaml:"await_forked_tasks,omitempty" gorm:"-"`
	MessagingRequestQueue string   `json:"messaging_request_queue,omitempty" yaml:"messaging_request_queue,omitempty" gorm:"-"`
	MessagingReplyQueue   string   `json:"messaging_reply_queue,omitempty" yaml:"messaging_reply_queue,omitempty" gorm:"-"`
	// CreatedAt job creation time
	CreatedAt time.Time `yaml:"-" json:"created_at"`
	// UpdatedAt job update time
	UpdatedAt time.Time `yaml:"-" json:"updated_at"`
}
3.3.3 JobExecution
JobExecution refers to a specific instance of a job-definition that gets activated upon the submission of a job-request. When a job is initiated by the job-launcher, this triggers the creation of a job-execution instance, which is also recorded in the database. Following this initiation, the job-launcher transfers responsibility for the job to the job-supervisor, which then commences execution, updating the status of both the job request and execution to EXECUTING. The job supervisor manages the execution process, ultimately altering the status to COMPLETED or FAILED upon completion. Throughout this process, the formicary system emits job lifecycle events to reflect these status changes, which can be monitored by UI or API clients.
For every task outlined within the task-definition associated with the JobExecution, a corresponding TaskExecution instance is generated. This setup tracks the progress and state of both job and task executions within a database, and any outputs generated during the job execution process are preserved in object storage.
type JobExecution struct {
	// ID defines UUID for primary key
	ID string `json:"id" gorm:"primary_key"`
	// JobRequestID defines foreign key for job request
	JobRequestID uint64 `json:"job_request_id"`
	// JobType defines type for the job
	JobType    string `json:"job_type"`
	JobVersion string `json:"job_version"`
	// JobState defines state of job that is maintained throughout the lifecycle of a job
	JobState types.RequestState `json:"job_state"`
	// OrganizationID defines org who submitted the job
	OrganizationID string `json:"organization_id"`
	// UserID defines user who submitted the job
	UserID string `json:"user_id"`
	// ExitCode defines exit status from the job execution
	ExitCode string `json:"exit_code"`
	// ExitMessage defines exit message from the job execution
	ExitMessage string `json:"exit_message"`
	// ErrorCode captures error code at the end of job execution if it fails
	ErrorCode string `json:"error_code"`
	// ErrorMessage captures error message at the end of job execution if it fails
	ErrorMessage string `json:"error_message"`
	// Contexts defines context variables of job
	Contexts []*JobExecutionContext `json:"contexts" gorm:"ForeignKey:JobExecutionID" gorm:"auto_preload"`
	// Tasks defines list of tasks that are executed for the job
	Tasks []*TaskExecution `json:"tasks" gorm:"ForeignKey:JobExecutionID" gorm:"auto_preload"`
	// StartedAt job execution start time
	StartedAt time.Time `json:"started_at"`
	// EndedAt job execution end time
	EndedAt *time.Time `json:"ended_at"`
	// UpdatedAt job execution last update time
	UpdatedAt time.Time `json:"updated_at"`
	// CPUSecs execution time
	CPUSecs int64 `json:"cpu_secs"`
}
The state of job execution includes: PENDING, READY, COMPLETED, FAILED, EXECUTING, STARTED, PAUSED, and CANCELLED.
3.3.4 TaskExecution
TaskExecution records the execution of a task or a unit of work, carried out by ant-workers in accordance with the specifications of the task-definition. It captures the status and the outputs produced by the task execution, storing them in the database and the object-store. When a task begins, it is represented by a task-execution instance, initiated by the task supervisor. This instance is stored in the database by the task supervisor, which then assembles a task request to dispatch to a remote ant worker. The task supervisor awaits the worker’s response before updating the database with the outcome. Task execution concludes with either a COMPLETED or FAILED status, and it also accommodates an exit code provided by the worker. Based on the final status or exit code, orchestration rules determine the subsequent task to execute.
type TaskExecution struct {
	// ID defines UUID for primary key
	ID string `json:"id" gorm:"primary_key"`
	// JobExecutionID defines foreign key for JobExecution
	JobExecutionID string `json:"job_execution_id"`
	// TaskType defines type of task
	TaskType string `json:"task_type"`
	// Method defines method of communication
	Method types.TaskMethod `yaml:"method" json:"method"`
	// TaskState defines state of task that is maintained throughout the lifecycle of a task
	TaskState types.RequestState `json:"task_state"`
	// AllowFailure means the task is optional and can fail without failing entire job
	AllowFailure bool `json:"allow_failure"`
	// ExitCode defines exit status from the job execution
	ExitCode string `json:"exit_code"`
	// ExitMessage defines exit message from the job execution
	ExitMessage string `json:"exit_message"`
	// ErrorCode captures error code at the end of job execution if it fails
	ErrorCode string `json:"error_code"`
	// ErrorMessage captures error message at the end of job execution if it fails
	ErrorMessage string `json:"error_message"`
	// FailedCommand captures command that failed
	FailedCommand string `json:"failed_command"`
	// AntID - id of ant with version
	AntID string `json:"ant_id"`
	// AntHost - host where ant ran the task
	AntHost string `json:"ant_host"`
	// Retried keeps track of retry attempts
	Retried int `json:"retried"`
	// Contexts defines context variables of task
	Contexts []*TaskExecutionContext `json:"contexts" gorm:"ForeignKey:TaskExecutionID" gorm:"auto_preload"`
	// Artifacts defines list of artifacts that are generated for the task
	Artifacts []*types.Artifact `json:"artifacts" gorm:"ForeignKey:TaskExecutionID"`
	// TaskOrder
	TaskOrder int `json:"task_order"`
	// CountServices
	CountServices int `json:"count_services"`
	// CostFactor
	CostFactor float64 `json:"cost_factor"`
  	Stdout []string `json:"stdout" gorm:"-"`
	// StartedAt job creation time
	StartedAt time.Time `json:"started_at"`
	// EndedAt job update time
	EndedAt *time.Time `json:"ended_at"`
	// UpdatedAt job execution last update time
	UpdatedAt time.Time `json:"updated_at"`
}
The state of TaskExecution includes READY, STARTED, EXECUTING, COMPLETED, and FAILED.
3.3.5 JobRequest
JobRequest outlines a user’s request to execute a job as per its job-definition. Upon submission, a job-request is marked as PENDING in the database and later, it is asynchronously scheduled for execution by the job scheduler, depending on resource availability. It’s important to note that users have the option to schedule a job for a future date to avoid immediate execution. Additionally, a job definition can include a cron property, which automatically generates job requests at predetermined times for execution. Besides user-initiated requests, a job request might also be issued by a parent job to execute a child job in a fork/join manner.
type JobRequest struct {
	//gorm.Model
	// ID defines UUID for primary key
	ID uint64 `json:"id" gorm:"primary_key"`
	// ParentID defines id for parent job
	ParentID uint64 `json:"parent_id"`
	// UserKey defines user-defined UUID and can be used to detect duplicate jobs
	UserKey string `json:"user_key"`
	// JobDefinitionID points to the job-definition version
	JobDefinitionID string `json:"job_definition_id"`
	// JobExecutionID defines foreign key for JobExecution
	JobExecutionID string `json:"job_execution_id"`
	// LastJobExecutionID defines foreign key for JobExecution
	LastJobExecutionID string `json:"last_job_execution_id"`
	// OrganizationID defines org who submitted the job
	OrganizationID string `json:"organization_id"`
	// UserID defines user who submitted the job
	UserID string `json:"user_id"`
	// Permissions provides who can access this request 0 - all, 1 - Org must match, 2 - UserID must match from authentication
	Permissions int `json:"permissions"`
	// Description of the request
	Description string `json:"description"`
	// Platform overrides platform property for targeting job to a specific follower
	Platform string `json:"platform"`
	// JobType defines type for the job
	JobType    string `json:"job_type"`
	JobVersion string `json:"job_version"`
	// JobState defines state of job that is maintained throughout the lifecycle of a job
	JobState types.RequestState `json:"job_state"`
	// JobGroup defines a property for grouping related job
	JobGroup string `json:"job_group"`
	// JobPriority defines priority of the job
	JobPriority int `json:"job_priority"`
	// Timeout defines max time a job should take, otherwise the job is aborted
	Timeout time.Duration `yaml:"timeout,omitempty" json:"timeout"`
	// ScheduleAttempts defines attempts of schedule
	ScheduleAttempts int `json:"schedule_attempts" gorm:"schedule_attempts"`
	// Retried keeps track of retry attempts
	Retried int `json:"retried"`
	// CronTriggered is true if request was triggered by cron
	CronTriggered bool `json:"cron_triggered"`
	// QuickSearch provides quick search to search a request by params
	QuickSearch string `json:"quick_search"`
	// ErrorCode captures error code at the end of job execution if it fails
	ErrorCode string `json:"error_code"`
	// ErrorMessage captures error message at the end of job execution if it fails
	ErrorMessage string `json:"error_message"`
	// Params are passed with job request
	Params []*JobRequestParam `yaml:"-" json:"-" gorm:"ForeignKey:JobRequestID" gorm:"auto_preload" gorm:"constraint:OnUpdate:CASCADE"`
	// Execution refers to job-Execution
	Execution       *JobExecution          `yaml:"-" json:"execution" gorm:"-"`
	Errors          map[string]string      `yaml:"-" json:"-" gorm:"-"`
	// ScheduledAt defines schedule time when job will be submitted so that you can submit a job
	// that will be executed later
	ScheduledAt time.Time `json:"scheduled_at"`
	// CreatedAt job creation time
	CreatedAt time.Time `json:"created_at"`
	// UpdatedAt job update time
	UpdatedAt time.Time `json:"updated_at" gorm:"updated_at"`
}
3.3.6 TaskRequest
TaskRequest specifies the parameters for a task that is dispatched to a remote ant-worker for execution. This request is transmitted through a messaging middleware to the most appropriate ant-worker, selected based on its resource availability and capacity to handle the task efficiently.
ExecutorOptions specify the settings for the underlying executor, including Docker, Kubernetes, Shell, HTTP, etc., ensuring tasks are carried out using the suitable computational resources.
Here’s a summary of the principal events model within the Formicary system, which facilitates communication among the main components:
Formicary Events
In above diagram, the lifecycle events are published upon start and completion of a job-request, job-execution, task-execution, and containers. Other events are propagated upon health errors, logging and leader election for the job scheduler.
3.5 Physical Architecture
Following diagram depicts the physical architecture of the Formicary system:
physical architecture
The physical architecture of a Formicary system is structured as follows:
Queen Server: It manages task scheduling, resource allocation, and system monitoring. The job requests, definitions, user data, and configuration settings are maintained in the database.
Ant Workers: These are distributed computing resources that execute the tasks assigned by the central server. Each ant worker is equipped with the necessary software to perform various tasks, such as processing data, running applications, or handling web requests. Worker nodes report their status, capacity, and workload back to the central server to facilitate efficient task distribution.
Storage Systems: Relational databases are used to store structured data such as job definitions, user accounts, and system configurations. Object storage systems hold unstructured data, including task artifacts, logs, and binary data.
Messaging Middleware: Messaging queues and APIs facilitate asynchronous communication and integration with other systems.
Execution Environments: Consist of container orchestration systems like Kubernetes and Docker for isolating and managing task executions. They provide scalable and flexible environments that support various execution methods, including shell scripts, HTTP requests, and custom executables.
Monitoring and Alerting Tools:Formicary system integrates with Prometheus for monitoring solutions to track the health, performance, and resource usage of both the central server and worker nodes. Alerting mechanisms notify administrators and users about system events, performance bottlenecks, and potential issues.
Security Infrastructure: Authentication and authorization mechanisms control access to resources and tasks based on user roles and permissions.
This architecture allows the Formicary system to scale horizontally by adding more worker nodes as needed to handle increased workloads, and vertically by enhancing the capabilities of the central server and worker nodes. The system’s design emphasizes reliability, scalability, and efficiency, making it suitable for a wide range of applications, from data processing and analysis to web hosting and content delivery.
4. API Overview
The Formicary API is a comprehensive orchestration engine designed for executing complex job workflows, represented as a directed acyclic graph (DAG) of tasks. It’s built on design principles such as Leader-Follower, Pipes-Filter, Fork-Join, and SEDA, catering to a range of execution strategies. The API supports task unit management, job definition, and workflow configurations, including conditional logic and parameterization. The API defines a range of models for different entities such as AntRegistration, Artifact, JobDefinition, JobRequest, and many more, providing a structured approach to orchestration. Key functionalities of the Formicary API include:
4.1 Ant Registration
Management of ant registrations, enabling queries and retrievals by ID such as:
GET /api/ants: Queries ant registration.
GET /api/ants/{id}: Retrieves ant-registration by its id.
4.2 Artifacts
Handling of artifacts, allowing for querying, uploading, and managing artifact data, including downloading and log retrieval.
GET /api/artifacts: Queries artifacts by name, task-type, etc.
POST /api/artifacts: Uploads artifact data from the request body and returns metadata for the uploaded data.
DELETE /api/artifacts:/{id}: Deletes an artifact by its ID.
GET /api/artifacts:/{id}: Retrieves an artifact by its ID.
4.3 System Configs
Creation, deletion, updating, and querying of system configurations.
GET /api/configs: Retrieves system configs.
POST /api/configs: Creates new system config based on request body.
DELETE /api/configs/{id}: Deletes an existing system config based on id.
GET /api/configs/{id}: Finds an existing system config based on id.
PUT /api/configs/{id}: Updates an existing system config based on request body.
4.4 Error Codes
Management of error codes, including creation, updating, deletion, and querying by type or regex.
GET /api/errors: Queries error-codes by type, regex.
POST /api/errors: Creates new error code based on request body.
PUT /api/errors: Updates new error code based on request body.
DELETE /api/errors/{id}: Deletes error code by id.
GET /api/errors/{id}: Finds error code by id.
4.5 Container Execution
Querying of container executions and management of container executors.
GET /api/executors: Queries container executions.
GET /api/executors/{id}: Deletes container-executor by its id.
4.6 Job Definitions
Comprehensive job definition management, including creation, deletion, querying, concurrency updates, enabling/disabling, and graphical representation (DOT format).
GET /api/jobs/definitions: Queries job definitions by criteria such as type, platform, etc.
POST /api/jobs/definitions: Uploads job definitions using JSON or YAML body based on content-type header.
DELETE /api/jobs/definitions/{id}: Deletes the job-definition by id.
GET /api/jobs/definitions/{id}: Finds the job-definition by id.
PUT /api/jobs/definitions/{id}/concurrency: Updates the concurrency for job-definition by id to limit the maximum jobs that can be executed at the same time.
POST /api/jobs/definitions/{id}/disable: disables job-definition so that no new requests are executed while in-progress jobs are allowed to complete.
GET /api/jobs/definitions/{id}/dot: Returns Graphviz DOT definition for the graph of tasks defined in the job.
GET /api/jobs/definitions/{id}/stats: Returns Real-time statistics of jobs running.
POST /api/jobs/definitions/{id}/enable: Enables job-definition so that new requests can start processing.
GET /api/jobs/definitions/{type}/yaml: Finds job-definition by type and returns response YAML format.
GET /api/jobs/plugins: Queries job definitions by criteria such as type, platform, etc.
4.7 Job Configs
Configuration management for jobs, including adding, deleting, finding, and updating configs.
GET /api/jobs/definitions/{jobId}/configs: Queries job configs by criteria such as name, type, etc.
POST /api/jobs/definitions/{jobId}/configs: Adds a config for the job.
DELETE /api/jobs/definitions/{jobId}/configs/{id}: Deletes a config for the job by id.
GET /api/jobs/definitions/{jobId}/configs/{id}: Finds a config for the job by id.
PUT /api/jobs/definitions/{jobId}/configs/{id}: Updates a config for the job.
4.8 Job Requests
Handling of job requests, including submission, querying, cancellation, restart, triggering, and wait time calculations.
GET /api/jobs/requests: Queries job requests by criteria such as type, platform, etc.
POST /api/jobs/requests: Submits a job-request for processing, which is saved in the database and is then scheduled for execution.
GET /api/jobs/requests/{id}: Finds the job-request by id.
POST /api/jobs/requests/{id}/cancel: Cancels a job-request that is pending for execution or already executing.
POST /api/jobs/requests/{id}/pause: Pauses a job-request that is pending for execution or already executing.
GET /api/jobs/requests/{id}/dot: Returns Graphviz DOT request for the graph of tasks defined in the job request.
GET /api/jobs/requests/{id}/dot.png: Returns Graphviz DOT image for the graph of tasks defined in the job.
POST /api/jobs/requests/{id}/restart: Restarts a previously failed job so that it can re-execute.
POST /api/jobs/requests/{id}/trigger: Triggers a scheduled job.
GET /api/jobs/requests/{id}/wait_time: Returns wait time for the job-request.
GET /api/jobs/requests/dead_ids: Returns job-request ids for recently completed jobs.
GET /api/jobs/requests/stats: Returns statistics for the job-request such as success rate, latency, etc.
4.9 Job Resources
Management of job resources, including adding, finding, updating, and configuring resources.
GET /api/jobs/resources: Queries job resources by criteria such as type, platform, etc.
POST /api/jobs/resources: Adds a job-resource that can be used for managing internal or external constraints.
GET /api/jobs/resources/{id}: Finds the job-resource by id.
PUT /api/jobs/resources/{id}: Updates a job-resource that can be used for managing internal or external constraints.
POST /api/jobs/resources/{id}/configs: Saves the configuration of a job-resource.
DELETE /api/jobs/resources/{id}/configs/{configId}: Deletes the configuration of a job-resource.
POST /api/jobs/resources/{id}/disable: Disables the job-resource so that any jobs requiring it will not be able to execute.
4.10 Organizations
Organization management, including creation, deletion, updating, and querying.
GET /api/orgs: Queries organizations by criteria such as org-unit, bundle, etc.
POST /api/orgs: Creates new organization.
DELETE /api/orgs/{id}: Deletes the organization by its id.
GET /api/orgs/{id}: Finds the organization by its id.
PUT /api/orgs/{id}: Updates the organization profile.
POST /api/orgs/{id}/invite: Invites a user to an organization.
POST /api/orgs/usage_report: Generates usage report for the organization.
4.11 Organization Configs
Management of organization-specific configs.
GET /api/orgs/{orgId}/configs: Queries organization configs by criteria such as name, type, etc.
POST /api/orgs/{orgId}/configs: Adds a config for the organization.
DELETE /api/orgs/{orgId}/configs/{id}: Deletes a config for the organization by id.
GET /api/orgs/{orgId}/configs/{id}: Finds a config for the organization by id.
PUT /api/orgs/{orgId}/configs/{id}: Updates a config for the organization.
4.12 Subscriptions
Management of system subscriptions.
GET /api/subscriptions: Finds an existing system subscription based on id.
POST /api/subscriptions: Creates new system subscription based on request body.
DELETE /api/subscriptions/{id}: Deletes an existing system subscription based on id.
GET /api/subscriptions/{id}: Finds an existing system subscription based on id.
PUT /api/subscriptions/{id}: Updates an existing system subscription based on request body.
4.13 Users
User management within an organization, including creation, deletion, and profile updates.
GET /api/users: Queries users within the organization that is allowed.
POST /api/users: Creates new user.
DELETE /api/users/{id}: Deletes the user profile by its id.
GET /api/users/{id}: Finds user profile by its id.
PUT /api/users/{id}: Updates user profile.
PUT /api/users/{id}/notify: Updates user notification.
4.14 User Tokens
Management of user tokens for API access.
GET /api/users/{userId}/tokens: Queries user-tokens for the API access.
POST /api/users/{userId}/tokens: Creates new user-token for the API access.
DELETE /api/users/{userId}/tokens/{id}: Deletes user-token by its id so that it cannot be used for the API access.
The API documentation is accessible at a URL and includes a Swagger YAML file for detailed API specifications. The API emphasizes support and extensibility, offering various endpoints for managing jobs, configurations, resources, and user interactions within the orchestration platform.
5. Getting Started
5.1 Declarative Job & Task Declaration
In the Formicary system, a job is structured as a declarative directed acyclic graph (DAG). This setup dictates the execution sequence, where the transition from one task to another is contingent upon the exit code or status of the preceding node or task.
5.1.1 Job Configuration
A job is described as a series of tasks arranged in a directed acyclic graph (DAG), with each task detailing the required environment, commands/APIs, and configuration parameters necessary for execution. The definition of a job encompasses the following attributes:
job_type: defines a short unique name of the job and as Formicary is a multi-tenant system, it’s only needs to be unique within an organization. For example: job_type: my_test_job
job_variables: defines variables for job context that are available for all tasks, e.g. job_variables: OSVersion: 10.1 Architecture: ARM64
description: is an optional property to specify details about the job, e.g., description: A test job for building a node application.
max_concurrency: defines max number of jobs that can be run concurrently, e.g. max_concurrency: 5
required_params: specifies list of parameter names that must be defined when submitting a job request, e.g., required_params: Name Age
cron_trigger: uses cron syntax to schedule the job at regular intervals, for example, the following job is set to run every minute: cron_trigger: 0 * * * * * *
skip_if: allows a job to skip execution based on a conditional logic using GO template, e.g. following condition will skip processing if git branch name is not main: skip_if: {{if ne .GitBranch "main"}} true {{end}}
retry: A job may be configured to attempt retries a certain number of times. For example, retry: 3
delay_between_retries: specifies the pause duration between each attempt. For instance, following setting specifies delay of 10 seconds between each retry: delay_between_retries: 10s
hard_reset_after_retries: When a job fails, only the failed tasks are executed. However, you can use hard_reset_after_retries so that all tasks are executed due to persisted failure, e.g.: hard_reset_after_retries: 3
timeout: defines the maximum time that a job can take for the execution and if the job takes longer, then it’s aborted, e.g., timeout: 5m
public_plugin: indicates the job is a public plugin so it can be shared by any other user in the system, e.g., public_plugin: true
sem_version: specifies a semantic version of the public plugin, e.g., sem_version: 1.2.5
tasks: defines an array of task definitions. The order of tasks is not important as formicary creates a graph based on dependencies between the tasks for execution.
5.1.2 Task Configuration
A task serves as a work segment carried out by an ant worker, encompassing the following attributes within its definition:
task_type: defines type or name of the task, e.g.: - task_type: lint-task
description: specifies details about the task, e.g.: description: This task verifies code quality with the lint tool.
method: defines executor to use for the task such as
DOCKER
KUBERNETES
SHELL
HTTP_GET
HTTP_POST_FORM
HTTP_POST_JSON
HTTP_PUT_FORM
HTTP_PUT_JSON
HTTP_DELETE
WEBSOCKET
MESSAGING
FORK_JOB
AWAIT_FORKED_JOB
EXPIRE_ARTIFACTS
on_completed: defines next task to run if task completes successfully, e.g.,: on_completed: build
on_failed: defines the next task to run if task fails, e.g.,: on_failed: cleanup
on_exit: is used to run the next task based on exit-code returned by the task, e.g., on_exit_code: 101: cleanup COMPLETED: deploy
environment: defines environment variables that will be available for commands that are executed, e.g.: environment: AWS_REGION: us-east-1
variables: define context property that can be used for scripts as template parameters or pass to the executors, e.g., variables: max-string-len: 50 service-name: myservice
after_script: is used to list commands that are executed after the main script regardless the main script succeeds or fails, e.g.: after_script: - echo cleaning up
before_script: is used to list commands that are executed before the main script, e.g.: before_script: - git clone https://{{.GithubToken}}@github.com/bhatti/go-cicd.git . - go mod vendor
timeout: defines the maximum time that a task can take for the execution otherwise it’s aborted, e.g.,: timeout: 5m
cache: allows caching for directories that store 3rd party dependencies, e.g., following example shows caching of pip dependencies so that they are not downloaded upon each execution: cache: key: cache-key paths: - .cache/pip - venv
retry: defines maximum attempts to execute a task if it fails, e.g.,: retry: 3
delay_between_retries: defines delay between a task retries, e.g.,: delay_between_retries: 10s
url: specifies URL to invoke for HTTP executor, e.g.,: method: HTTP_GET url: https://jsonplaceholder.typicode.com/todos/1
artifacts: defines list of files or directories that are persisted in the artifacts store and are available for dependent tasks or user download, e.g., artifacts: paths: - output.json
except: is used to skip task execution based on certain condition, e.g.: except: {{if ne .GitBranch "main" }} true {{end}}
allow_failure: defines the task is optional and can fail without failing entire job, e.g., allow_failure: true
allow_start_if_completed: Upon retry, only failed tasks are re-executed, but you can mark certain tasks to rerun previously completed task, e.g. allow_start_if_completed: true
always_run: A task can be marked as always_run so that they are run even when the job fails for cleanup purpose, e.g., always_run: true
tags: is used to route the task to a specific ant worker that supports given tags, e.g.,: tags: - Mac
webhook: configures a job to call an external webhook API upon completion of a job or task, e.g.: webhook: url: {{.WebhookURL}} headers: Authorization: Bearer {{.WebhookAuth}} query: task_key: task_value
services: allows starting sidecar container(s) with the given image, e.g.,: services: – name: redis image: redis:6.2.2-alpine ports: – number: 6379
notify: configure job to receive email or slack notifications when a job completes successfully or with failure, e.g., (Note: when parameter can take always, onSuccess, onFailure or never values): notify: email: recipients: – myemail@mydomain.cc when: always
fork_job_type / await_forked_tasks: allows spawning other related jobs or marketplace plugins from a job, which are run concurrently, e.g.: - task_type: fork-task method: FORK_JOB fork_job_type: child-job on_completed: fork-wait - task_type: fork-wait method: AWAIT_FORKED_JOB await_forked_tasks: - fork-task
EXPIRE_ARTIFACTS: method can be used to expire old artifacts, e.g.: - task_type: expire method: EXPIRE_ARTIFACTS
MESSAGING: implements a customized executor by subscribing to the messaging queue, e.g., - task_type: trigger method: MESSAGING messaging_request_queue: formicary-message-ant-request messaging_reply_queue: formicary-message-ant-response
5.1.3 GO Templates
The job and task definition supports GO templates, and you can use variables that are passed by job-request or task definitions, e.g.
Note: The configuration above supports OAuth 2.0 based authentication and allows enabling of the allocation of computing resource quotas per user. Furthermore, it supports setting up notifications through email and Slack.
You can then launch the server as follows:
docker-compose up
Once, the Formicary system starts up, you can use dashboard UI or API for managing jobs at the specified host and port.
5.2.3 Launching Ant Worker(s)
Here is an example docker-compose file designed to launch the ant-worker:
Above config shares config for the redis and minio so that ant workers can access queen server and store artifacts directly in the object-store. Here is a sample configuration for the ant worker:
Above kubernetes configuration assumes that you are running your kubernetes cluster at 192.168.1.120 and you can change it accordingly. You can then launch the worker as follows:
docker-compose -f ant-docker-compose.yaml up
6. Usage with Examples
The Formicary system can be utilized for running batch jobs, orchestrating workflows, or managing CI/CD pipelines. In this system, the execution parameters are detailed in a job configuration file. Each job outlines a Directed Acyclic Graph (DAG) that represents the sequence in which tasks should be executed, essentially mapping out the workflow or the execution trajectory for the tasks. Each task is defined as a discrete unit of work, capable of being executed through various executors such as DOCKER, KUBERNETES, HTTP, WEBSOCKET, SHELL, MESSAGING, among others.
6.1 Workload & Pipeline Processing
A pipeline encapsulates various stages of data processing, adaptable to numerous scenarios such as CI/CD pipelines in software development, ETL processes for data import/export, or other types of batch processing. The formicary facilitates these pipelines through the concept of tasks and jobs, where a task represents a single unit of work, and a job is a collection of tasks organized in a DAG. Tasks within a job are executed in sequence, with the execution order of subsequent tasks contingent on the exit status of the preceding task.
The following example illustrates a job definition for a straightforward pipeline where a video pipeline first validates input, downloads a mock video and then mock encodes it:
The above example kicks off video-encoding job and passes URL, InputEncoding, and OutputEncoding as parameters. You can then view status of the job using dashboard UI, e.g.,
video pipeline
Above UI also allows users to download artifacts generated by various tasks.
6.2 Parallel Workload & Pipeline Processing
You can then enhance workload & pipelines by adding multiple jobs that originate from the parent job and run concurrently in the background. For instance, a video-encoding job can achieve parallel video encoding by initiating multiple jobs as illustrated below:
Above definition defines validate and download tasks as before but split task splits video file into smaller video files that can be encoded in parallel. It then defines fork-encode1 and fork-encode2 tasks to fork child video-encoding job that was defined earlier and then wait for their completion in fork-await task. Finally, it combines output files into a single file. Following graph diagram shows the execution flow:
parallel video encoding
6.2.1 Fork Task
The task method with value of FORK_JOB spawns a child job where fork_job_type defines type of the job and variables define the input parameters to the job.
6.2.2 Waiting for completion of child jobs
The task method with value of AWAIT_FORKED_JOB waits for completion of child jobs where await_forked_tasks defines list of jobs to wait.
6.2.3 Uploading Job Definition
You can upload above pipeline job using API as follows:
The above example kicks off parallel-video-encoding job and passes URL, InputEncoding, and OutputEncoding as parameters.
6.3 CI/CD Pipelines
To implement CI/CD, you can create a job configuration and upload it to the server. The various stages of the build process, such as compilation, testing, and deployment, are represented by tasks within this job configuration. Organizations can use continuous integration to regularly integrating code changes into a shared repository where each integration is automatically built and tested, facilitating early detection of bugs and integration issues. Further continuous delivery and deployment automates the release of software to production, moving away from manual approvals and deployments. Here is a list of major features for supporting CI/CD pipelines in the Formicary system:
Artifacts management for any packages and binaries produced during the CI/CD pipeline or software deployment.
Job Parameters and Variables: Refer to the documentation on Variables and Request Parameters to set up job configuration variables and request parameters.
Environment Variables: Consult the section on Environment Variables to configure and access environment variables within your container.
Job / Organization Configs: For secure configurations at the job and organization level, see the Job / Organization Configs section.
Access Tokens for Source Code Repositories: Instructions for accessing source code repositories can be found in the relevant documentation.
Starting Jobs Manually: For manual job initiation, see the guide on Scheduling Jobs Manually. Jobs can be submitted as outlined there.
Scheduling Jobs for the Future: To schedule a job for a future time, refer to the Job Scheduling documentation.
Regular Interval Job Scheduling: For setting up jobs to run at regular intervals, see the Periodic Job Scheduling section.
GitHub Webhooks: Utilize GitHub webhooks for job scheduling as described in the GitHub-Webhooks documentation.
Post-Commit Hooks: For job scheduling using git post-commit hooks, consult the Post-commit hooks section.
Skipping Job Requests: To skip scheduled jobs, refer to the Job Skip documentation.
Following is an example of CI/CD pipeline for a simple GO project:
job_type: go-build-ci
max_concurrency: 1
# only run on main branch
skip_if: {{if ne .GitBranch "main"}} true {{end}}
tasks:
- task_type: build
method: DOCKER
working_dir: /sample
container:
image: golang:1.16-buster
before_script:
- git clone https://{{.GithubToken}}@github.com/bhatti/go-cicd.git .
- git checkout -t origin/{{.GitBranch}} || git checkout {{.GitBranch}}
- go mod download
- go mod vendor
script:
- echo branch {{.GitBranch}}, Commit {{.GitCommitID}}
- make build
after_script:
- ls -l
cache:
key_paths:
- go.mod
paths:
- vendor
on_completed: test
- task_type: test
method: DOCKER
container:
image: golang:1.16-buster
working_dir: /sample
environment:
GO111MODULE: on
CGO_ENABLED: 0
before_script:
- git clone https://{{.GithubToken}}@github.com/bhatti/go-cicd.git .
- git checkout -t origin/{{.GitBranch}} || git checkout {{.GitBranch}}
script:
- make test-coverage
after_script:
- ls -l
dependencies:
- build
on_completed: deploy
- task_type: deploy
method: DOCKER
container:
image: golang:1.16-buster
working_dir: /sample
before_script:
- git clone https://{{.GithubToken}}@github.com/bhatti/go-cicd.git .
- git checkout -t origin/{{.GitBranch}} || git checkout {{.GitBranch}}
script:
- make build
dependencies:
- test
Above job configuration demonstrates how different stages of build, test and deployment process can be defined with artifacts and vendor-cachings support.
6.3.1 Uploading Job Definition
You can upload above pipeline job using API as follows:
The above example kicks off go-build-ci job and passes GitCommitID, GitBranch, and GitMessage as parameters.
6.3.4 Github-Webhooks
See Github-Webhooks for scheduling above job with GitHub webhooks support.
6.3.5 PostCommit Hooks
See Post-commit hooks for scheduling above job using Git post-commit hooks.
6.4 ETL Jobs
Here is a sample ETL (Extract, Transform, Load) job that retrieves stock data, processes and extracts pricing information, and conducts calculations on the obtained data:
The above example kicks off etl-stock-job and passes Symbol as a parameter. You can then download results after the job execution.
6.5 Scanning Containers
6.5.1 Trivy
Trivy is a simple and comprehensive vulnerability/misconfiguration scanner for containers and other artifacts. Following example shows scanning a docker in docker (dind) using Trivy:
You can set up a job to automatically retry a failed task or the entire job up to a specified number of maximum attempts, incorporating a delay between each retry attempt as described below:
You can configure a job to timeout if it does not complete with the allowed duration as shown below:
job_type: test-job
timeout: 5m
...
6.6.7 On-Exit Task
Besides determining the subsequent task through on_completed or on_failed, you can employ on_exit to initiate the next task according to the exit code produced by the task. This exit code, distinct from the task’s status, is generated by the command specified in the script. It’s important to note that on_exit assigns specific exit codes for COMPLETED and FAILED, allowing you to consolidate all exit conditions in a single location, for example:
Following example shows how exit_codes with EXECUTING state can be used for polling tasks:
job_type: sensor-job
tasks:
- task_type: first
method: HTTP_GET
environment:
OLD_ENV_VAR: ijk
allow_failure: true
timeout: 15s
delay_between_retries: 5s
script:
{{ if lt .JobElapsedSecs 3 }}
- https://jsonplaceholder.typicode.com/blaaaaahtodos/1
{{ else }}
- https://jsonplaceholder.typicode.com/todos/1
{{ end }}
on_completed: second
on_exit_code:
404: EXECUTING
- task_type: second
container:
image: alpine
script:
- echo nonce {{.Nonce}}
- exit {{ Random 0 5 }}
on_exit_code:
1: FAILED
2: RESTART_JOB
3: COMPLETED
4: ERR_BLAH
5: RESTART_TASK
on_completed: third
- task_type: third
container:
image: alpine
environment:
OLD_ENV_VAR: ijk
script:
- date > date.txt
- env NEW_ENV_VAR=xyz
- echo variable value is $NEW_ENV_VAR
artifacts:
paths:
- date.txt
6.6.10 Formicary Plugins
A plugin represents a publicly accessible job definition that other jobs can utilize. It can encompass a range of functions, from security assessments to data evaluation and beyond. While any member within an organization can share a job definition, a public plugin enables the creation of a job that’s accessible to all users. Organizations can publish a plugin by creating a job definition that starts with the organization’s bundle prefix and includes a semantic version number, like 1.0 or 1.2.1, indicating its version. Here is an example plugin:
In Formicary, an executor abstracts the runtime environment needed for executing a task. The type of executor is specified through the use of a method. Formicary natively supports the following executor methods:
7.1 Shell Executor
The shell executor forks a shell process from the ant worker to run commands specified in the script section. This executor doesn’t need extra configuration; however, assigning a unique user with appropriate permissions to the ant worker is advisable to ensure security.
7.2 REST APIs
The REST API Executor triggers external HTTP APIs through actions such as GET, POST, PUT, or DELETE, for example:
job_type: http-job
tasks:
- task_type: get
method: HTTP_GET
url: https://jsonplaceholder.typicode.com/todos/1
on_completed: post
- task_type: post
method: HTTP_POST_JSON
url: https://jsonplaceholder.typicode.com/todos
on_completed: put
- task_type: put
method: HTTP_PUT_JSON
url: https://jsonplaceholder.typicode.com/todos/1
on_completed: delete
- task_type: delete
method: HTTP_DELETE
url: https://jsonplaceholder.typicode.com/todos/1
7.3 Websockets
The Websockets method enables browser-based or ant workers written in Python, Go, Java, and other languages to connect and carry out tasks, for example:
job_type: web-job
tasks:
- task_type: process
  method: WEBSOCKET
  tags:
    - web
    - js
The web or client uses websocket clients register with the server, e.g.
The Docker executor initiates a primary container, named after the job or task, to run the specified script, along with a secondary ‘helper’ container, designated by a ‘-helper’ suffix, to handle artifact management, e.g.,
The Kubernetes executor launches a primary container, which executes the script and is named according to the job or task, along with an auxiliary ‘helper’ container, identified by a ‘-helper’ suffix, for artifact management. Tasks can specify dependent services that are initiated with a ‘svc-‘ prefix, e.g.:
The Formicary is specially designed for executing background tasks, jobs, DAGs, and workflows in a complex, scalable environment. Each task represents a discrete unit of work that can be executed using a variety of protocols such as Docker, Kubernetes, Shell, HTTP, and Messaging. Its architecture employs a Leader-Follower model with a queen-leader that schedules tasks and ant-workers that execute them. It supports advanced patterns like Pipes and Filters, SEDA, and Fork/Join, enabling tasks to be interconnected, parallelized, and aggregated. Formicary distinguishes itself from other similar frameworks by supporting declarative job definitions, extensible execution, AuthN/AuthZ, artifacts management, quota management, caching and encryption, and advanced scheduling options including cron-based scheduling, task retries, and job prioritization, offer significant control over job execution. The resource management capabilities especially the dynamic allocation and monitoring of resources help to optimize task execution without overloading the system
Formicary‘s architecture supports a wide range of use cases from complex workflow orchestration across various environments to specific tasks like image processing pipelines, automated build/test/release workflows, scheduled data ETL jobs, and machine learning pipelines. Formicary supports advanced error handling and retry capabilities, essential for long-running and complex tasks. Its ability to handle complex, conditional workflows and scale according to demand makes it suitable for organizations with intricate processing requirements.
I just finished reading “Tidy First?” by Kent Beck. I have been following Kent for a long time since early days of XUnit and Extreme programming in late 90s. Kent is one of few influential people who have changed the landscape of software development and I have discussed some of his work in previous blogs such as Tips from Implementation Patterns, Responsibility vs Accountability, Heuristics from “Code That Fits in Your Head”, etc. In this book, Kent describes the concept of Tidy to clean up messy code so that you can make changes easily. The concept of Tidying is very similar to “Refactoring”, and though Refactoring originally meant changing the structure without changing the behavior but it has lost that distinction and now applies to both structure and behavior changes. In addition, the question mark in the book title implies that you may choose to tidy your code based on cost and benefits from the changes. This book is also heavily influenced by Structured Design: Fundamentals of a Discipline of Computer Program and Systems Design by Edward Yourdon and Larry Constantine who introduced the concept of coupling and cohesion, which is very fundamental to the software design. I also read that book in late 80s when I first learned about the structured design and programming with concepts such as a single entry and a single exit, cohesion and coupling, etc.
The “Tidy First?” book is very light and concise, which assumes that you are already familiar with a lot of fundamental concepts of software design but following are a few essential lessons from the book:
1. Guard Clauses
This is part of the first section that describes techniques for tidying that suggests adding guard clauses to routines. The author does not mention structured programming directly and only gives an example of FORTRAN that frowned upon multiple returns because debugging with multiple returns in that environment was hard. Instead the author advocates early return to reduce nested conditional logic but cautions against overuse of too many early returns. This advice is also similar to the Replace Nested Conditional with Guard Clauses technique from the Refactoring book though the author does not references it.
2. Dead Code
The author advocates deleting dead code, which is no-brainer.
3. Normalize Symmetries
The author advocates a consistency especially when different parts of a system are grown organically that might solve same problem differently. For example, you might see different ways of lazy initialization in different parts of the system that can confuse readers.
4. New Interface, Old Implementation
When dealing with a complex interface or implementation, Kent suggests creating a new pass through interface that simplifies the interaction with the old implementation. The original Refactoring book by Martin Fowler also includes a number of similar patterns and techniques such as Composing Methods, Extract Method, Replace Method with Method Object, Extract Class, etc. but the author does not reference those in the book.
5. Reading Order
When working with a long file, you may be tempted to refactor it into multiple smaller modules but the author suggests reordering parts of the file so that it’s easy for a reader to understand it. The author again cautions against mixing behavior changes with structure changes to minimize risks associated with the tidying the code.
6. Cohesion Order
When extending an existing system requires changing several widely dispersed sports in the code, you may be tempted to refactor existing code to make code more cohesive. However, the author suggests just placing cohesive code next to each other first before larger refactoring and recommends decoupling only when:
This is another no-brainer and unlike older languages that required explicit declaration of variables, most modern languages encourage declaration and initialization together.
8. Explaining Variables
Instead of using a complex expression upon initialization a struct or invoking a method, the author recommends using well named variables to extract the sub-expressions. This advice is similar to the Extract Variable technique from the Refactoring book though the author does not cite the source.
9. Explaining Constants
The advice of extracting constants dates back to the structured programming and design and Refactoring book also includes Replace Magic Number with Symbolic Constant for similar advice though the author does not cite those sources. However, the author does caution against adding coupling for constants, e.g., if you have ONE defined as 1 in a module, you don’t need to import that module just to reuse that constant.
10. Explicit Parameters
The author recommends passing explicit parameters instead of passing a map that may include a lot of unrelated properties. Similarly, instead of accessing environment variables deep in the code, extract them at the top-level and then pass them explicitly. This advice is similar to the Stamp coupling (data-structured coupling) that cautions against passing a composite data structure when a routine uses only parts of it though the author does not references it in the book.
Note: other forms of coupling defined in the structured design (not referenced in the book) includes content coupling (high – information hiding), common coupling (sharing global data), external coupling (same format/protocol), control coupling (passing flag to control the flow), and data coupling (sharing parameters).
11. Chunk Statement
This technique simply recommends adding a blank line between parts of the code that are closely related. Though, you may use other refactoring techniques such as Extract Method, Move Method or other techniques but tidying up is less costly.
12. Extract Helper
In this technique, you extract a part of the code that has limited interaction with other code into a helper routine. In this case, the author does cite Extract Method from the Refactoring book. Another thing that you may consider that the author didn’t mention explicitly is to using one level of abstraction to facilitate reading code from top to bottom, which is cited in the Clean Code book.
13. One Pile
When dealing with a system where the code is split into many tiny pieces, the author recommends inlining the code into a single pile and then tidy it up. The author offers a few symptoms such as long, repeated argument lists; repeated cod with conditionals; poor naming of helper routines; shared mutable data structures for the code that can be tidy up. This technique is somewhat similar to Inline Class and Consolidate Duplicate Conditional Fragments techniques from the Refactoring book. In my experience, a lot of emphasis on unit testing to decoupling different parts of the system causes the code to split into tiny pieces but author does not go into specific reasons. Also, it may not be practical to create a single pile if there is a large complex code and author provides no practical examples for this technique.
14. Explaining Comments
This another common advice where the author suggests commenting only what wasn’t obvious from the code from the reader’s perspective. Other uses of comments can be a TODO when a code has a bug or requires changes for other limitations.
15. Delete Redundant Comments
This common advice probably could have combined with previous advice and suggests eliminating any comments that are obvious from the code.
16. Separate Tidying
This is part of the second part of the book that describes how tidying up fits into the software development lifecycle. When making changes to tidy up, you will have to consider how big are those changes, how many PRs you will need, and whether you should combine multiple PRs for structure. Ultimately, this requires some experimentation and customization based on your organization. Finally, author recommends omitting reviews for tidying PRs, which in my opinion is a bit risky unless you have fairly rigorous test harness. I have observed a trivial or innocuous change sometime can cause undefined behavior. For example, you might have removed dead-code but then find out later that some parts of the system still had some dependency on it.
17. Chaining
In this chapter, the author suggests tiny tidying steps and build upon various techniques for tidying up discussed in the first section such as guard clause, dead code, normalize symmetries, etc. The author is a bit apologetic for being anti-comment (or anti-documentation) as the agile movement specially extreme-programming does not explicitly calls for it but commenting (and documentation) is essential part for understanding the code.
18. Batch Size
This chapter focuses on how many batches of structure and behavior related PRs for tidy up should be made before integrating and deploying. This requires evaluating a tradeoff with various number of tidying per batch. For example, the cost and risk increases as the batch size grows due to merge conflicts, interactions with behavior changes, and more speculation due to additional cost.
tidying
The author recommends smaller batches to reduce the cost of review to reduce the cost of tidying up but ultimately the teams will have to find the right balance.
19. Rhythm
The author suggests managing rhythm for tidying up in batches where each change takes a few minutes or an hour before enabling desired behavior changes. The author cites Pareto principle and argues that 80% of the changes will occur in 20% of the files so you may end up touching the same code for tidying up, which is why the author suggests tidying up in small increments.
20. Getting Untangled
When making behavior changes, you may see a lot of opportunities for tidy up with structure changes but it may result in combination of structure and behavior changes. In that case, you may be tempted to create a single PR for all changes, which can be error prone; split tidyings into separate PRs, which may add more work; discard your changes and start over with tidying first. Though, sunk cost fallacy may discourage last option but the author recommends experimenting with the last option.
21. First, After, Later, Never
This chapter discusses tidying up with respect to a behavior change in the system. The author suggests Never when the code does not require changing the behavior or an old mantra “if it ain’t broke, don’t fix it.” The Later is generally a fantasy but basically you will have to estimate the work for tidying up. Another benefit is that you may want to learn about how the behavior evolves before tidying it up. The author suggests After when the code is messy and you will need to change the same code again soon so it will be cheaper to tidy now and cost of tidying is proportion to the cost of behavior change. The author suggests First when it will simplify making behavior change with immediate benefits as long as the cost can be amortized with future changes. These tradeoffs in this chapter are very similar to managing technical debt that most teams have to manage but the author does not use this term in the book.
22. Beneficially Relating Elements
This is part of third section of the book that discusses software design, cost of changes, trade-offs with investing in the structure of software, and principles for making changes. The author in this chapter defines software design as “beneficially relating elements,” where elements can be composed and have sub-elements such as atoms->molecules->crystals, and elements can have boundaries. The elements can have relations with other elements such as Invokes, Publishes, Listens, Refers, etc., and elements benefit each other in creating larger systems. The author gives an example of restructuring following code:
The author describes behavior in terms of input/output pairs and invariants that should be maintained, which in turn creates value for businesses. The software creates value in providing the current behavior and how it can be extended for future changes. The author shows how software can provide greater value by supporting options for extension. This holds specially true for volatile environment and author relates lessons from his Extreme Programming Explained book, which I read back in 2004:
The structure of the system doesn’t matter directly to its behavior but it creates options for allowing behavior changes easily.
24. Economics: Time Value and Optionality
In this chapter, the author shares how he learned about the nature of money through a series of finance-related projects. The major lessons included:
A dollar today is worth more than a dollar tomorrow.
In a chaotic situation, options are better than things.
These strategies may conflict at times when earning now reduces future options, thus these trade-offs must be carefully considered using Net present value (NPV) and Options from the finance world.
25. A Dollar Today > A Dollar Tomorrow
A dollar today is more valuable than a dollar tomorrow because you can’t spend future dollar or invest it. As the software behavior creates value and makes money now so it encourages tidy after over tidy first. However, when cost of tidy-first + behavior-change is less than the cost of behavior change without tidying, then tidy first. In a nutshell, economic value of a software system is the sum of the discounted future cash flows.
26. Options
As discounted future cash flows conflict with optionality, you will need to find a balance in a Goldilocks world. The author shares how he learned about options pricing when working with trading software on Wall Street. These lessons included:
What behavior an I implement next has the value even before it’s implemented.
The more behavior in the portfolio, the more value will be created with optionality.
The more uncertain are the predictions of value are, the greater the value of the option is.
The author then defines basics of options, that allows you option to buy or sell based on underlying price, premium of the option, and duration of the option. Having worked in an options trading company myself, I understand the value of options in risk management though chapter does not cover those topics.
In terms of the software design with optionality:
The more volatile the value of a potential behavior change, the better.
The longer the development duration, the better.
The cheaper the software cost in future, the better.
The less design work to create an option, the better.
27. Options Versus Cash Flow
The discounted cash flow biases towards making money sooner and don’t tidy first and options on the other side biases towards spending money now to make more money later or tidy first/after/later. Author recommends tidy first when
cost(tidying) + cost(behavior-change after tidying) < cost(behavior-change without tidying)
Though, in some cases you may want to tidy firs even if the cost with tidy-first is a bit higher by amortizing the cost against other future changes.
28. Reversible Structure Changes
The structure changes are generally reversible but behavior changes are not easily reversible, thus require rigorous reviews and validation. Also, certain design changes such as extracting a service is not reversible and requires careful planning, testing and feature-flags, etc. At Amazon where I work, these kind of decisions are called “one-way doors” and “two-way doors” decisions, which are considered for any changes to the APIs and implementation.
29. Coupling
This book narrates insights from Structured Design: Fundamentals of a Discipline of Computer Program and Systems Design where authors of the book noticed that all expensive programs had one property in common: changing one element required changing other elements, which was termed as coupling. Coupling drives the cost of software and more elements are coupled, the higher the cost of change will be. In addition, some coupling can be cascading where each element triggers more changes for dependent elements. The author also refers to “connascence” to describe coupling from Meilir Page-Jones that includes (not referenced in the book):
Static connascences such as Connascence of name (CoN), Connascence of type (CoT), Connascence of meaning (CoM) or connascence of convention (CoC), Connascence of position (CoP), Connascence of algorithm (CoA).
Dynamic connascence such as Connascence of execution (CoE), Connascence of timing (CoT), Connascence of timing is when the timing of the execution of multiple components is important., Connascence of values (CoV), Connascence of identity (CoI)
Though, the author does not discuss other forms of coupling but it’s worth knowing common coupling in object-oriented systems such as Subclass-coupling, Dynamic coupling, Semantic coupling, Logical coupling, and Temporal coupling.
In summary, it’s essential to understand dependent changes before tidying up. One thing lacking in this chapter was use of tooling as a lot of static analysis and dependency management tools can be used to gather this kind of data.
The author uses power law distribution (bell graph) to graph cost per time that grows slowly, then rapidly, then shrinks. In other words:
cost(change) ~= cost(big change)
cost(big change) ~= coupling
cost(software) ~= coupling
31. Coupling Versus Decoupling
You may choose not to remove coupling due to its cost as defined by discounted cash flow. In other cases, coupling does not become problem until now. Finally, having some coupling is just inevitable. For example, you may try to reduce coupling in one part of the software but it shifts towards other parts. This means that you should try to find a balance by evaluating trades off with cost of decoupling.
32. Cohesion
When decoupling, you may group sub-elements under the same containing element with more cohesion and move unrelated elements out of the group. When sub-elements are changed together, they benefit from cohesion with ease of change and analysis. On the other hand uncoupled elements can be put under their own submodules or sibling modules, which require careful consideration. Other factors that I have found to be useful, which are not mentioned in the book include analyzing interactions and direction of communication. For example, when two elements are more chatty then they should be closer together. Similarly, I learned from Large-Scale C++ Software Design back in 90s that software design should try to remove any cyclic dependency across modules, which generally requires extracting common behavior into a separate module.
33. Conclusion
In this chapter, the author summarizes that “tidy first” is impacted by cost of change, revenue it generates, how coupling can be reduced to make changes faster, and how it will add cohesion so that changes are in smaller scope. The author encourages tidying up the code but cautions against against doing too much. Instead, tidy up to enable the next behavior change. This book is part of a series and though this book focuses on individuals but subsequent series will examine the relationships between changers as shown below:
Who? | When? | What? | How? | Why?
You | Minutes-Hours | Tidying | SB diff | Coupling and Cohesion
You/Team | Days to Weeks | Refactoring | Wkly plan | Power laws
Overall, this book addresses essential tradeoffs between quality and speed of software delivery that each team has to face. As this book was very concise, I felt it missed a number of related topics. For example, first section many of techniques and patterns that are better explained in other books such as Refactoring book. This book also does not cover testing and use of static analysis tools such as lint, clippy, findbugs, checkstyle, etc. that can help identify code smells, dead code, cyclic dependencies, cyclomatic complexity, etc. Another dimension of software development is non-functional requirements that addresses quality, scalability, reliability, security, etc. For example, in chapter 23, the author claims that if you can send 1,000 notifications, you can almost certainly send 100,000 notifications but this requires architectural support for scaling and isn’t always guaranteed. In addition, with scale you also have to deal with failures such as timeout, retries, unavailability, etc., which is of lesser issue at smaller scale. I also felt that the author avoided some of well-defined terms such as technical-debt and quality metrics that are commonly used when dealing with tidying or refactoring your code. The insight to compare “tidying your code” (or technical-debt) to options trading isn’t new. For example, Steve Freeman wrote blog entry, Bad code isn’t Technical Debt, it’s an unhedged Call Option in 2010 about this and Jay Fields expanded on it with types of technical-debt in 2011. Ultimately, the tradeoffs related to tidying your code depends on your organization. For instance, I have worked a number of startups where they want to be paid now otherwise they won’t exist to earn the dollar tomorrow as well as large financial and technology companies where the quality of the code in terms of structure and non-functional aspects are just as essential as the behavior change. Nevertheless, this tiny book encourages individual contributors to make incremental improvements to the code and I look forward to Kent’s next books in the series.